The templates feature allows you to set specific pre-order preferences automatically, either by manually linking a template or automatically under certain criteria. Not only will listings for these products start with a predefined set of preferences, but you’ll also be able to push new changes to them as a group.
(We have a walkthrough video on templates here)
Templates are compatible with manual methods of listing products, as well as our Listing Manager automation.
Creating templates #
Creating a conditionally applied template #
- Navigate to the ‘Listing Templates’ screen in PreProduct

- On the left hand-side you will need to set-up the product criteria for when you would like the template to apply
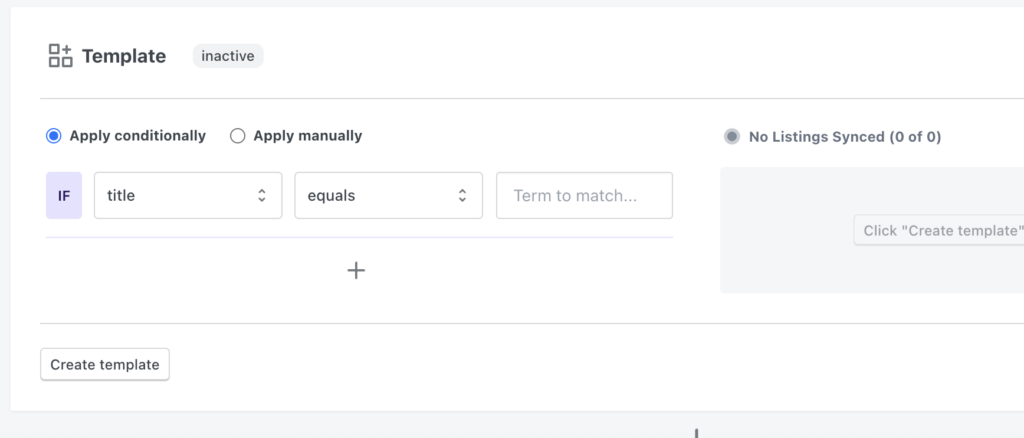
- You will need to enter a term (ie shirt or sustainable) that is common across all of the listings, then you can select either title or tag for where the term appears, as well as whether the term equals or does not equal, includes or does not include.


- You are able to set as many product criteria as you would like, you can add more than one by clicking on the plus (+) icon.
- Once you have added all of the product criteria you would like to apply to the template, click on the ‘Create template’ green button.

- Next you will need to set the listing preferences for the template, by clicking on ‘Set listing preferences’
- This will then take you to the listing screen, where you can set; the shipping time, an early bird discount, as well as the type of pre-order listing (charge later, deposit upfront, charge upfront, capture only)

- Then once you have selected all of the listing preferences, click on ‘Create listing’, and the template will be created and look something like the below image. You can also give the template a name, simply by clicking on template.

Creating a manually applied template #
Creating a manually applied template is very similar to the above, but instead you choose “Apply manually”.

Managing listings #
Creating listings with the template #
- Once the template is created, you will need to go to the new listing screen, scroll to the bottom and click on ‘Bulk create listings’ (further information on the bulk lister here)

- Then select all of the products you would like to list
- If you then tick the checkbox ‘Applicable templates override the below settings’ this will mean that template you created will be applied for all applicable products.
- If you’d like to specify a ‘manually applied’ template, select it from the “Template” dropdown box. Otherwise leave it as “Conditional templates only”

- If you want to ensure you only create listings for products that have a valid template, the checkbox ‘Only create listings when there’s an applicable template’ is a good safe-guard.
Updating listings via templates #
To edit an existing template, this can be simply done by clicking on the specific preference you would like to change

Once you have edited this, you just need to click on the ‘Update and sync listings’ green button

Finishing listings via templates #
To bulk finish all listings attached to a specific listing you can simply click the ‘Finish listings’ button at the bottom of the template


