TLDR: A Shopify pre-sale lets you take orders, and often revenue, before your stock actually lands. It is the same thing most merchants call a pre-order: you list a product that is not available yet, customers buy it, and you ship once it arrives. The real decisions are when to charge (upfront, later, or via deposit) and how clearly you set lead-time expectations. Get those two right and it becomes one of the cleanest ways to fund production, validate demand, and build launch hype, without discounting your way there.
Introduction
A pre-sale is one of the few growth levers that pulls revenue forward and extends your selling window at the same time. Some brands run one to gauge demand before committing to stock. Plenty of others have already committed to a production run and use a Shopify pre-sale to start selling sooner and build hype ahead of launch. Either way, you take orders first and ship once stock lands.
If the word “pre-sale” feels ambiguous, that is because it is. Some merchants mean a VIP early-access drop. Others mean selling a brand-new product before launch, or keeping a sold-out hero product available while stock is inbound. In practice, “pre-sale” and “pre-order” describe the same mechanic, so we will treat them as the same thing here and focus on what actually matters: how to run one well.
This guide covers what a pre-sale is, why it works, the scenarios where it fits, and exactly how to set one up on Shopify. We have powered more than 1 million pre-orders, so the recommendations below are grounded in real merchant data, not guesswork. If you are choosing a Shopify pre-order app or just sanity-checking your approach, start here.
What is a Shopify pre-sale?
A Shopify pre-sale is selling a product before it is available, with the order shipping once stock arrives. The customer commits now, you fulfil later. That is it, and it is exactly what people mean when they say “pre-order.”
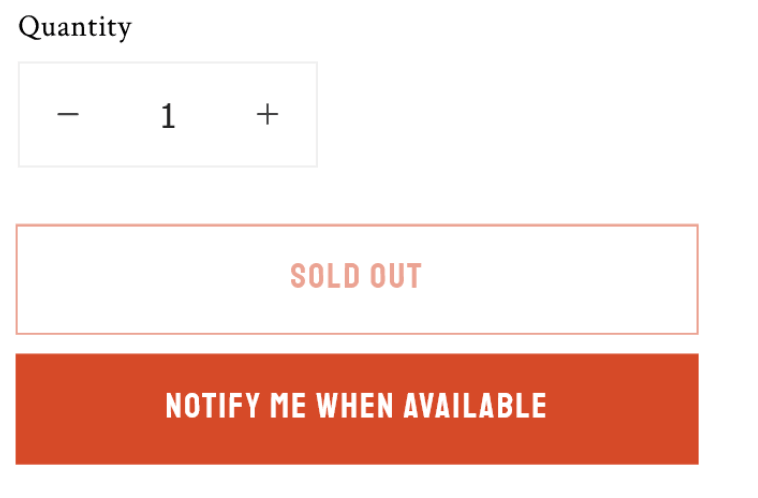
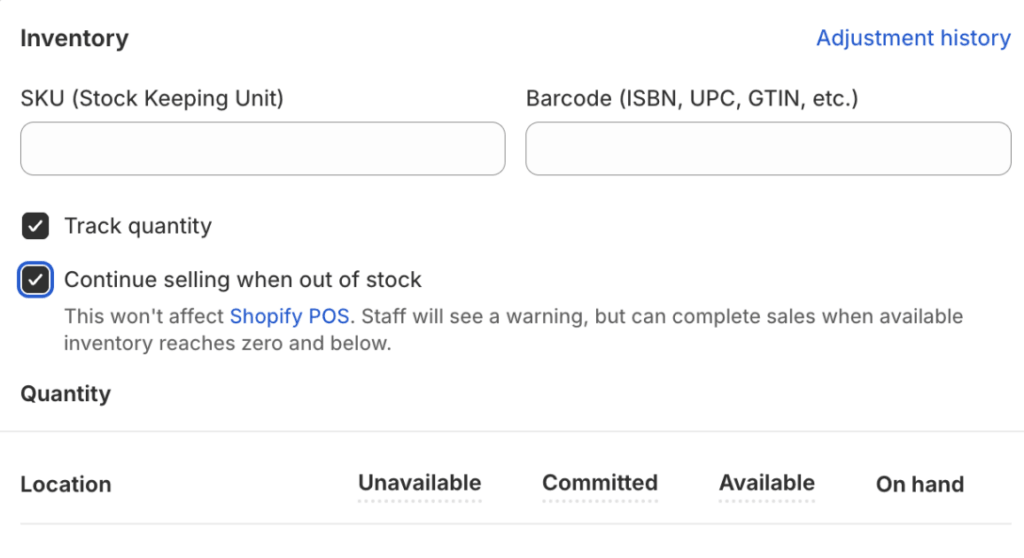
The mechanic matters more than the label. When a product is on pre-sale, the usual “add to cart” flow is replaced with a pre-order purchase, payment is handled on your terms, and the item is held back from fulfilment until you are ready to ship. The most basic version of a Shopify pre-order is just toggling “continue selling when out of stock” in your product admin, which lets a zero-stock product keep passing through checkout. That keeps the sale alive, but it will not charge on your terms, hold fulfilment, or set customer expectations, which is why most brands run pre-sales through a dedicated pre-order app.
A good pre-sale gives you three things at once:
- Revenue sooner, so you are not floating production costs alone.
- Demand validation, so you make what people actually want.
- Hype, because a pre-sale creates a reason to buy now rather than later.
If you want the fundamentals first, our explainer on how pre-orders work walks through the full mechanics for both customers and merchants.
Why run a pre-sale?
Merchants reach for a pre-sale at every stage, and the reason shifts depending on where you sit.
It pulls revenue forward and extends your selling window. If you have already committed to stock, a pre-sale lets you start selling the moment you announce, not the day inventory lands. That is weeks of extra selling, often the highest-energy weeks around a launch, captured instead of left on the table.
It builds momentum. A pre-sale gives shoppers a reason to act now. Limited windows, early access, and “be first” framing all convert better when the product is genuinely not available anywhere else yet.
It protects cash flow. You can collect orders, and in many cases payment, before you commit to a production run. That is the difference between funding a launch with customer demand versus your own runway.
It validates demand before you spend. For newer products, every order is a real signal. Instead of forecasting blind, you watch orders come in and size your purchase order to match, so overstocking and the discounts or write-offs that follow become far less likely.
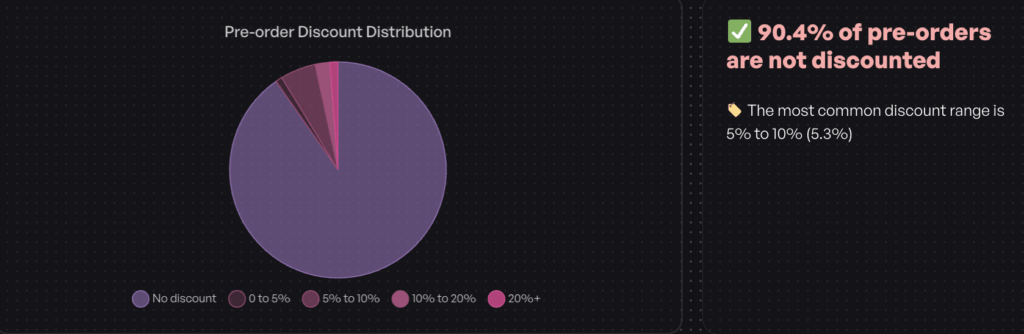
And you do not need to slash prices to make it work. Across our dataset, 90.4% of pre-order listings ran with no discount at all. Pre-orders sell on access and anticipation, not markdowns, so you protect margin while you protect cash flow.
When a pre-sale makes sense
Not every situation calls for the same setup. Here are the common scenarios, and what each one usually needs.
New product launch
You are releasing something that has never been sold before. A pre-sale lets you take orders during the build-up, fund the first run, and launch with proof of demand. Pair it with a Shopify coming soon page to warm your email list before the pre-sale opens.

Early access or VIP drop
You want to reward your most engaged customers with first dibs before the public launch. This is the “pre-sale” most people picture: a gated window for subscribers or members, then general availability later.
Restocking a sold-out product
A hero product sells out and stock is weeks away. Rather than show “sold out” and lose the sale, keep it available as a pre-sale so demand keeps converting while inventory is inbound.
Made-to-order or limited editions
For higher-ticket, made-to-order, or limited-run items, right down to one-off units and small batches, a pre-sale with a deposit secures genuine commitment and lets you plan production around confirmed orders.

Each of these maps to a payment choice, which is the decision we will tackle next.
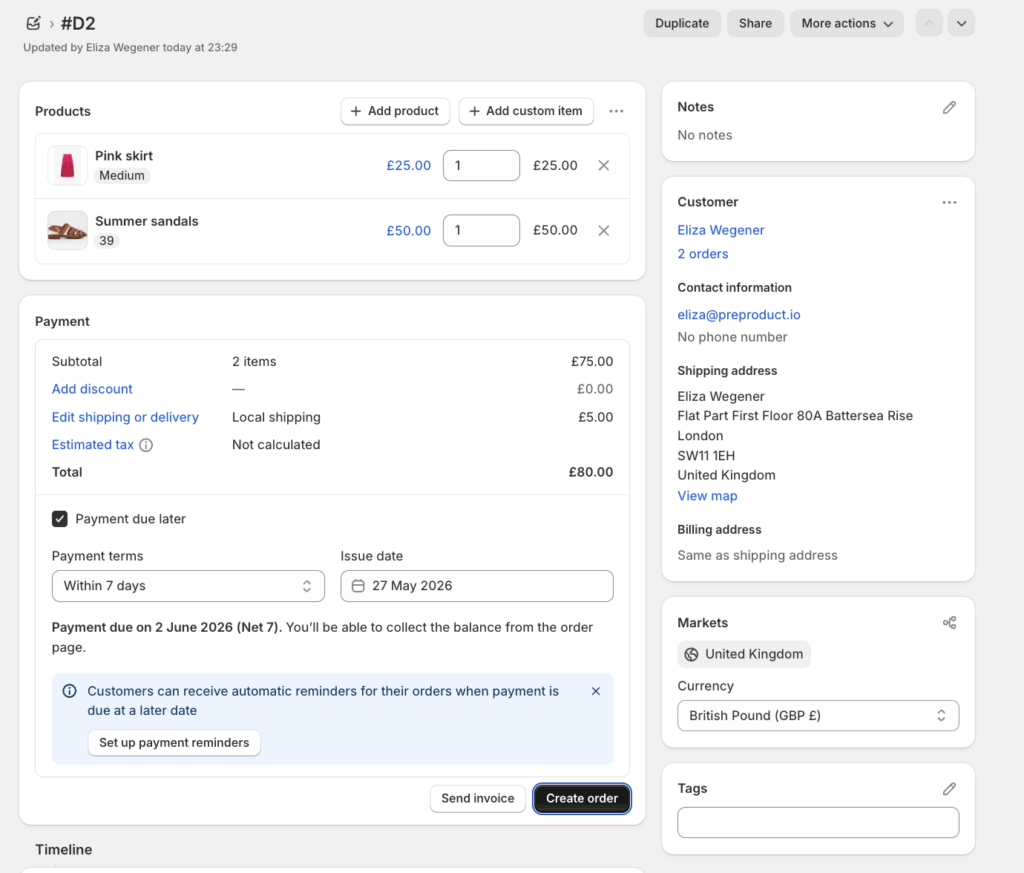
How to charge for a pre-sale: upfront, later, or deposit
This is the real decision underneath any campaign. The label you use barely matters; how and when you charge is what shapes conversion, cash flow, and cancellations.
There are four main approaches:
- Charge upfront. Collect full payment at checkout. Best for short lead times, typically under 30 days, where the customer expects to pay now.
- Charge later. Vault the card at checkout and charge when stock lands. Ideal for longer lead times, because customers commit without paying for something weeks or months away.
- Deposit upfront. Take a portion now and the balance later. This suits higher-ticket and made-to-order items where you want real commitment without asking for the full amount.
- Capture-only. Tokenise the card now and capture on your fulfilment trigger.
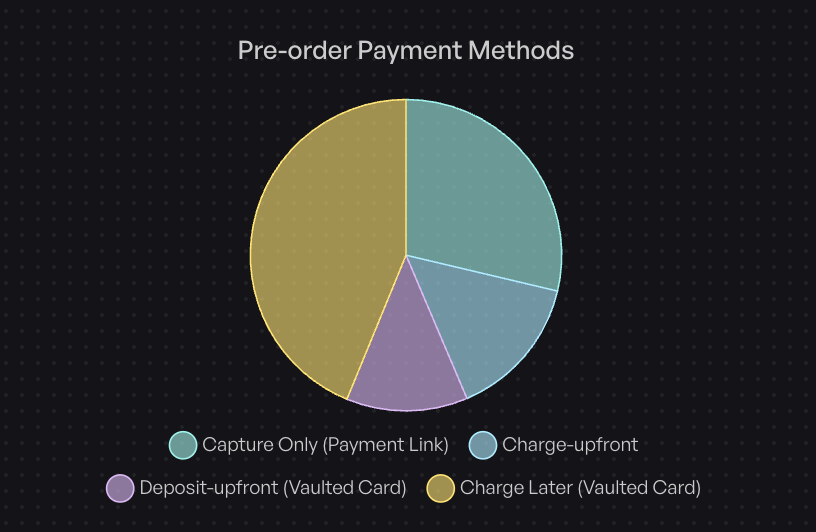
The data backs up matching the model to your lead time. Charge-later is the most popular approach at 43.8% of pre-order listings, with capture-only at 28.7%, charge-upfront at 14.9%, and deposit-upfront at 12.6%. Timing skews early too: 47.8% of pre-orders are charged within 30 days. A simple rule of thumb is charge upfront for short lead times and charge-later for anything longer.

If you want the full breakdown of each option with examples, our pre-order payment models guide compares them side by side. For the two most common deferred setups, see our guides to Shopify deposits and charge-later pre-orders.
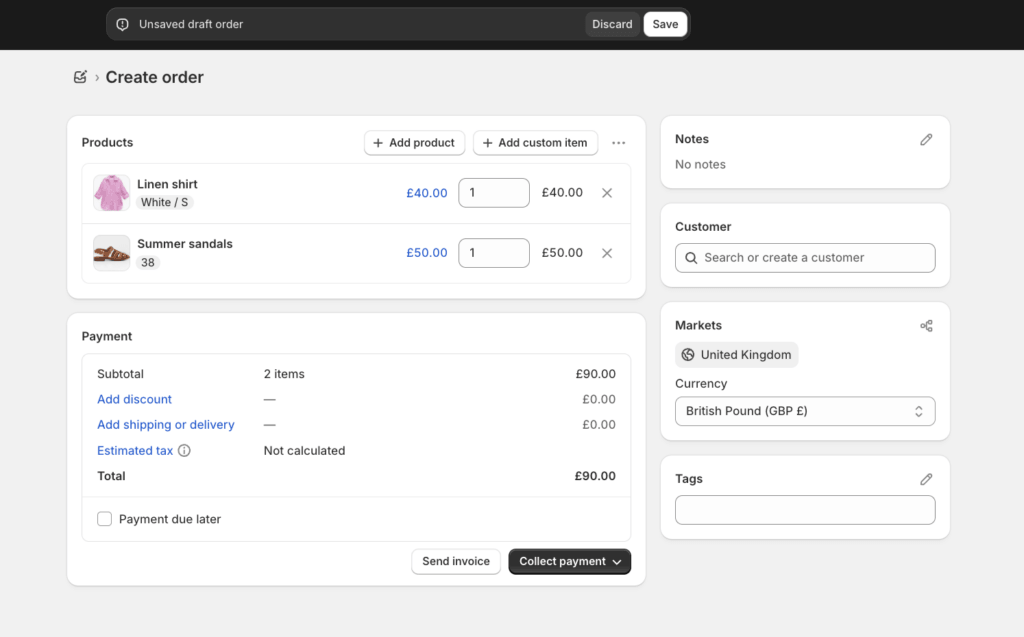
How to set up a pre-sale on Shopify
Because native pre-orders are limited, most brands run a pre-sale with a dedicated app. The setup is quick once you know the steps.
- Pick the product and choose your payment model. Decide upfront, charge-later, or deposit based on the lead time and price, using the guidance above.
- Set fulfilment holds. This keeps pre-sale items out of your normal fulfilment flow until you trigger release, so nothing ships early by accident. It is the safeguard that separates a clean pre-sale from a support headache.
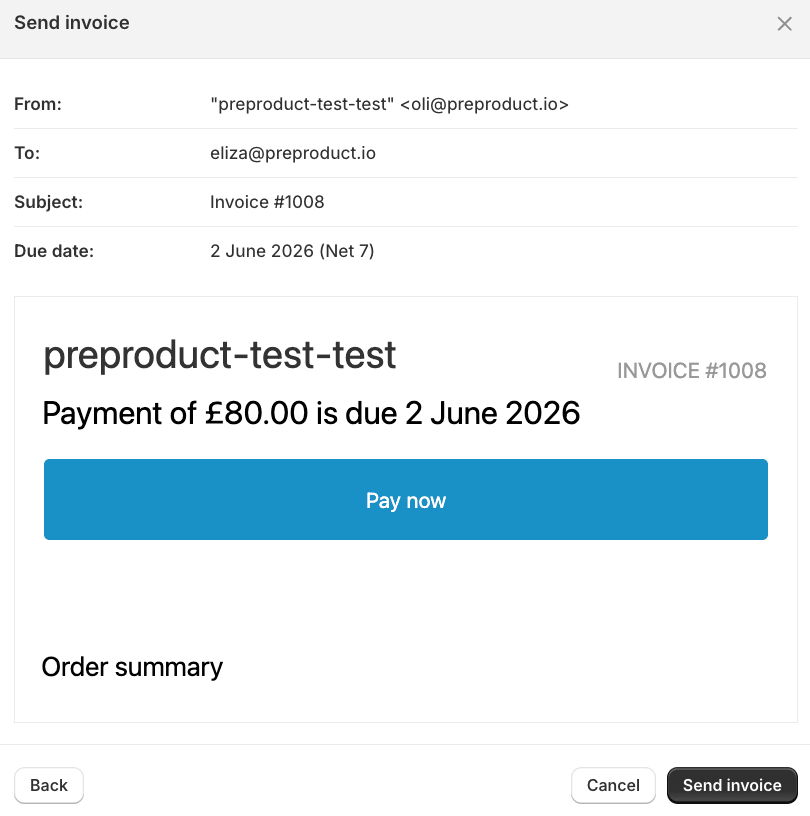
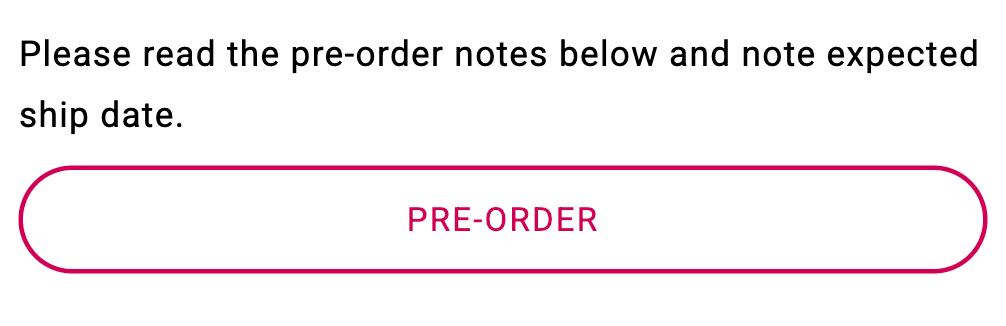
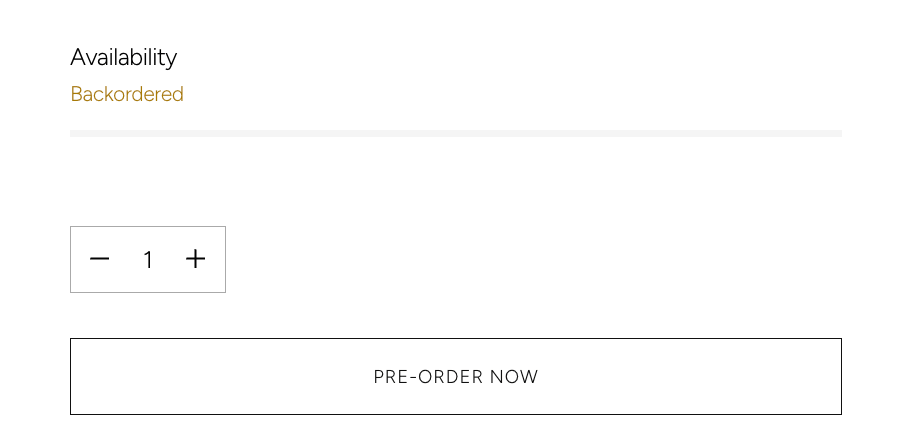
- Write clear front-end copy. Set lead-time and shipping expectations on the product page and at checkout. Customers should know exactly what they are buying and when it ships before they pay.
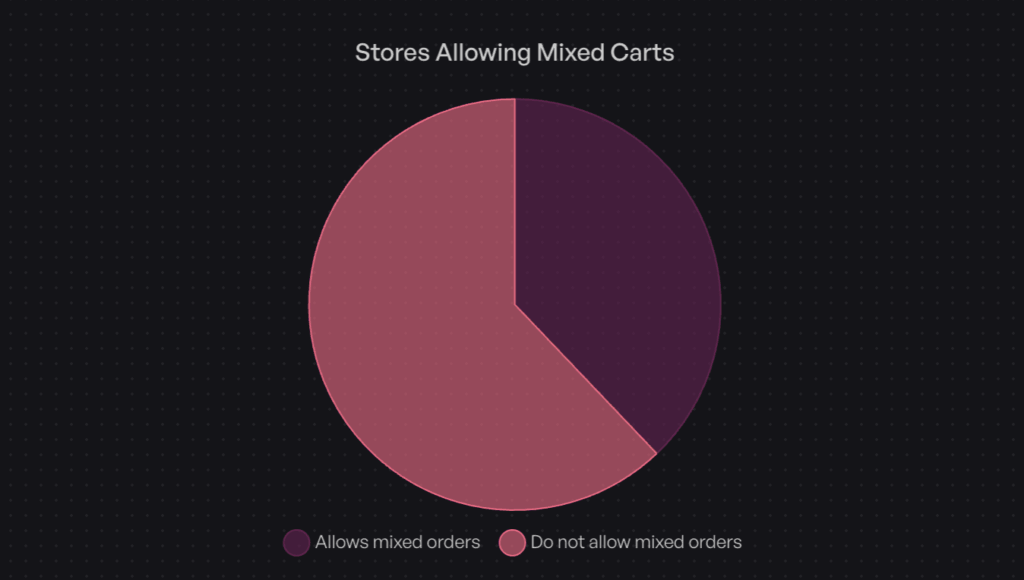
- Decide on cart behaviour. You can isolate pre-sale items into their own cart or allow mixed carts of buy-now and pre-order products. Most merchants keep things separate: 62.1% of listings do not allow mixed carts, which keeps fulfilment simpler.
- Launch and drive traffic. Open the pre-sale to your list, your ads, and your social channels, then monitor orders as they come in.
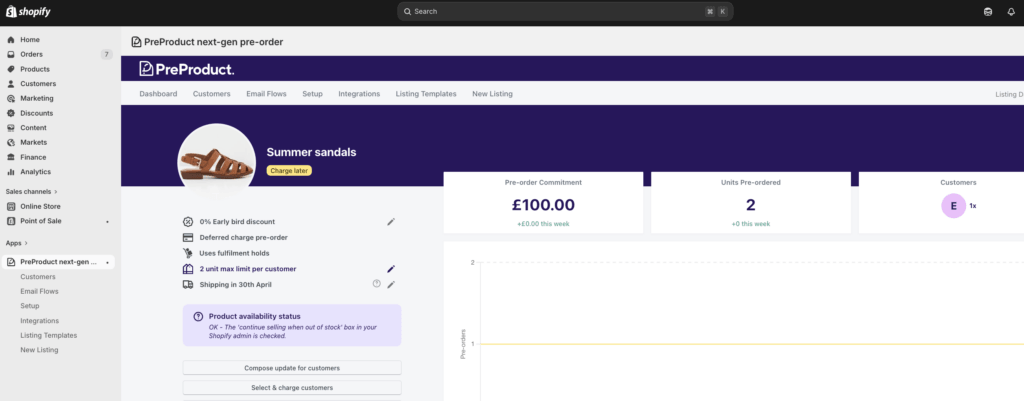
This is where running pre-orders as your only focus pays off. PreProduct handles every payment model, automatic fulfilment holds, and customer messaging in one place, so you are not stitching a campaign together from features bolted onto a back-in-stock app. For the full walkthrough, see our guide on how to do pre-orders on Shopify.
What a pre-sale looks like in practice
Picture a homeware brand launching a new $180 lighting range with a 12-week lead time from the factory. Buying the full run upfront would tie up cash on a product that has never been tested in market.
Instead, the brand runs a charge-later pre-order. It opens early access to its email subscribers a week before the public, with clear copy on the product page: “Ships in 12 weeks, your card is charged when we dispatch.” Subscribers commit, no money changes hands yet, and the brand watches orders climb.
By the time the public window opens, there is social proof and a confirmed order count. The brand sizes its purchase order to real demand instead of a forecast, charges cards as stock lands, and releases fulfilment holds to ship. No overstock, no upfront risk, and revenue committed before a single unit was made. That is the whole point: the campaign carries the risk, not your bank balance.
Pre-sale best practices
A pre-sale lives or dies on expectations. Here is how to keep yours converting and your customers happy.
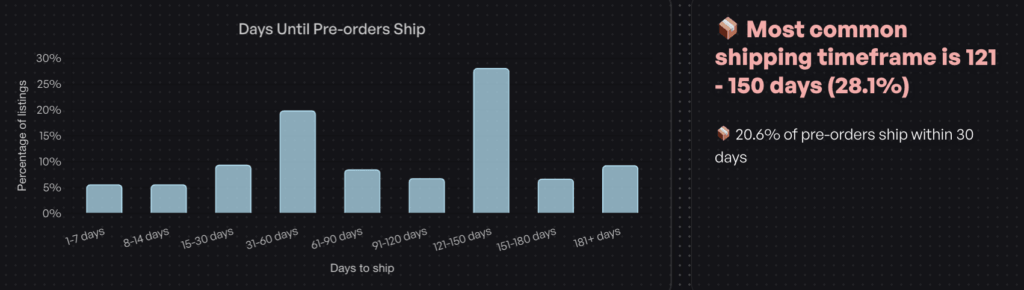
Be upfront about lead times. Pre-order shipping windows can be long. In our data, the most common shipping timeline was 121 to 150 days. That is fine, as long as customers know before they buy. Put the ETA on the product page, not buried in the fine print.
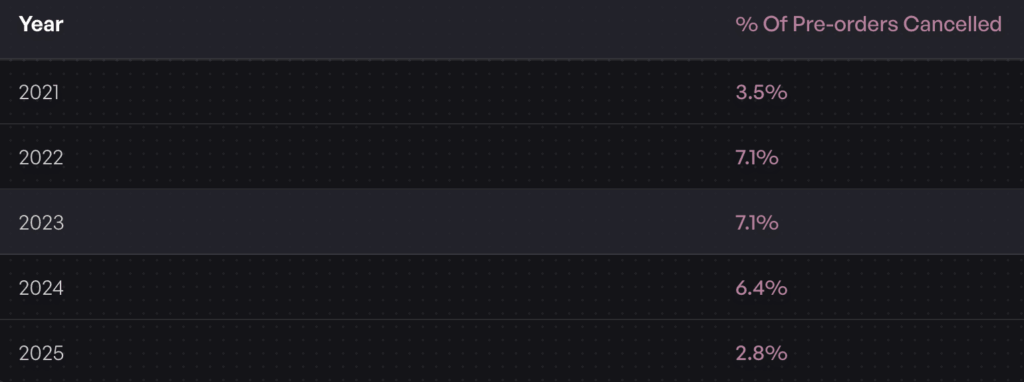
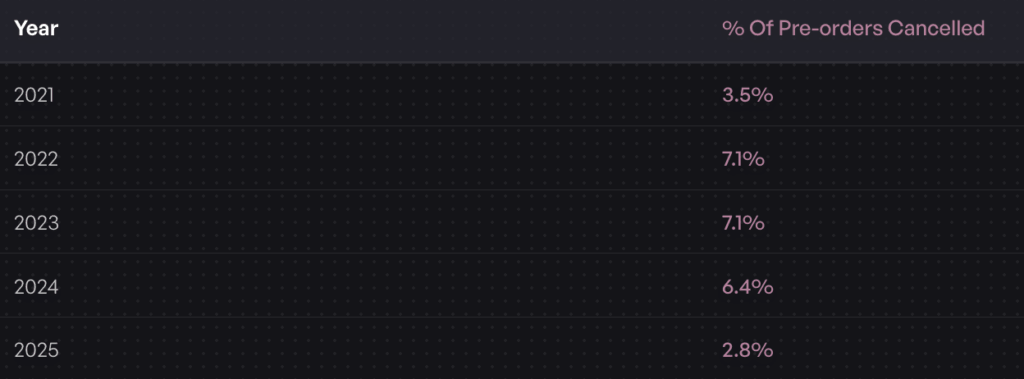
Keep customers in the loop. Cancellations average 5.4% across pre-orders, and clear communication keeps that number low. Order confirmations, upcoming-charge notices, and a customer portal where shoppers can check status all reduce anxiety and support tickets during a long wait.
Do not over-discount. As the data shows, most campaigns win on access and anticipation, not price. Reserve discounts for genuine early-access incentives rather than reflexively marking everything down.
Warm the list first. Consider building anticipation with a coming soon page and an email sequence, then open the pre-sale to an audience that is already waiting.
Plan the whole campaign. A pre-sale is a launch, not a toggle. Mapping out the build-up, launch, and post-campaign phases keeps momentum high. Our guide on how to run a pre-order campaign lays out the full framework.
Conclusion
A Shopify pre-sale is one of the smartest bets you can make on a launch, because it lets you take orders and revenue before you commit to inventory. Whatever you call it, the wins come down to a few decisions:
- Match the payment model to the lead time. Charge upfront for short windows, charge-later or deposit for longer ones.
- Set fulfilment holds so nothing ships before you are ready.
- Be clear about shipping timelines up front to keep cancellations low.
- Sell on access, not discounts, and warm your audience before you launch.
Get those right and a pre-sale becomes a repeatable way to fund production, validate demand, and build hype around every release. When you are ready to run your first Shopify pre-sale, PreProduct gives you every payment model and fulfilment hold you need, built by a team that does pre-orders and nothing else. Start taking pre-orders today.
Frequently asked questions
Is a pre-sale the same as a pre-order?
Yes. In ecommerce the terms are used interchangeably. Both mean selling a product before it is available, with the order shipping once stock arrives.
Does Shopify support pre-sales natively?
Only in the most basic sense. Toggling “continue selling when out of stock” in your product admin lets a sold-out product keep selling through checkout, but it will not charge on your terms, hold fulfilment, or set expectations. Most brands run pre-sales through a dedicated app for that reason.
Can you charge customers later for a pre-sale?
Yes. With a charge-later setup, the card is vaulted at checkout and charged when stock lands. It is the most popular model for pre-sales with longer lead times.
How long should a Shopify pre-sale run?
It depends on your lead time and goals, but the window should be long enough to build momentum and short enough to keep urgency. Many brands run a gated early-access phase for a few days, then open to the public for one to two weeks. Always show the expected ship date so customers know what they are committing to.
Pre-sell With PreProduct
7 day free trial with all plans