How to set up pre-orders on Shopify


1. Introduction

Pre-orders can be a great tool for your online store, with potential to increase hype around new releases whilst solving your cash flow problems. It’s beneficial to understand how to set up Shopify pre-orders.

What is a pre-order?

A pre-order is where customers can place orders for products or services before they become available for general sale. Essentially, customers are buying an item before it is physically in stock or released.

There are several benefits to setting up pre-orders:

Pre-orders can provide insight for Shopify stores about the demand for their products.

By seeing how many people are pre-ordering an item, stores can adjust their production and inventory management to meet demand. This can help them avoid overproduction, which can lead to excess inventory and financial losses. If you plan to use pre-orders for probing future demand, we recommend capture-only or charge-later pre-orders, that way customers aren’t being charged anything until you’re comfortable moving forwards.

Pre-orders can generate buzz and excitement for a product before its release.

By allowing customers to pre-order, store owners can boost hype and create a sense of exclusivity around new releases. It also gives you an opportunity to launch twice in a way, once for the pre-order release and once again when the product arrives and you start taking regular buy-now orders.

Pre-orders can boost your online store cashflow, as they can capture revenue upfront.

When customers pre-order products, they typically pay the full price or a deposit at the time of the order, which provides stores with a cash flow boost before the product is even released. This can be especially helpful for small businesses or startups that may not have access to significant capital or financing (although financing options for small e-comm brands is in improving!) .


2. Set up pre-orders on Shopify

Does my Shopify store support pre-orders?

All Shopify stores are capable of supporting pre-orders, however not all payment processors support deferred-charge pre-orders. Currently both Shopify Payments and PaPal are supported, however you will run into issues when using an unsupported third party payment gateway or even Shop Pay.

That said, Shopify will automatically hide any unsupported payment providers from your checkout. So, as long as you have Shopify Payments or PayPal enabled, you’re good to go and move forward to set up pre-orders on Shopify.

Installing a Pre-order App

To get started and set up pre-orders on Shopify, visit the Shopify App Store and search for “pre-order”, then select the app you wish to install.

Once you have located the app, click on it to access the app listing page, and then select the “Add app” option.

To grant the app access to your Shopify admin account, click “Install app” and authorize its use.

Integrating the App with Your Storefront

Shopify 1.0

If your Shopify theme is Shopify “store 1.0” and you’re not comfortable with customising the code of your product template, then I’d recommend contacting the app developer, as they’ll need to edit code to add their snippet to your online store.

Generally the process is to locate the Shopify theme file containing the “buy” button and insert the app’s customized code beneath the {% endform %} liquid tag. This will let the app’s script determine which product the pre-order button should apply for (if any) when running on that page.

Keep in mind that the file name may differ, but commonly it will be one of: product-template.liquid, product-form.liquid, or product-main.liquid, among others. (Typically in your ‘sections’ or ‘snippets’ folder)

*We also recommend saving your theme file locally first, incase of any mistakes. That way you have a backup if anything goes wrong, as well as being able to take advantage of powerful code editor ‘file find’ tools like ‘find in project’.

Shopify 2.0

With the introduction of Shopify 2.0, app blocks can now seamlessly integrate into the Shopify admin’s drag-and-drop theme customizer, making it much easier to set up pre-orders on Shopify. (‘app block’ is effectively the same as a ‘snippet’ in this context)

App blocks streamline the product pre-order template installation process, as well as automatically removing themselves if you uninstall the app.

Listing Pre-orders on Shopify

Once you’ve completed the above steps to integrate the app with your Shopify storefront, you can now start pre-selling!

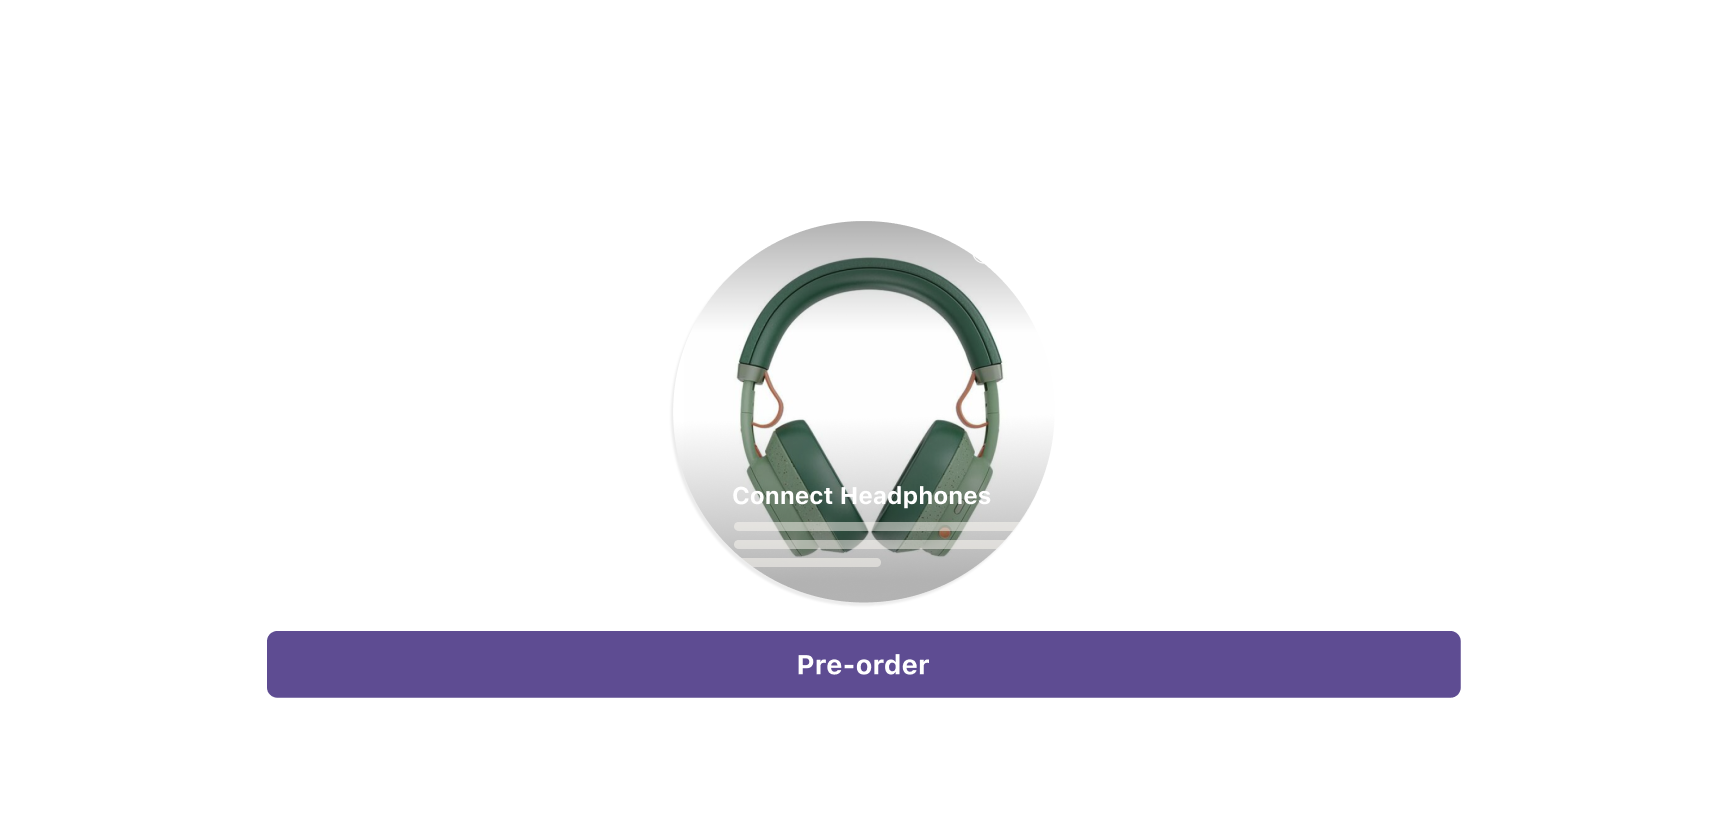
Begin by listing a product in your selected pre-order app. Most if not all pre-order apps sit on top of your existing Shopify product listings. Once listed in the app, the pre-order product page’s cart button text should be replaced with a pre-order version, accompanied by any other front-end additional information, i.e. special pre-order messaging.


You will need to decide which type of pre-order to use, generally depending on the payment settings they use. The general pre-order types are:

  • Charge upfront pre-order – 100% charged upfront (Most apps will offer this).
  • Charge Later pre-orders – 100% charged later when you trigger the charge.
  • Deposit-based pre-orders – A percentage paid upfront, with the outstanding charged later.
  • Capture-only pre-orders – A payment link is sent once you’re ready to send customers through your payment gateway.

Different apps may support or not support any of the above, so it’s important to research this ahead of installing (for example, PreProduct’s list is here).

What kind of pre-order should you use?

pros, and, cons

The below is just a set of rough guidelines from what I’ve seen running a pre-order solution over the years.

Charge upfront pre-orders are useful if you need the cash flow upfront, and appropriate if you have a good idea of when the pre-order items will be ready for shipping. Charging upfront also comes with a higher commitment from customers, over something like capture-only or notify-me-when-in-stock.

Charge upfront may not be the best type of pre-order if you’re worried about manufacturing delays or freight issues. Customers could become frustrated if they’ve fully paid, but then have unexpected delays receiving the product.


Charge later pre-orders can be one of the better choices when you’re not sure how long manufacturing may take, or when there is some uncertainty around production and supply chain. As customers will be less inclined to be annoyed by delays when they haven’t parted with any money yet. It’s still important to keep customers informed of delays though.

Charge later is also convenient if customers have a change of mind, whilst waiting for the out of stock product to come in; because no refund is needed, the pre-order can just be cancelled (without any bank transaction started/cancellation needed).

Deposit-based pre-orders is a good alternative that sits between charge upfront pre-order and charge later pre-order. This type of pre-order shows commitment from customers, but also means customers do not need to pay for the full product upfront, which can help increase pre-order sales by lowering the price to buy for customers.

Capture-only pre-orders can be a great pre-order option when you need to gauge interest. They require the least amount of commitment from both the buyers and shop owners. Similar to a back-in-stock flow, customer’s only go through checkout once the product’s available and can be imminently shipped.


Deciding on a pre-order shipping statment

When creating a pre-order listing, you will also need to set a shipping statement. This could be in a period of days or fixed phrase (ie ‘Next Summer’). The balance here is that a pre-order listing with too vague a shipping statement can deter potential buyers, however an exact shipping statement with a much longer duration can also detract from the willingness to buy.

At PreProduct, generally we advise merchants to keep it specific when they can. With the caveat that you should go with what’s comfortable and if that’s not committing to an exact date, then that’s a completely sensible decision. You should also bear in mind that the communicated shipping statement can be changed at any point (well in a lot of apps at least).


Choosing an exact pre-order shipping statement

Using a less specific pre-order shipping statement

Shopify product settings

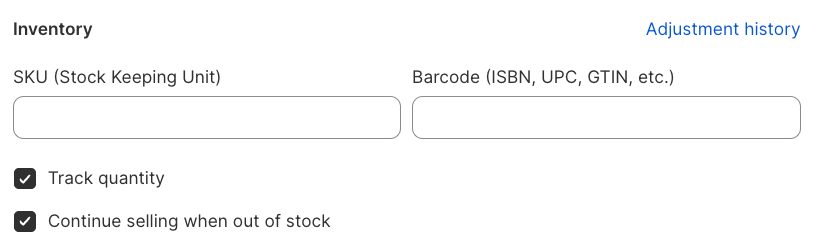
The product/variant section of the Shopify admin dashboard contains an option to enable the ‘continue selling when out of stock’ feature. This setting is crucial when utilising pre-orders and has two important purposes:

  1. If a product has zero stock and the box is unchecked, customers will not be able to purchase it. However, if the box is checked, the product can still pass through the checkout, whatever the inventory level. Some apps (eg PreProduct) automatically manage this box, when creating/finishing a pre-order listing.
  2. Furthermore, most Shopify themes display an ‘out of stock’ message when a product/variant has zero stock and the box is un-ticked. Ensuring the ‘continue selling when out of stock’ box is ticked will prevent this message from being displayed.


3. Offering Discounts on Pre-orders


Basic Discount Setup

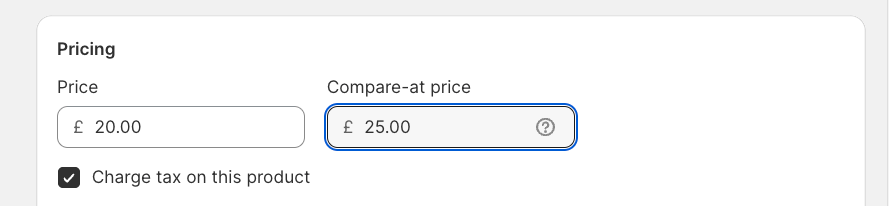
If you’re not using a pre-order app, you can set up a discount in any theme by altering the ‘Price’ and ‘Compare at Price’ in the Shopify product admin. The ‘Compare at Price’ is the original price and the ‘Price’ is the discounted price. This means the Shopify will know that there is a discount and your theme will most likely reflect this on your front-end. 


Purchase Options Discounts

For pre-order listings that use purchase options (in PreProduct’s case, this is every kind apart from capture-only listings), rather than altering the price of the product directly on Shopify, the discount is applied at the pre-order listing and order level.

This means that the discount is fixed for any pre-orders already captured, but if you decide to change the discount for future pre-orders, they’ll have the updated subtraction applied. This is great, as you don’t need to worry about the price change; and furthermore, can even change the Shopify product price without impacting previous pre-orders.

With early bird discounts, you can enable customers to commit to a purchase early on and capture more sales, this is due to a created sense of exclusivity and urgency. Tapping into the classic psychology of ‘wanting more for less’ and FOMO.

Letting early adopters get in early can boost customer loyalty, and rewarding these customers with a discount can boost this dynamic even more so.


4. Setting up pre-orders on Shopify to use deposits

Creating Deposit-based pre-orders

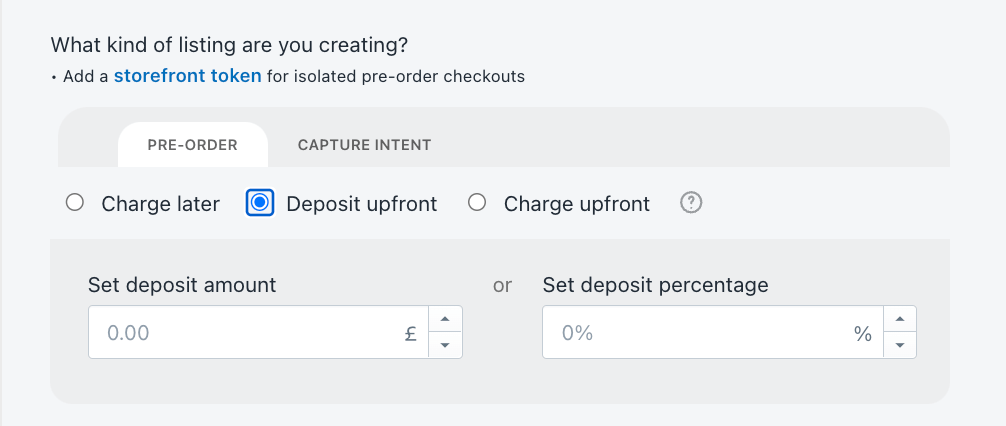
When you set up pre-orders on Shopify and create a listing, there should be an option to choose whether to capture deposits/partial payments for pre-order listings in supporting deposit pre-order apps.

When creating a pre-order listing, you will just need to select the deposit type: fixed amount or percentage. This will be communicated on the product and cart pages, as well as next to the payment authorization section of the checkout.


How do deposit pre-orders work?

Pre-order listings that use deposits will communicate to customers the price and terms of the order before they click the pre-order cart button. They’ll then be directed through your usual checkout process, however there will be details of the deposit price, the outstanding price, as well as when the merchant plans to charge it. Then once you’re ready to trigger the outstanding payment, you can trigger the charge via your pre-order app. Usually this is is powered by vaulted credit card technology so no further action is needed from the customer.

Using deposits can be beneficial as they require customers to commit a portion of the pre-order payments upfront, demonstrating a genuine interest and commitment to purchasing the product.

Deposits provide an immediate influx of cash for the business, which can be crucial for covering production costs, marketing efforts, or other expenses related to fulfilling pre-orders. It’s completely up to you whether you implement a non-refundable deposit policy.

Charging Tax and Shipping Fees

When using deposit based pre-orders, both shipping and taxes will be charged in the final outstanding amount, not in the deposit amount. Your existing tax and shipping profiles will be respected.

5. Summary and Conclusion

In summary, to use and set up pre-orders on Shopify offers several powerful advantages for ecommerce stores.

  • They provide valuable insight into product demand for pre-order products, enabling stores to predict inventory amount and avoid overproduction.
  • Pre-orders generate anticipation for a product, improving hype for your future releases.
  • Lastly, pre-orders can generate upfront revenue, providing cash flow before product release, something that ecommerce companies of all sizes can get excited about.

If you are interested in giving pre-orders on Shopify a go and experiencing some of these benefits I mentioned above, we’d love you to start a free trial of PreProduct today.

Get the Shopify App


Eliza Wegener

Co-founder @PreProduct

Pre-sell With PreProduct

7 day free trial with all plans

Adding pre-orders to the Shopify Turbo theme


The Turbo Shopify Theme

The Turbo Shopify theme is one of Out of the Sandbox’s flagship themes and a favourite of Kurt Elster. This article will go through adding pre-orders to the Shopify Turbo theme. Turbo is fully featured and performant, as well as being Shopify store 2.0 compatible. Meaning it’s pretty straight-forward to add third-party apps. However, we’ll also go through a more limited ‘free’ way of setting up pre-orders with Turbo.

There are many great reasons to offer pre-orders, including a positive influence on cash flow, the wiggle room it can afford your product launches, and the supply chain risks that can be offset. If you’d like to read more about the advantages of Shopify pre-orders, we talk about them extensively on our homepage.

Turbo theme

ref: Out of the sandbox

Adding Pre-orders Manually

We do not recommend this method at all, but realise that some people would prefer to see a free of charge version of offering pre-orders. Backup your themeAlways backup theme files before you change code. This way, you’ll always have a safe version to revert to if something goes wrong.

Word of warning

It’s possible to collect pre-orders without any apps and with minimum developer work, by using the following bare-bones approach. Although I don’t recommend doing this for several reasons that we’ll go into after the step-by-step:

  1. Shopify has a checkbox in the Shopify product section under ‘inventory’ called ‘continue selling when out of stock’. When ticked, Shopify will accept orders for that product, even when the stock level is empty or negative.
  2. It’s also possible to change your add-to-cart button’s text via the Shopify theme files so that it shows ‘pre-order’ when a product has 0 in stock and the above setting is enabled. Using something like the liquid code below within the button tag.
{%- if product.variants.first.inventory_policy == "continue" and product.variants.first.inventory_quantity == 0 -%} pre-order {%- endif -%}

As well as the overhead of hardcoding a change into your store’s theme that doesn’t localise to the user’s language, the above method will also mean:

  • ‘pre-orders’ and ‘buy-now’ orders are mixed together in your Shopify order section, leading to mistakes and laborious admin.
  • No efficient control of what product is on pre-order and what is on ‘buy now’.
  • Your store’s front-end won’t communicate to customers when they’ll receive their pre-order.
  • You have no way of communicating with customers during the pre-order process. e.g. A ‘Your natural deodorant is three weeks away from shipping’ email or customer portal.
  • Pre-order payment has to be upfront (no pay later or deposit option)
  • No way to place limits or any advanced pre-order features on your listing.

All of these drawbacks can very quickly add up to a negative customer experience with a lot of work on your end to manage and stay in control. Luckily Shopify’s app ecosystem has many apps who work on these problems and ways to increase your pre-orders. Thanks to Turbo’s Store 2.0 compatibility, you won’t need to write a line of code to integrate one either.

Using PreProduct for pre-orders

Like I just mentioned, Shopify’s Appstore is home to many pre-order apps that will help you find success with your pre-sales.
PreProduct offers the below benefits, as well as a customisable pre-order cart. After selecting PreProduct from the AppStore, simply click ‘install app’ from the top of the page and Shopify will take you through a quick install process.

PreProduct’s feature set includes:

  • The ability to choose which specific product/variants will be on pre-order.
  • A designated dashboard for your pre-orders, without regular orders being mixed in.
  • Customisation of the design/messaging of the pre-order button and front-end, including dynamic variables like shipping time.
  • Email campaigns to keep customers in the loop and engaged throughout the pre-order campaign.
  • Different payment options like; ‘pay later’, ‘deposit’ and ‘pay now’. Meaning you can list pre-orders much earlier and with better flexibility (+ in some countries, conform to necessary legal requirements).
  • Analytics and dashboards for reporting/interacting/merging the individual pre-orders.

Using the Shopify store 2.0 ‘customize’ editor you won’t have to add permanent code to your theme. You can just drag and drop a block into your product page. Meaning you’re in complete control of where the pre-order section goes in your storefront, as well as when it gets taken out.

Adding a pre-order app block to your Shopify turbo theme

Once you have PreProduct installed, you’ll be able to drag it’s block into your product page exactly where you want it. Here’s how:

  • Navigate to the ‘Online store’ section of your Shopify dashboard.
  • Click ‘Customize’.
  • You will now be greeted with Shopify’s customize editor. It will be set to your home page. Click ‘catalogue’ to go to a collection page and then click on any product to select your product page.
  • Notice the different areas of your product page in the left-hand side bar, signified by the tag icon and name in bold. We want to add to your ‘Product Information’ section, so click the blue ‘Add block’ link at the bottom of that list.
  • A pop-up should appear with a list of blocks under the ‘APPS’ heading. Click the PreProduct block.
  • The PreProduct block has now been added to the ‘Product information’ section. To choose it’s position, click the little back arrow to the left of its nam and drag it up or down until you’re happy with the position.
  • That’s it, you should be all good to go. Don’t forget to save! (Top right corner of the page).

Summary

You have now finished setting up pre-orders for the Shopify Turbo theme. You can now start listing products for pre-order and taking pre-sales for your future and out of stock products.

Pre-sell With PreProduct

7 day free trial with all plans

Adding pre-orders to Shopify Dawn


The Dawn Shopify Theme

Dawn is Shopify’s exciting new theme. As of the end of August 2021, new stores will be set-up with Dawn as default and have access to a bundle of new features which Shopify are calling ‘Store 2.0’. Among these new features is the long rumoured ‘sections anywhere’ ability, speed increases, support for 3d models out of the box and much more. However, the topic of this article is how to add pre-orders to Shopify Dawn. There are many compelling reasons to offer pre-orders, including their positive effects on cash flow, the flexibility they afford your product launches, and the risks they can offset. If you would like to read more about the benefits and strategies of pre-orders, we have an article on why you should take pre-orders on Shopify here.

Dawn theme

ref: Shopify

Adding Pre-orders Manually

I do not recommend this method at all, but realise that some people would prefer to see a free of charge version of offering pre-orders.

Word of warning

It’s possible to start collecting pre-orders without installing any apps or paying a developer to modify Dawn through a very bare-bones approach, although I don’t recommend doing this for several reasons that will be soon become apparent. Here are the steps:

  • Backup your theme. (you should always backup theme files before you change code, so you have a safe version to revert to if something goes wrong).
  • Shopify has a checkbox in the Shopify product admin under ‘inventory’ called ‘continue selling when out of stock’. When checked, your store will accept orders for that product, even when the stock level is 0.
  • You can then made a code change like the below to what text is outputted in your add-to-cart button. You’ll be looking for something similar to the first block of code below; which you’ll want to change to the block below.

Before:

{%- if product.selected_or_first_available_variant.available -%}
  {{ 'products.product.add_to_cart' | t }}
{%- else -%}
  {{ 'products.product.sold_out' | t }}
{%- endif -%}

After:

{%- if product.variants.first.inventory_policy == "continue" and product.variants.first.inventory_quantity == 0 -%}
  pre-order
{%- elsif product.selected_or_first_available_variant.available -%}
  {{ 'products.product.add_to_cart' | t }}
{%- else -%}
  {{ 'products.product.sold_out' | t }}
{%- endif -%}

  • Finally, navigate back to the ‘online store’ screen in Shopify and click ‘Customize’, click through the store preview until you’re looking at your product page. Then click ‘Buy buttons’ from the list of ‘product information’ blocks and uncheck the ‘Show dynamic checkout buttons’ option so that only your main buy button shows up.
Problems with the manual approach

On top of the fact that this option hardcodes a change into your store’s theme and doesn’t localize to the user’s language, it also will mean:

  • Muddled up ‘pre-orders’ and ‘buy-now’ orders in your Shopify order section, leading to mistakes and laborious admin.
  • No efficient control of what’s a pre-order and what’s a ‘buy now’ listing in your store.
  • Your storefront won’t tell customers when they should hope to receive their pre-order.
  • You have no way of communicating with customers during the pre-order process. e.g. ‘Your Red Sneakers are two weeks away from shipping’.
  • Pre-order payment has to be upfront.
  • No way to place limits or any advanced pre-order features on your listing.

All of these drawbacks can very quickly add up to a bad customer experience with a lot of work on your end to stay afloat and in control. Luckily Shopify’s app ecosystem has apps listed by companies who spend their whole time solving these issues and figuring out the best way to increase your pre-orders. The best bit is… thanks to ‘Store 2.0’s new features, you won’t need to write a line of code to integrate one.

Adding a pre-order app

Like I mentioned above, Shopify’s Appstore is home to many pre-order apps that will help you find success with your pre-sales.
PreProduct offers the below benefits, as well as a customisable pre-order cart. However, there are many other good options on the Shopify AppStore. After selecting a pre-order app from the App Store, simply click ‘install app’ from the top of the page and Shopify will take you through a quick install process.

Pre-order app features can include:

  • A user interface to choose which of your product/variants will be on pre-order and when.
  • A designated dashboard for your pre-orders, without regular orders being mixed in.
  • Customisation of the visual design/messaging of the pre-order button and front-end, including real-time variables like shipping time.
  • Email campaigns to keep customers in the loop and engaged throughout the pre-order process.
  • Different pre-order payment options like; ‘pay later’, ‘deposit’ and ‘pay now’ meaning you can list pre-orders earlier and with more flexibility (and in some countries, conform to necessary legal requirements).
  • Analytics and dashboard for reporting/interacting with the individual pre-orders.

Pre ‘Store 2.0’, permanent code had to be added to your store theme to add a pre-order app, resulting in increased setup time while a developer made the integration, as well as the potential for your theme to acquire more and more third-party code as you installed/uninstalled various kinds of apps.
Now Shopify gives store owners the ability to add something called an ‘app block’. Instead of having a developer add permanent code to your theme, you can simply drag and drop a block into your product page. Meaning you’re in complete control of where the pre-order section goes in your storefront, as well as when to take it out.

How to add a pre-order app block to your product page with Dawn

Once you have a pre-order app installed from the Shopify app store, as long as it supports ‘Store 2.0’, you’ll be able to drag it’s block into your product page exactly where you want it. Here’s how:

  • Navigate to the ‘Online store’ section of your Shopify dashboard.
  • Click ‘Customize’
  • You will now be greeted with Shopify’s drag-and-drop editor. It will currently be set to your home page. Click ‘catalogue’ to go to a collection page and then click on any product to select your product page.
  • Notice the different areas of your product page in the left-hand side bar, signified by the tag icon and name in bold. We want to add to your ‘Product Information’ section, so click the blue ‘Add block’ link at the bottom of that list.
  • A pop-up should appear with a list of blocks under the ‘APPS’ heading. Click the pre-order app’s block.
  • The app’s block has now been added to the ‘Product information’ section. To choose it’s position, click the little back arrow to the left of the apps name so you can see all of the product page blocks again. Then hover over the app’s name in the ‘Product information’ section and drag it up or down until you’re happy with its position.
  • That’s it, you should be all good to go. Don’t forget to save! (Top right corner of the page).

Now that you have pre-orders set up on your store, you can start listing new products straight away and promoting them. Whilst there are specific pre-order marketing tactics, we generally find the usual suspects work well. For example, conversion and abandonment optimisation through an app like Tada, organic/paid social media, influencer partnerships, email marketing etc.

Summary

Once you have finished adding pre-order functionality to Shopify Dawn, you can start taking pre-sales straight away for your future and out of stock products. Now that Shopify’s clever ‘sections everywhere’ app blocks have been released, integrating exciting new features into your store has never been easier.

Pre-sell With PreProduct

7 day free trial with all plans