Failed Shopify Payments: What They Mean and How to Fix Them

Few things are more frustrating than watching sales slip away because of a failed Shopify payments. Whether it’s a customer seeing “payment declined” at checkout or a deferred charge that won’t go through months after a pre-order was placed, payment failures cost merchants real revenue and can damage customer trust.
The good news? Most failed payments are fixable, and many are recoverable. Research shows that many failed charge payments can be recovered with proper retry logic and timing. But first, you need to understand what went wrong.

This guide breaks down the different types of Shopify payment failures, explains what each error code means, and walks through practical steps to diagnose, fix, and prevent them. We will also cover the unique challenges that pre-order merchants face with deferred payments and authorization expiration, topics most guides overlook entirely.

What causes Shopify payments to fail?

Payment failures fall into three main categories: customer-side issues, merchant-side issues, and platform/gateway problems. Understanding where the failure originated helps you fix it faster.

Customer-side issues are the most common. These include expired cards, insufficient funds, incorrect card details, and fraud detection blocks from the customer’s bank. Sometimes a customer’s bank simply flags the transaction as suspicious, especially for international purchases or unusually large orders.

Merchant-side issues typically involve configuration problems. Maybe your payment gateway credentials are incorrect, you’re still in test mode, or your fraud filters are too aggressive. These issues affect all customers, not just one.

Platform and gateway issues are less common but do happen. Shopify or your payment provider might experience outages, or there could be processing delays during high-traffic periods.

For merchants running pre-orders with charge-later payment models, there’s a fourth category: deferred payment failures. When you charge a customer weeks or months after their initial order, cards expire, accounts close, and customers forget they placed an order. This creates a unique set of challenges we’ll address in this guide.

Shopify payment error codes explained

When a payment fails, Shopify returns a standardized error code that tells you exactly what went wrong. Here’s a complete reference based on Shopify’s API documentation.

Card and bank declines

These errors indicate the customer’s bank or card issuer rejected the transaction:

Error CodeWhat It MeansWhat to Do
CARD_DECLINEDThe card issuer declined the transaction without a specific reasonCustomer should try a different card or contact their bank
CALL_ISSUERThe bank wants the customer to call them before approvingCustomer must contact their card issuer directly
PICK_UP_CARDThe card has been reported lost or stolenCustomer needs to use a different payment method
INSUFFICIENT_FUNDSNot enough money in the accountCustomer should use a different card or add funds

The generic CARD_DECLINED is frustrating because the bank doesn’t always explain why. It could be fraud protection, spending limits, or account restrictions. The customer’s best option is to call the bank phone number on their card.

Card detail errors

These happen when the payment information entered doesn’t match what the bank has on file:

Error CodeWhat It MeansWhat to Do
EXPIRED_CARDThe card’s expiration date has passedCustomer needs to update their card details
INCORRECT_NUMBERThe card number is wrongCustomer should re-enter their card number carefully
INCORRECT_CVCThe security code (CVV/CVC) doesn’t matchCustomer should check the 3-4 digit code on their card
INVALID_CVCThe security code format is incorrectCustomer should verify they’re entering digits only
INVALID_EXPIRY_DATEThe expiration date format is wrongCustomer should use MM/YY format

Card detail errors are usually simple to fix. The customer just needs to re-enter their information carefully.

Address verification failures

Address Verification Service (AVS) failures occur when billing address details don’t match the card issuer’s records:

Error CodeWhat It MeansWhat to Do
INCORRECT_ZIPThe ZIP or postal code doesn’t matchCustomer should verify their billing ZIP code
INCORRECT_ADDRESSThe full billing address doesn’t matchCustomer should check their complete billing address

AVS mismatches are common for customers who’ve recently moved or have multiple addresses on file with their bank.

Processing and configuration errors

These errors often indicate problems on the merchant side:

Error CodeWhat It MeansWhat to Do
GENERIC_ERRORAn unknown error occurred during processingRetry the transaction; if persistent, contact support
CONFIG_ERRORYour gateway or merchant configuration is wrongCheck your payment gateway settings and API credentials
PROCESSING_ERRORSomething went wrong during processingWait and retry; could be a temporary issue
TEST_MODE_LIVE_CARDA real card was used but your gateway is in test modeSwitch your gateway from test to live mode

If you’re seeing CONFIG_ERROR or TEST_MODE_LIVE_CARD, the problem is almost certainly in your Shopify admin under Settings > Payments.

Regional and feature limitations

Some errors relate to what payment methods are available:

Error CodeWhat It MeansWhat to Do
INVALID_COUNTRYThe payment method isn’t available in the customer’s countryOffer alternative payment methods
PAYMENT_METHOD_UNAVAILABLEThe payment method is temporarily unavailableTry a different payment method or wait
UNSUPPORTED_FEATUREYour gateway doesn’t support a required featureCheck gateway capabilities or switch providers

Shopify payment status types

Beyond error codes, Shopify uses transaction statuses to indicate where a payment stands in its lifecycle:

  • SUCCESS: The transaction completed. Funds will settle to your account.
  • FAILURE: The transaction was rejected. No funds were captured.
  • PENDING: The transaction is still processing. This is normal for some payment methods.
  • ERROR: Something went wrong during processing, distinct from a decline.
  • AWAITING_RESPONSE: The system is waiting for a response from the payment gateway.
  • UNKNOWN: The status couldn’t be determined. Check your gateway dashboard.

What “Payment pending” means: When you see a pending status, it usually means Shopify is waiting for confirmation from the payment provider. For methods like bank transfers or some regional payment options, pending payments can take several days to clear. Most pending payments have an expiry date, typically around a week, after which they change to “Expired” if not completed.

For pre-order merchants, it’s important to distinguish between an authorization pending (waiting for you to capture a payment hold) and a deferred payment pending (waiting to charge a vaulted card). Authorization holds expire after 7 days on standard Shopify plans, which is why many pre-order apps use vaulted cards instead.

Authorization expiration: what pre-order merchants need to know

This section is critical if you’re taking pre-orders with lead times longer than a week. Understanding Shopify’s authorization periods can save you significant headaches.

Standard authorization period: Shopify Payments allows a 7-day authorization period. This means when a customer places an order, the payment is authorized (the funds are held on their card) but not captured. You have 7 days to capture that payment before the authorization expires.

What happens after 7 days: If you capture payment after the standard authorization period, Shopify charges an additional 1.75% fee on top of your normal processing fees. This adds up quickly on larger orders.

Extended authorization for Shopify Plus: Merchants on Shopify Plus may have access to extended authorization periods for certain card types, but this varies by issuing bank and isn’t guaranteed.

Why this matters for pre-orders: If you’re selling products that won’t ship for 30, 60, or 120+ days, the 7-day authorization model doesn’t work. By the time stock arrives, the authorization has long expired.

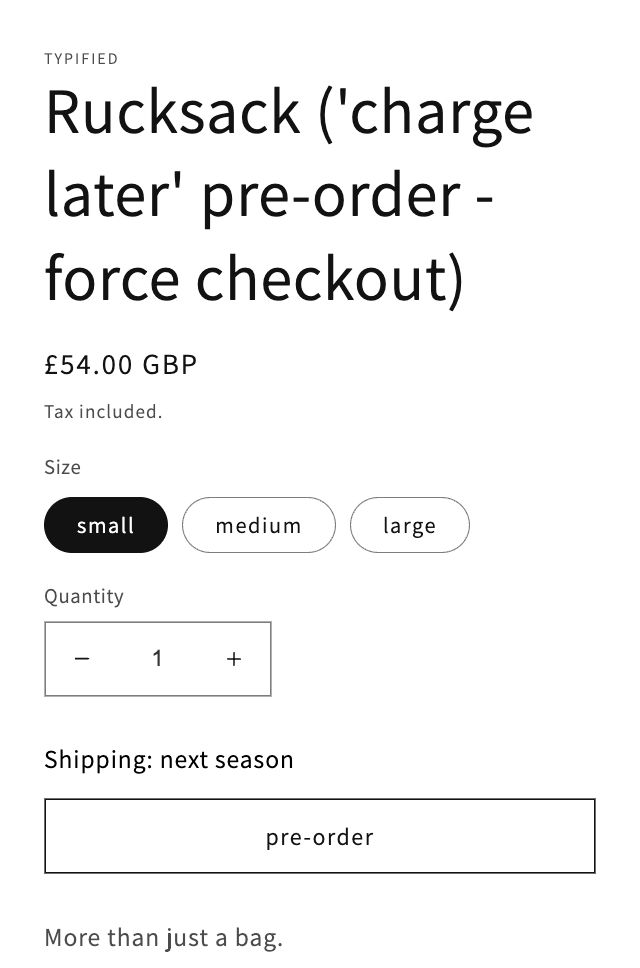
The solution: Charge-later with vaulted cards. Instead of authorizing and capturing later, charge-later pre-orders vault the customer’s card at checkout (securely storing the payment method) and charge it when you’re ready to ship. This bypasses the authorization period entirely.

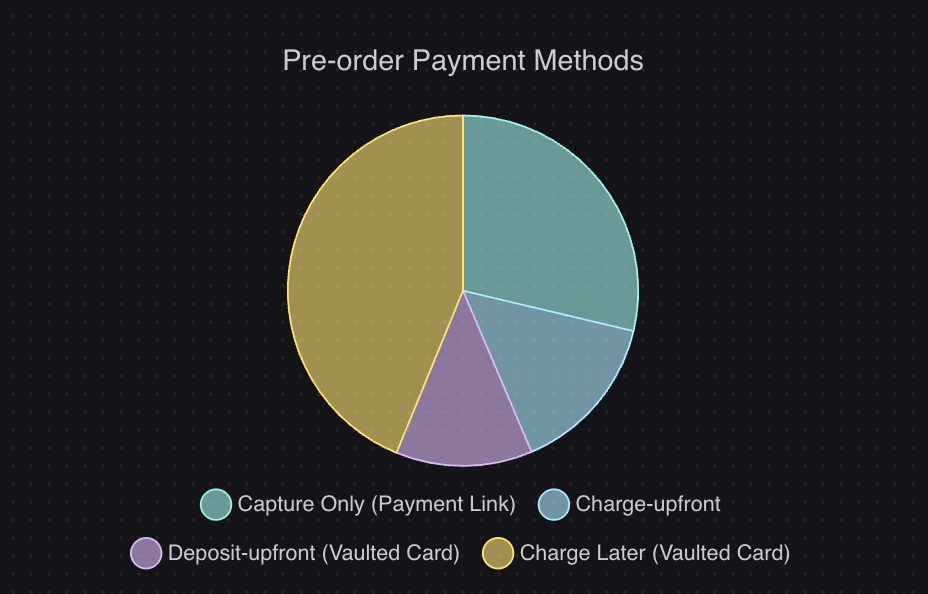
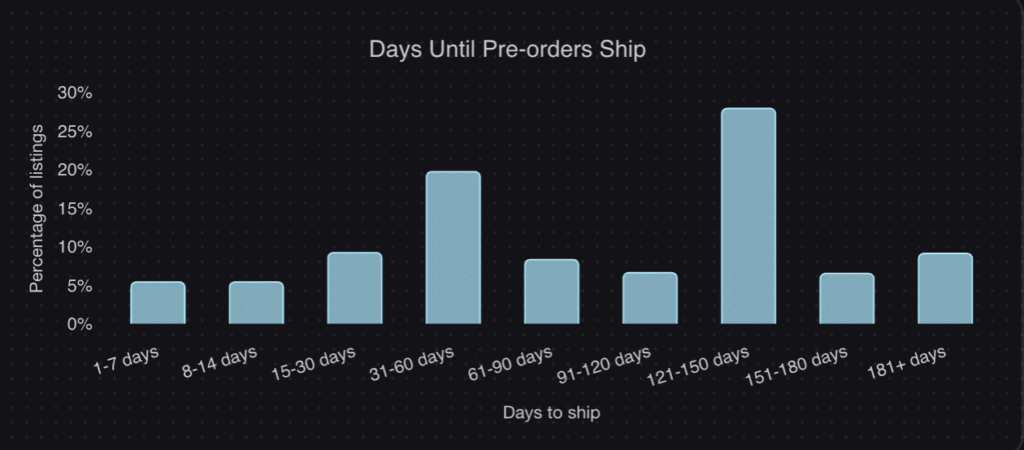
According to our analysis of over one million pre-orders, 43.8% of pre-order listings use charge-later models, and 28.1% of pre-orders have lead times of 121-150 days. For these merchants, vaulted cards aren’t optional; they’re essential.
How to fix common Shopify payment failures

Now for the practical part. Here’s how to address the most common failure scenarios.

For checkout payment failures

When customers can’t complete checkout, work through this checklist:

  1. Check your payment gateway setup: Go to Settings > Payments in your Shopify admin. Verify that your gateway is active, API credentials are correct, and you’re not in test mode.
  2. Review your fraud filter settings: Overly aggressive fraud filters can block legitimate customers. Check your settings and consider loosening restrictions if you’re seeing high false-positive rates.
  3. Verify Shopify’s status: Visit the Shopify status page to check for any ongoing incidents affecting payment processing.
  4. Test with a real transaction: Run a small test purchase using a real card to confirm your setup is working correctly.
  5. Offer multiple payment methods: If one method fails, customers can try another. Consider enabling Shop Pay, PayPal, Apple Pay, or Google Pay alongside credit cards.

If specific customers are experiencing issues, the error code will guide your response. For CARD_DECLINED or CALL_ISSUER, the customer needs to contact their bank. For INCORRECT_CVC or INVALID_EXPIRY_DATE, they just need to re-enter their details.

For failed deferred charges

When a charge-later pre-order or subscription payment fails, you need a recovery process:

  1. Notify the customer immediately: Send an email explaining that their payment couldn’t be processed and provide a direct link to update their payment method.
  2. Retry with smart timing: Don’t retry immediately after a failure. Wait 24 hours for the first retry. This gives temporary issues (like a bank’s fraud hold or a card limit reset) time to resolve.
  3. Follow a dunning schedule: Industry best practice suggests retrying at 24 hours, then 3-5 days, then 7-10 days. After the final retry, send a last-chance notice before cancellation.
  4. Make payment updates easy: Provide a customer portal where customers can update their payment method without contacting support. This self-service option dramatically improves recovery rates.
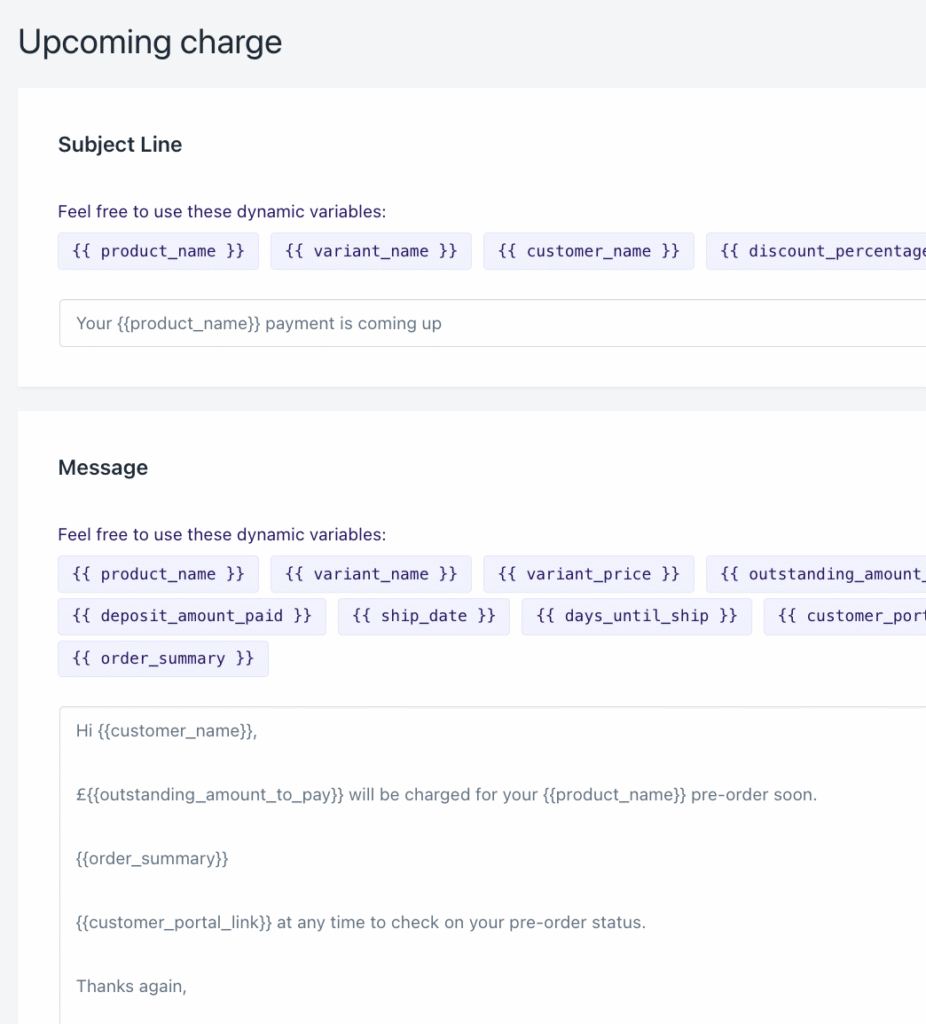
  5. Send pre-charge notifications: For deferred charges, send an “upcoming charge” email 3-7 days before you plan to charge. This catches expired cards proactively and reminds customers the charge is coming.

If you’re using PreProduct for pre-orders, our failed charge recovery flow handles much of this automatically, including customer notifications and retry logic.

For failed payouts

When Shopify can’t send money to your bank account:

  1. Verify bank account details: Double-check your account number and routing number in Settings > Payments > Shopify Payments.
  2. Confirm currency settings: Ensure your bank account currency matches your Shopify Payments payout currency. Currency mismatches cause failed payouts.
  3. Maintain a positive balance: If you’ve issued refunds or received chargebacks, you might have a negative balance. Shopify needs a positive balance to process payouts.
  4. Check for account restrictions: Some banks have restrictions on business deposits or international transfers. Contact your bank if payouts consistently fail.

Recovering failed payments: dunning strategies that work

Failed payments don’t have to mean lost revenue. With the right recovery strategy, you can recapture the majority of failed transactions.

Why recovery matters: Failed payments can lead to involuntary churn rates of 20-40% monthly if left unaddressed. But research shows that many of these failures are recoverable with proper retry logic and customer communication.

Pre-dunning for deferred charges: The best failed payment is one that never happens. For pre-orders and subscriptions, send customers a notification 3-7 days before their scheduled charge. This email should:

  • Remind them a charge is coming
  • State the amount and what it’s for
  • Provide a link to update their payment method if needed

Immediate notification: When a payment fails, notify the customer within minutes. Your email should:

  • Clearly state that payment couldn’t be processed
  • Avoid accusatory language (their card wasn’t “rejected,” the payment “couldn’t be completed”)
  • Include a direct link to update payment information
  • Provide a deadline for resolution

Smart retry schedule:

  • 24 hours after failure: First automatic retry. Resolves temporary holds and daily limit resets.
  • 3-5 days after failure: Second retry with follow-up email. Catches customers who intended to update their card but forgot.
  • 7-10 days after failure: Final retry with urgent notice. Make clear that the order will be cancelled without payment.

Customer self-service: The easier you make it to update payment information, the higher your recovery rate. A customer portal where customers can:

  • View their pending charges
  • Update their card on file
  • See their payment history

…will outperform email-only recovery every time.

Handling chargebacks and disputes

Chargebacks are different from payment failures, but they’re related. A chargeback happens when a customer disputes a charge with their bank after the payment was successful. The bank reverses the transaction and takes the money (plus a fee) from your account.

Common chargeback reasons:

  • Fraudulent transaction: The cardholder claims they didn’t authorize the purchase
  • Product not received: The customer says they never got their order
  • Product not as described: The customer claims the product was different than expected
  • Duplicate charge: The customer was charged twice
  • Unrecognized transaction: The customer doesn’t recognize the charge on their statement

The response process: When you receive a chargeback through Shopify Payments:

  1. You’ll be notified with a deadline to respond (typically 7-21 days)
  2. Gather evidence: Order confirmation, shipping tracking, delivery confirmation, customer communication, your terms and policies
  3. Submit your response through the Shopify admin before the deadline
  4. The card network reviews the evidence and makes a decision (can take up to 120 days)

Important: Always submit evidence, even if the customer says they’ve withdrawn the dispute. Without a formal withdrawal letter submitted as evidence, you could still lose.

Prevention strategies:

  • Use clear merchant descriptors so customers recognize charges
  • Send order confirmations and shipping notifications
  • Require signature on delivery for high-value orders
  • Maintain clear pre-order policies that customers agree to at checkout
  • Respond quickly to customer service inquiries

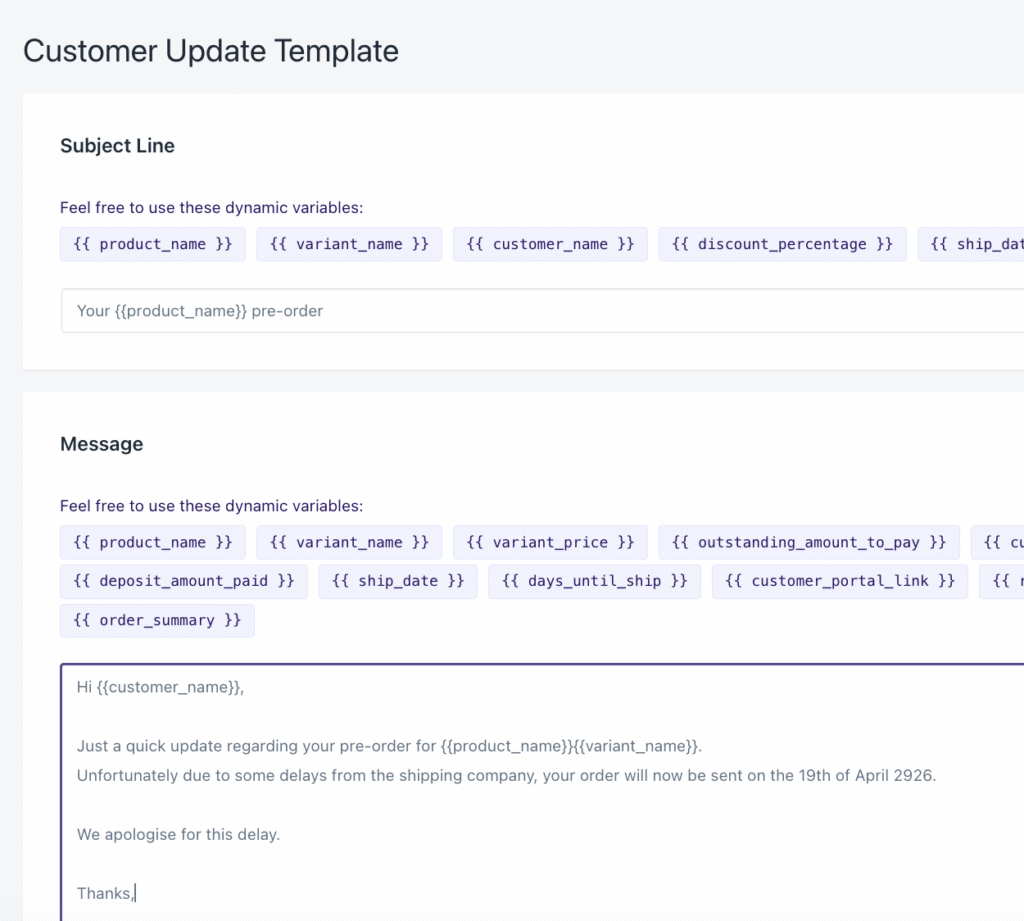
For pre-orders specifically, clear communication about lead times and expected ship dates prevents “product not received” disputes. When customers know what to expect, they’re less likely to dispute a charge out of confusion.
Preventing payment failures before they happen

The best approach to payment failures is preventing them in the first place.

At checkout:

  • Display pricing clearly, including taxes and shipping, before checkout
  • Offer multiple payment methods so customers have alternatives
  • Use address validation to catch typos before submission
  • Keep your fraud filters balanced; too strict means lost sales
Before deferred charges:

  • Send pre-charge notification emails 3-7 days in advance
  • Monitor for expiring cards and prompt updates proactively
  • Allow customers to update payment methods anytime via a portal
  • Set appropriate retry logic for failed charges
Ongoing monitoring:

  • Track your payment failure rate and abandonment metrics monthly
  • Test your checkout process regularly, especially after theme or app changes
  • Monitor the Shopify status page during high-traffic periods
  • Review failed transactions to identify patterns

For pre-orders specifically:

  • Set realistic lead time expectations on product pages
  • Send regular status updates during longer lead times
  • Use charge-later with vaulted cards for products shipping beyond 7 days
  • Implement dunning automation through Shopify Flow or your pre-order app

When you’re running pre-orders at scale, failed payment recovery should be automated, not manual. Tools like Shopify Flow can trigger customer notifications, schedule retries, and even cancel orders after a set number of failed attempts.

Conclusion

Failed Shopify payments are frustrating, but they’re manageable. Most failures can be diagnosed from the error code, fixed with the right troubleshooting steps, and recovered with smart dunning strategies.

Here’s the key takeaway: approach payment failures as a lifecycle, not a one-time fix.

  1. Diagnose: Use error codes to understand what went wrong
  2. Fix: Address the root cause, whether it’s configuration, customer card issues, or gateway problems
  3. Recover: Implement retry logic and customer communication to recapture failed payments
  4. Prevent: Put systems in place to reduce failures before they happen

For pre-order merchants, the standard authorization model doesn’t work for products with long lead times. If you’re shipping more than a week out, charge-later pre-orders with vaulted cards bypass authorization expiration entirely and give you the flexibility to charge when you’re ready to fulfill.

Payment failures will always happen. The difference between merchants who lose revenue and those who don’t comes down to having the right systems in place to catch and recover those failures before they become permanent losses.

Pre-sell With PreProduct

7 day free trial with all plansMigrate pre-orders

Pre-order Payment Models: Complete Guide to Charge Later, Deposits, Installments & More on Shopify

Prefer a video? Click here to see Oli walk through the various types.

In analyzing $85 million in pre-order sales across more than one million transactions, one pattern became clear: the pre-order payment model you choose can make or break your campaign. Yet most merchants struggle to understand when to use charge later versus deposits, or whether upfront payments make sense for their lead times.

The challenge is not a lack of options. Shopify merchants have access to five distinct pre-order payment models, each with different strengths, technical requirements and ideal use cases. The real problem is that guidance on choosing between them has been scattered across dozens of articles, leaving store owners to piece together a strategy through trial and error.

This guide consolidates everything you need to know about pre-order payment models on Shopify. Whether you are setting up pre-orders on Shopify for the first time or optimizing an existing strategy, you will learn when to use each approach based on real data from PreProduct’s analysis of 1M+ pre-orders, understand the technical requirements behind deferred charges, and walk away with a decision framework matched to your specific situation.

What Are Pre-order Payment Models?

A pre-order payment model defines when and how you collect money from customers who purchase products before they ship. This sounds straightforward, but selecting the right pre-order payment model ripples through every aspect of your business, from cash flow and refund rates to customer trust and operational complexity.

The five main approaches

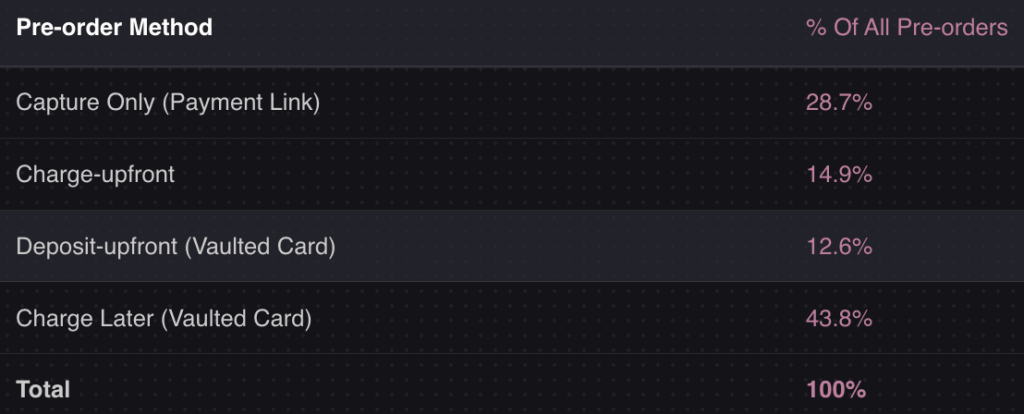
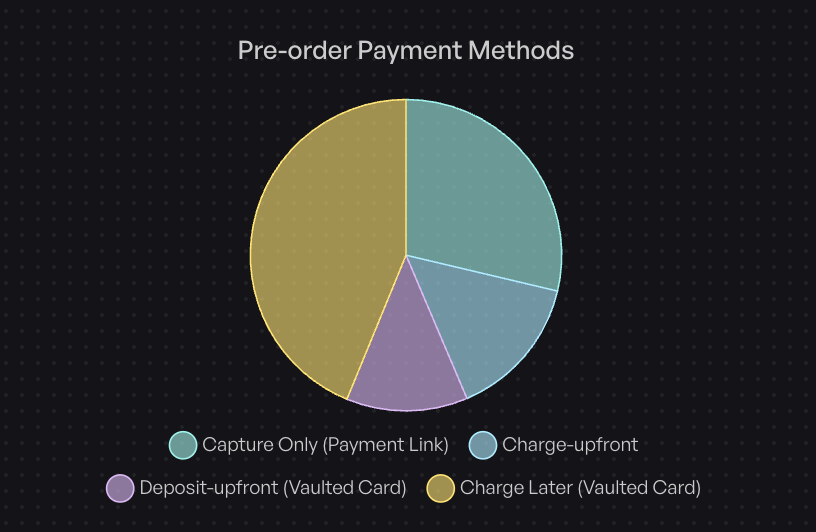
Based on our data, Shopify merchants distribute across these types of pre-order payment models:

  • Charge later (deferred payment): 43.8% of pre-orders (75,781 listings)
  • Capture-only (payment links): 28.7% of pre-orders
  • Charge upfront: 14.9% of pre-orders
  • Deposit upfront with balance later: 12.6% of pre-orders
  • Multi-step installment plans: Emerging option for high-ticket items

The dominance of charge-later reflects a significant shift in merchant strategy. Until vaulted card technology became widely available through Shopify Payments in recent years, most merchants had no choice but to charge upfront or manually send payment links later.

Why your payment model choice matters

Your payment model affects nearly every metric that matters:

Conversion rates shift dramatically based on payment timing. Charge-later pre-orders remove the friction of paying for something you will not receive for weeks or months. Customers feel more comfortable committing when no money changes hands until the product ships.

Cash flow implications cut both ways. Charging upfront provides immediate revenue, but deposits and charge-later methods can actually improve cash flow predictability by reducing refund rates and cancellations.

Operational complexity increases with deferred charges. You need systems for failed payment recovery, customer communication about upcoming charges, and fulfillment holds to prevent premature shipping.

Technical foundation: vaulted cards

Understanding vaulted cards is essential for grasping why certain payment models work the way they do. When a customer completes checkout on a charge-later or deposit pre-order, their card details are securely stored (or “vaulted”) with Shopify Payments or PayPal. This allows you to charge the card later without the customer re-entering their payment information.

The critical difference between vaulted cards and traditional authorization holds: authorization holds expire. Shopify’s standard authorization period is just 7 days, with extended authorization available up to 30 days on Shopify Plus, but at a 1.75% surcharge.

Vaulted cards have no time limit. You can charge a customer 3 months after checkout at standard processing rates. This is why charge-later has become the dominant model for pre-orders with longer lead times.

Payment Model 1: Charge Upfront

Charge upfront is the simplest pre-order payment model. The customer pays in full at checkout, just like a regular order. The difference is that fulfillment is delayed until your product is ready to ship.

How it works

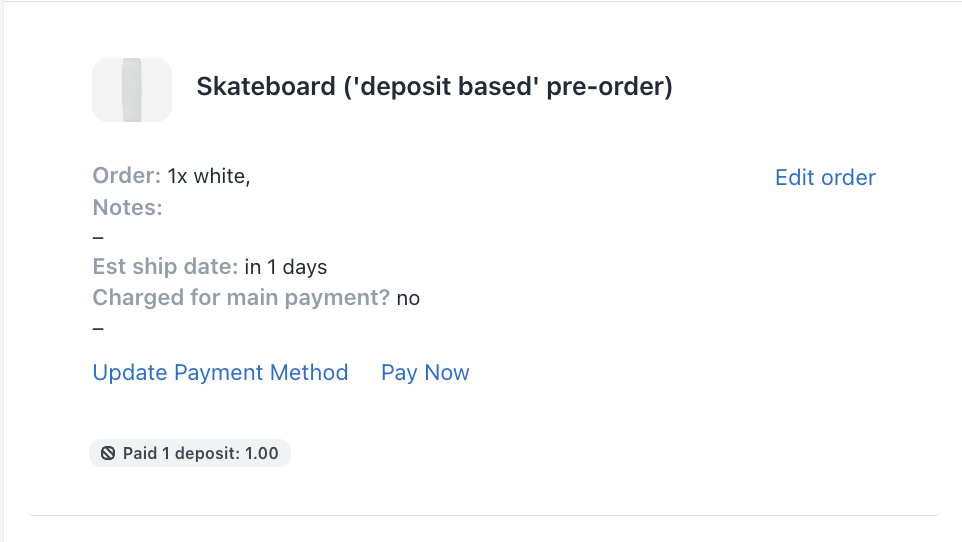
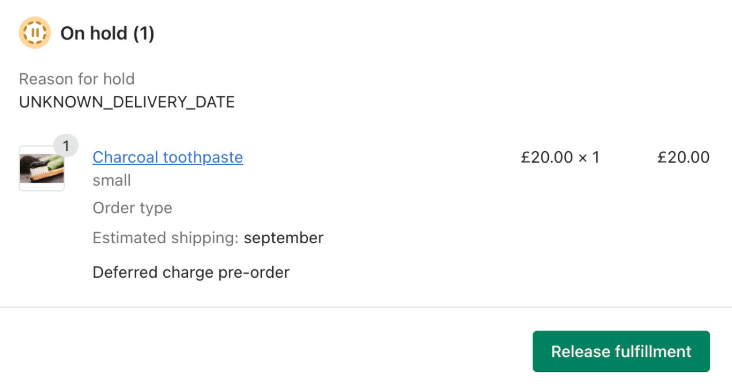
When a customer completes a charge-upfront pre-order, their payment processes immediately. Shopify creates an order in your admin with the payment captured. To prevent premature shipping, you need fulfillment holds configured so the order stays in a “hold” state until you release it.

When to use charge upfront

Charge upfront works best in specific scenarios:

Short lead times under 14 days: When customers will receive their order quickly, the friction of paying upfront is minimal. Restocks and short-timeline launches fall into this category.

Critical cash flow needs: If you need revenue immediately to fund production or cover costs, upfront payment guarantees that cash.

Established customer trust: Brands with loyal followings can ask for payment upfront without damaging conversion rates. Customers who know and trust you are less concerned about paying early.

Low refund risk products: Commodity items or products with predictable demand carry less risk of cancellation requests.

Pros and cons

Pros:

  • Immediate revenue recognition
  • Simplest operational model
  • Payment is verified and funds secured
  • Works with any payment gateway

Cons:

  • Higher refund request rates for longer lead times
  • Customer hesitation reduces conversion
  • More support inquiries about order status
  • Potential chargeback risk if delays occur

Our data shows 14.9% of merchants use charge upfront, typically for restocks and launches with confirmed, short timelines.

Payment Model 2: Charge Later (Deferred Payment)

Charge later has become the dominant pre-order payment model for good reason. This Shopify deferred payment pre-order approach allows customers to complete checkout without an immediate charge. Their card is vaulted securely, and you trigger the charge when ready to ship.

How it works

The checkout experience feels nearly identical to a regular purchase. The customer enters their payment details and completes the order. Behind the scenes, Shopify creates a payment mandate that vaults the card details. The order enters a “payment pending” state with a fulfillment hold.

When your inventory arrives or production completes, you trigger the charge. The vaulted card is billed, and the order transitions to paid status ready for fulfillment.

When to use charge later

Lead times over 30 days: This is the sweet spot. Authorization periods cannot cover this timeline, so vaulted cards are your only option for deferred payment without manual intervention.

Maximizing conversion: Customers convert at higher rates when they know payment happens only when the product ships. The psychological barrier of “paying for something I won’t get for months” disappears.

Testing market demand: If you are gauging interest in a new product, charge-later lets you collect real purchase commitments without asking customers to take financial risk.

Uncertain fulfillment timelines: When you cannot guarantee exact ship dates, charge-later gives you flexibility. Customers feel less anxious about delays when they have not paid yet.

Why charge later dominates

The numbers tell the story. 43.8% of pre-orders use charge-later on Shopify, representing 75,781 listings in our dataset. This is not random. Charge-later solves the fundamental tension of pre-orders: customers want products early, but they do not want to pay for products they cannot receive.

From a technical standpoint, vaulted cards eliminate the authorization period constraint entirely. Standard authorization holds expire at 7 days. Extended authorization costs an additional 1.75% and only extends to 30 days. Vaulted cards have no time limit at standard processing rates.

Technical requirements

Charge-later requires specific payment gateway support:

  • Shopify Payments: Full support for vaulted cards and deferred charges
  • PayPal: Supports vaulted cards for deferred payment
  • Other gateways: Generally do not support this model; use capture-only instead

You also need selling plan configuration with payment mandates and fulfillment holds to prevent orders from flowing to your 3PL before payment is collected.

Failed charge management

The main operational consideration with charge-later is handling failed charges. Cards expire, get cancelled, or hit spending limits. Our data shows 95%+ success rate for deferred charges when merchants follow good communication practices.

The keys to minimizing failed charges:

  • Send a “heads up” email 48-72 hours before charging
  • Provide an easy way to update payment details
  • Have dunning workflows for retry logic
  • Set clear policies for order cancellation after failed attempts

Payment Model 3: Deposit Upfront (Partial Payment)

The deposit pre-order payment model strikes a balance between charge-upfront and charge-later. You collect a portion of the payment immediately to validate commitment, then charge the balance when ready to ship.

How it works

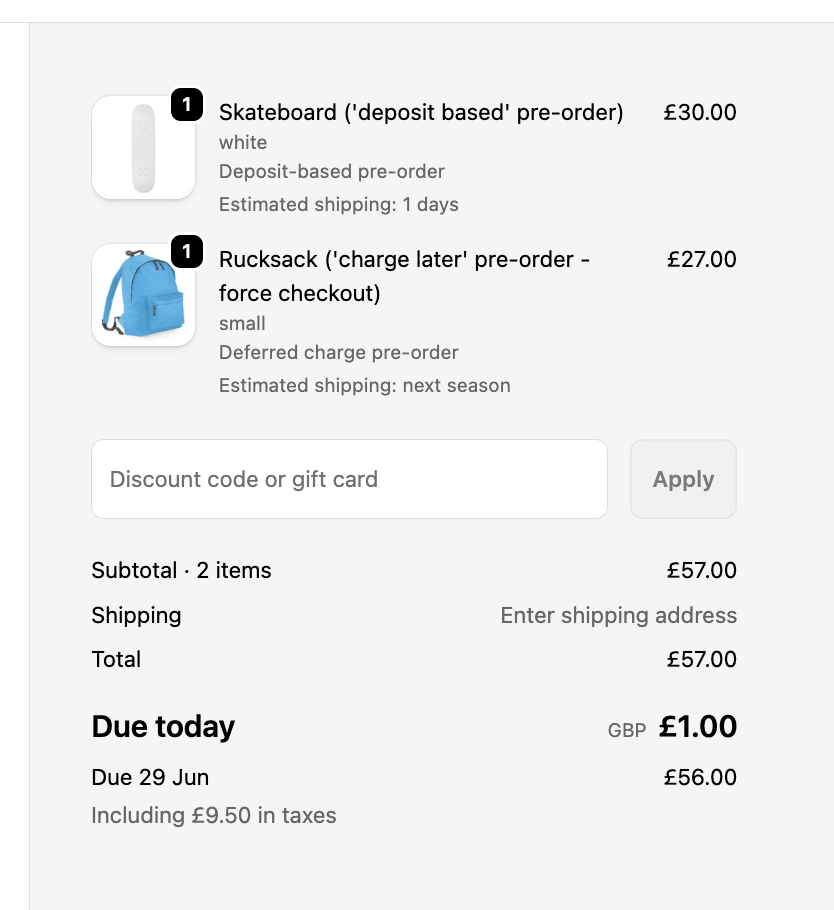
At checkout, the customer pays a percentage of the total (typically 10-50%). Their card is vaulted for the remaining balance. When you are ready to fulfill, you trigger the balance charge through the vaulted card, then release for fulfillment.

When to use deposits

High-ticket items over $300: Larger purchases benefit from deposits because they validate genuine commitment. A customer willing to put down $200 on a $500 item is unlikely to cancel.

Custom or made-to-order products: When you incur costs to produce an item specifically for a customer, deposits protect you from cancellation losses.

Partial cash flow needs: If you need some revenue to fund production but want to keep conversion rates high, deposits provide a middle ground.

Long lead times with expensive goods: Combining high price points with extended timelines makes deposits particularly valuable.

Optimal deposit percentages

Based on merchant data and industry practices, here are recommended deposit percentages for Shopify pre-orders:

Price RangeRecommended Deposit
$50-$30010-25%
$300-$1,00025-40%
$1,000+30-50%
Custom/made-to-order40-50%
6+ month lead times30-40%

The principle is straightforward: higher deposits for higher-risk scenarios. Made-to-order items that cannot be resold need stronger commitment signals. High-ticket items need deposits proportional to your exposure.

Pros and cons

Pros:

  • Validates customer commitment and reduces cancellations
  • Improves cash flow without charging full amount
  • Balances conversion rates with revenue needs
  • Protects against order abandonment

Cons:

  • More complex than single-payment models
  • Requires balance charge management
  • Customer support questions about two-part payment
  • Failed balance charges create partial-payment scenarios

Our data shows 12.6% of merchants choose deposits, with particular concentration in fashion, furniture, and custom goods. For a deeper dive into deposit and partial payment configurations, see our complete guide to Shopify partial payments.

Payment Model 4: Capture-Only (Payment Links)

The capture-only pre-order payment model represents the most flexible but least automated approach. Customers express interest and provide contact information at checkout, but no payment is collected or vaulted. When ready to charge, you send a manual payment link.

How it works

The customer completes a simplified checkout that captures their order details and contact information. No payment processes. When your product is ready, you generate and send a payment link. The customer clicks through to complete payment, and you fulfill the order.

When to use capture-only

Uncertain timelines: If you genuinely do not know when a product will ship, capture-only avoids the commitment of vaulting cards for an indefinite period.

Non-Shopify Payments stores: This is the only deferred payment option for stores using payment gateways other than Shopify Payments or PayPal.

Maximum flexibility: Some merchants prefer the explicit customer reconfirmation that comes with payment link conversion.

Demand testing at zero commitment: Capture-only lets you gauge interest with minimal friction, though conversion at payment time will be lower.

Pros and cons

Pros:

  • Works with any payment gateway
  • Maximum flexibility on timing
  • Customer explicitly reconfirms intent
  • No failed deferred charge risk

Cons:

  • Extra customer friction at payment time
  • Lower conversion rate at payment collection
  • Requires manual payment link sending
  • No payment guarantee from initial checkout

Our data shows 28.7% of merchants use capture-only. Many are stores without Shopify Payments, but others prefer the explicit reconfirmation step.

Payment Model 5: Multi-Step Installment Plans

The installment pre-order payment model splits the total into multiple scheduled payments, typically 2-4 charges spread across weeks or months. This approach is growing for high-ticket Shopify pre-order payment options where the full amount creates purchasing friction.

How it works

At checkout, the customer pays the first installment. Their card is vaulted for remaining payments. Subsequent charges trigger automatically on a defined schedule (weekly, monthly, or milestone-based). The customer receives visibility into their payment schedule through a portal.

When to use installments

Very high-ticket items over $1,000: When the total price creates genuine budget friction, spreading payments makes the purchase accessible.

Extended production timelines of 3+ months: Long timelines naturally align with spread payments, as customers pay over time while the product is being made.

Competing with Affirm/Klarna: Rather than sending customers to third-party financing, installment plans let you offer payment flexibility on your terms.

Premium product positioning: Installment options can signal premium status while making purchases accessible.

Setup and configuration

Shopify payment plans for pre-orders require:

  • Define the number of installments (2-4 is typical)
  • Set payment schedule (first payment at checkout, remaining on dates)
  • Configure customer portal for payment visibility
  • Optional: offer pay-early discount to encourage faster payment

Platform requirements

Native Shopify installment support requires Shopify Plus. However, apps like PreProduct enable multi-step payment plans for merchants on standard Shopify plans, opening this model to a broader range of stores.

Pros and cons

Pros:

  • Enables high-ticket sales that would otherwise not convert
  • Merchant-controlled terms (unlike third-party BNPL)
  • Spreads payment across production timeline
  • Customer portal creates positive touchpoints

Cons:

  • Higher operational complexity
  • More failed payment points to manage
  • Requires robust dunning workflows
  • Customer confusion possible with multiple charges

Comparing Pre-order Payment Models: Decision Framework

With five pre-order payment models to choose from, how do you decide? Start with your constraints, then optimize for your goals.

Quick reference comparison table

ModelBest ForLead TimePrice PointCash FlowComplexity
Charge UpfrontShort timelinesUnder 14 daysAnyImmediateLow
Charge LaterLong timelines30-180 daysAnyDelayedMedium
DepositsHigh-ticketAny$300+PartialMedium
Capture-OnlyUncertain timingAnyAnyManualLow
InstallmentsVery high-ticket60+ days$1,000+SpreadHigh

Decision flowchart

Work through these questions in order:

1. What is your lead time?

If under 14 days, charge upfront works well. Customers expect quick delivery and do not mind paying immediately for something arriving soon.

If 14-30 days, charge-later or deposits both work. Authorization periods can technically cover this window, but vaulted cards are simpler and cheaper.

If over 30 days, charge-later is strongly preferred. Authorization periods cannot cover this timeline without expensive workarounds, and customer expectations favor paying at ship time.

2. What is your price point?

Under $300: Charge-later maximizes conversion. The amount is not high enough to warrant deposit complexity.

$300-$1,000: Deposits validate commitment on purchases large enough that cancellation creates real loss.

Over $1,000: Consider installments or substantial deposits. The full amount creates genuine budget friction for many customers.

3. What are your cash flow needs?

Need revenue immediately: Charge upfront or deposits provide cash at checkout.

Can wait for fulfillment: Charge-later offers better conversion without immediate revenue.

4. What is your payment gateway?

Shopify Payments or PayPal: All five models are available.

Other gateways: Capture-only is your deferred payment option.

Cost comparison

Understanding the fee implications helps inform your decision:

  • Standard processing: 2.9% + 30 cents (typical)
  • Extended authorization (after day 7): Additional 1.75%
  • Vaulted cards (charge-later/deposits): Standard rates only

This cost difference matters. On a $100 order held for 30 days, extended authorization would cost an extra $1.75 compared to using vaulted cards. At scale, this adds up quickly.

Best Practices for Any Pre-order Payment Model

Regardless of which pre-order payment model you choose, certain principles apply universally.

Clear customer communication

Transparency prevents support tickets and chargebacks:

  • Product page: Explain payment timing before the customer reaches checkout
  • Checkout: Reinforce terms with consent language
  • Confirmation email: Recap what the customer agreed to
  • Pre-charge notification: Send 48-72 hours before any deferred charge

Operational considerations

Set yourself up for smooth execution:

  • Test manually first: Run through the customer experience yourself before automating
  • Configure fulfillment holds: Prevent 3PLs from shipping before payment clears. Learn more about managing pre-order inventory in Shopify
  • Document refund policies: Know what happens when customers want to cancel
  • Train support team: Ensure they understand payment timing and can answer questions

Compliance requirements

Pre-orders carry regulatory considerations. According to Shopify’s pre-order guidance, merchants must be transparent about shipping timelines and refund policies. For detailed templates and guidance, see our Shopify pre-order policy guide.

  • FTC guidelines: In the US, you must ship within stated timeframes or offer cancellation
  • Clear policies: Display refund and cancellation terms prominently
  • Honest timelines: Under-promise and over-deliver on shipping estimates

Common Pre-order Payment Model Mistakes to Avoid

Learn from merchants who have struggled with pre-order payment model selection:

Payment model selection errors

Using charge upfront for 60+ day lead times: Customers grow anxious when they have paid but see no product. Refund requests spike, and support burden increases.

Missing authorization period deadlines: If you try to capture a held authorization after 7 days (or 30 on Plus), the charge fails. You then need to request payment again from the customer.

Deposits too low or too high: A 5% deposit does not validate commitment. A 75% deposit creates the same friction as charging upfront. Find the balance for your price point.

Technical pitfalls

Wrong payment gateway for deferred charges: Attempting charge-later without Shopify Payments or PayPal leads to failed implementations.

No fulfillment holds: Without holds, orders flow to your 3PL and ship before payment is collected on deferred models. See our guide on managing pre-orders with your 3PL for proper setup.

Missing failed payment recovery: Without dunning workflows, failed deferred charges become lost revenue.

Conclusion: Choosing Your Pre-order Payment Model

Choosing the right pre-order payment model comes down to matching your constraints (lead time, price point, payment gateway) with your goals (conversion, cash flow, operational simplicity).

Key takeaways

  1. Charge-later dominates for good reason: 43.8% adoption reflects superior conversion for longer lead times
  2. Deposits validate commitment: For $300+ items, partial payment upfront reduces cancellation risk
  3. Match model to lead time: Under 14 days favors upfront; over 30 days requires vaulted cards
  4. Vaulted cards eliminate authorization limits: Shopify Payments and PayPal enable unlimited deferred charge windows
  5. Communication prevents problems: Clear expectations at every touchpoint reduce support burden

Next steps

Start by assessing your product catalog. Segment by lead time and price point. For each segment, identify the payment model that balances conversion with your operational needs.

If you have not yet chosen a pre-order solution, consider what payment flexibility you need. Not all apps support all five models.

For flexible pre-order payments with charge-later, deposits, and multi-step installments, explore PreProduct’s Shopify pre-order solution. With data from over one million pre-orders and support for all five payment models, you can implement the right approach for your business.

FAQ

What is the best pre-order payment model for long lead times?

Charge-later (deferred payment) is best for lead times over 30 days. Vaulted cards allow you to charge at standard processing rates without authorization period limits. Customers also prefer not paying until closer to shipment.

Can I use different payment models for different products?

Yes. Most pre-order apps allow you to configure payment settings per listing. Use charge-upfront for restocks arriving in days, charge-later for new launches with longer timelines, and deposits for high-ticket custom items.

What deposit percentage should I charge?

For items $50-$300, use 10-25%. For $300-$1,000 items, use 25-40%. For items over $1,000 or custom/made-to-order products, 30-50% provides adequate commitment validation without creating excessive friction.

Do deposits reduce cancellations?

Yes. Deposits create psychological commitment that reduces cancellation rates compared to charge-later. Customers who have put money down are more likely to complete the purchase. The effect is stronger with higher deposit percentages.

Can I offer installments without Shopify Plus?

Native Shopify installment support requires Plus, but apps like PreProduct enable multi-step payment plans on standard Shopify plans.

What happens if a deferred charge fails?

The card may have expired, been cancelled, or hit a limit. Best practice is sending pre-charge notification emails so customers can update payment details proactively. When charges fail, dunning workflows retry automatically and send update requests to customers.

How do I communicate payment timing to customers?

Include payment timing on the product page, in checkout messaging, in confirmation emails, and through pre-charge notifications. Customers should never be surprised by a charge. Transparency builds trust and reduces chargebacks.

Which payment gateways support charge-later?

Shopify Payments and PayPal support vaulted cards for deferred charges. Other gateways typically require capture-only (payment links) for deferred payment scenarios.

Pre-sell With PreProduct

7 day free trial with all plansMigrate pre-orders

Pre-order Purchase Order Management: A Practical Guide for Shopify Merchants

Running a pre-order campaign without knowing when your inventory will arrive is like flying blind. You risk overselling, frustrating customers with delays, or leaving money on the table by listing too late. Effective pre-order purchase order management is the key to getting this right, connecting your incoming inventory to your sales strategy.

This guide walks through how to connect your PO workflow to your pre-order strategy. You will learn when to list products based on PO status, how to set quantity limits that prevent overselling, and how to time charges so you collect payment when inventory actually lands. Whether you are managing this manually or looking to automate, these frameworks will help you run cleaner pre-order campaigns.

Why Shopify Purchase Orders and Pre-orders Must Work Together

The Core Challenge

Purchase orders represent future inventory. They tell you what is coming, how much, and when it should arrive. Pre-orders sell that future inventory before it hits your warehouse.

The problem? These two systems often operate independently. Your procurement team creates POs in one system while your ecommerce team runs pre-orders in another. When they are not connected, things go wrong:

  • Overselling: You accept 200 pre-orders but only 150 units are coming
  • Missed sales: You wait until stock arrives to list, losing weeks of potential orders
  • Customer frustration: You promise shipping dates based on optimistic PO timelines that slip
  • Cash flow chaos: You charge customers before knowing if or when you can fulfill

Getting this alignment right matters. Pre-order inventory management is one of the most common operational challenges we see merchants struggle with.

Key Decisions POs Should Inform

Your purchase order data should drive four critical pre-order decisions:

  1. When to list: Start accepting pre-orders once a PO is confirmed, not before (unless you are crowdfunding or using easily cancellable pre-order types like charge-later or capture-only)
  2. Quantity limits: Cap pre-orders based on PO quantities minus buffers
  3. Charge timing: Match your payment model to the PO arrival window
  4. Customer communication: Set shipping expectations based on realistic PO timelines

The Shopify Purchase Order Limitation

Before diving into workflows, there is an important reality to address. Shopify has a native purchase order feature that lets you track pre-order incoming inventory, record supplier details, and mark stock as “Incoming.” It works well for basic PO management.

What Shopify’s Native PO Feature Does

  • Track incoming inventory with expected arrival dates
  • Record supplier details, costs, and payment terms
  • Update inventory counts when POs are received
  • Provide visibility into what stock is on the way

What It Does Not Do

Here is the challenge: Shopify’s purchase order feature has no API. You cannot:

  • Create or read POs programmatically
  • Automate workflows between POs and pre-order apps
  • Sync PO arrival dates with your pre-order campaigns
  • Trigger actions when PO status changes

This is not a temporary gap. As of late 2025, Shopify confirmed there are no immediate plans for a Purchase Order API. The legacy Stocky API, which offered read-only access, has been deprecated.

Workarounds for Automation

If you need to connect POs to pre-orders automatically, you have three options:

Third-party PO software: Tools like Cogsy, Inventory Planner, or Fabrikator manage purchase orders outside Shopify and can integrate with Shopify Flow. You can then connect Flow to a pre-order app like PreProduct that exposes Flow actions and triggers.

ERP systems: For larger operations, ERP integrations can bridge the gap between purchase orders and pre-order management.

Manual workflows: For most merchants, a well-structured manual process works fine. Track POs in Shopify or a spreadsheet, then update your pre-order listings accordingly.

When to List Products for Pre-order

Purchase order pre-order timing matters. List too early and you risk customer frustration if the PO gets delayed or canceled. List too late and you miss the window to capture demand before stock arrives.

Timing Framework Based on PO Status

PO StatusPre-order Action
PO drafted or plannedToo early. Wait for supplier confirmation.
PO confirmed and orderedSafe to list. Build in buffer days for customer timelines.
PO in transitShorter pre-order window. Tighter timeline but lower risk.
PO received, not yet processedTransition to regular “in stock” sale.

The key threshold is supplier confirmation. Once you have a confirmed PO with an expected arrival date, you have enough certainty to start accepting pre-orders.

Buffer Days: Building in Safety Margin

Never promise customers the exact date your PO is expected to arrive. Suppliers miss deadlines. Shipments get delayed. Customs holds things up. Inventory needs inspection before it is sellable.

Add buffer days to every customer-facing timeline:

  • 7-10 days minimum for domestic suppliers with reliable track records
  • 14-21 days for international shipments or new suppliers
  • 30+ days for complex products requiring quality checks

Example: Your PO shows an expected arrival of August 20. Display a shipping window of “September 1-5” to customers. This gives you two weeks to receive, inspect, and process the inventory before fulfillment.

Matching Pre-order Windows to PO Arrival

Your payment model should align with how long customers will wait:

PO Arrival WindowRecommended Payment Model
Within 7 daysCharge upfront. Low risk, fast turnaround.
8-30 daysCapture-only or deposit. Cards are vaulted, charged on arrival.
31-90 daysCharge-later or deposit. Flexibility for timeline uncertainty.
90+ daysCharge-later with deposit option.

Longer lead times or less certain ones often benefit from deferred-charge pre-orders, whether that is charging all later or taking a deposit upfront and charging the balance when stock arrives. According to data from over one million pre-orders, 43.8% of pre-order listings use a charge-later model. This flexibility is valuable when PO timelines are uncertain, because you are not sitting on customer money while waiting for suppliers to deliver.

Setting Pre-order Inventory Limits Based on PO Quantities

This is where many merchants make costly mistakes. They list products for pre-order without limits, assuming they can always adjust. Then the campaign takes off, they oversell, and suddenly they are issuing refunds and apologizing to customers.

Calculating Available-to-Promise Inventory

Start with your PO quantity, then subtract buffers:

  1. PO quantity: Total units on order
  2. Buffer stock (10-15%): Safety margin for damaged or defective units
  3. Cancellation buffer (5-6%): Expected pre-order cancellations based on industry data
  4. Result: Maximum pre-orders you should accept

Example Calculation

  • PO quantity: 150 units
  • Buffer stock (10%): -15 units
  • Cancellation buffer (5%): -7 units
  • Maximum pre-orders: 128 units

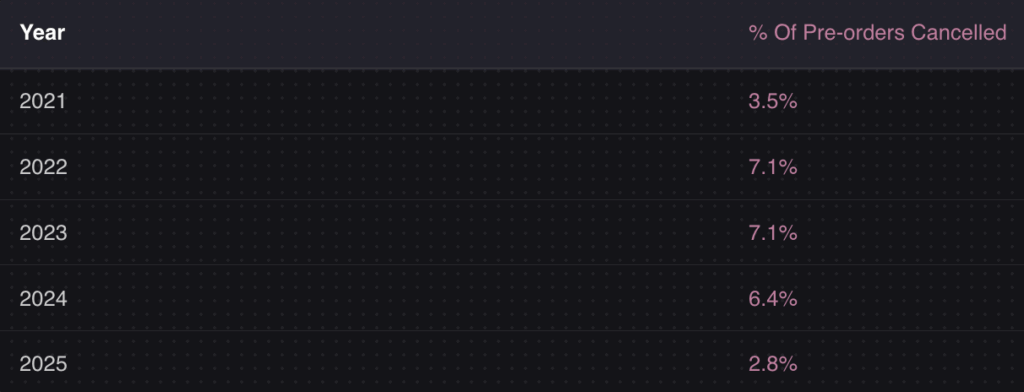
Why the cancellation buffer? Data shows an average pre-order cancellation rate of 5.4%, with some years reaching 6.4%. If you accept 150 pre-orders expecting 150 units, cancellations actually work in your favor. But if you are at risk of underselling relative to your PO, factor this into your planning.

Variant-Level Allocation

For products with multiple variants (sizes, colors, configurations), you need to split your PO quantity across each SKU:

  • Use historical sales data to predict size distribution
  • If launching a new product, use industry benchmarks for your category
  • Monitor early pre-order patterns and reallocate if one variant is outpacing others

A fashion brand might allocate a 150-unit PO across sizes like this:

SizeHistorical %Allocated UnitsPre-order Limit (with buffers)
XS8%1210
S22%3328
M35%5345
L25%3731
XL10%1513

Preventing Overselling

Set hard limits in your pre-order app. PreProduct allows variant-level quantity limits that automatically hide buy buttons once reached. This prevents overselling without manual monitoring.

Key practices:

  • Set limits at campaign creation, not after launch
  • Configure auto-delist behavior when limits are reached
  • If selling across multiple channels, use centralized inventory allocation

Timing Charges to PO Arrival

When you charge customers matters for cash flow, refund rates, and customer trust. Charge too early and you are sitting on customer money without product to ship. Charge too late and you miss the cash flow benefit of pre-orders.

Triggering Charges on Inventory Receipt

You have three approaches depending on your operational maturity:

Manual: When your PO is received and inventory is processed, log into your pre-order app and trigger charges. Simple, but requires discipline.

Semi-automated: Use Shopify Flow to trigger actions when inventory levels update. PreProduct exposes Flow triggers that can initiate charges based on inventory changes. This requires a pre-order app with Flow integration but does not need an ERP.

Fully automated: If you use an OMS or ERP that tracks PO receipt, you can trigger charges via webhooks when inventory is confirmed available. This is the enterprise approach.

Most merchants start manual and add automation as they scale. There is nothing wrong with processing charges yourself when a PO arrives, especially if you are running a few campaigns per month.

Handling PO Delays

Supplier delays happen. When they do:

  1. Communicate early: Do not wait until the original ship date passes. Send update emails as soon as you know there is a delay
  2. Use your customer portal: Give customers a place to check their order status and see revised timelines. PreProduct’s customer portal lets customers view their pre-order status, payment schedule, and expected shipping dates without contacting support
  3. Offer options: Let customers wait, get a refund, or switch to a different variant
  4. Delay charges: If using charge-later, do not trigger charges until you have inventory confirmed
  5. Update listings: Adjust ship date estimates on your product page for new pre-orders

Having a communication template ready saves time when delays occur. Your pre-order policy should cover how you handle delays before customers ever place an order.

What to Do When Pre-orders Undershoot PO Quantities

Most content about pre-orders focuses on preventing overselling. But what happens when demand is lower than expected? You pre-ordered 50 units but have 150 arriving.

The Underperforming Campaign Scenario

This is more common than merchants expect. Maybe the product did not resonate. Maybe your marketing did not reach the right audience. Maybe you ordered based on optimistic forecasts.

Now you have excess inventory arriving with no pre-order customers waiting for it.

Mitigation Strategies

Immediate conversion: As soon as the PO lands, convert remaining inventory to regular “in stock” status. Remove pre-order messaging and ship times.

“Now in stock” campaign: Email your pre-order customers that the product has arrived. Even if they did not pre-order, they may have been watching. Create urgency around immediate availability.

Adjust future PO quantities: Use pre-order data to right-size future orders. If you consistently see 30% of expected demand, reduce PO quantities accordingly.

Smaller, more frequent POs: Instead of one large order, negotiate smaller batches with your supplier. This reduces risk if demand does not materialize.

Using Pre-order Data for Demand Planning

Pre-orders are the most accurate demand signal you can get. Unlike surveys or intent data, pre-orders represent actual purchase commitments.

Use this data to inform procurement:

  • Track pre-order velocity by day and week
  • Compare pre-order demand across variants to optimize future assortment
  • Build a feedback loop between pre-order performance and PO planning

For more on this topic, see our guide on demand planning and forecasting for ecommerce.

Manual Pre-order Purchase Order Management Workflow

Here is a practical workflow you can implement today, without expensive software or complex integrations.

Phase 1: PO Creation and Pre-order Setup

  1. Create your PO in Shopify or your tracking system with expected arrival date
  2. Calculate your pre-order limit: PO quantity minus 10-15% buffer, minus 5% cancellation buffer
  3. Create your pre-order listing in PreProduct with the calculated limit at the variant level
  4. Set customer-facing ship date: PO expected arrival plus 7-14 day buffer
  5. Configure payment model based on timeline (charge-later for 30+ days, upfront for shorter windows)

Phase 2: Campaign Monitoring

  1. Track pre-order count daily against your limits
  2. Compare demand signals across variants. Reallocate limits if one is selling out while others lag
  3. Monitor PO status with your supplier. Any timeline changes should trigger customer updates
  4. Send milestone updates if running a long campaign (30+ days). Keep customers engaged

Phase 3: PO Arrival and Fulfillment

  1. Receive and process inventory: Confirm quantities match PO, inspect for defects
  2. Trigger charges on vaulted cards (manual or via Flow automation)
  3. Release fulfillment holds so orders flow to your 3PL or fulfillment team
  4. Update customers with shipping confirmation and tracking
  5. Convert remaining inventory to regular in-stock status

Tools That Support This Workflow

  • PreProduct: Pre-order management with variant-level limits, charge-later, and Flow integration
  • Shopify Flow: Basic automation for inventory-triggered actions
  • Spreadsheet or Shopify POs: Simple PO tracking for manual workflows
  • Third-party PO apps: Cogsy, Inventory Planner, or Fabrikator for more sophisticated PO management

Key Takeaways

Pre-order purchase order management comes down to timing, limits, and communication:

  • Wait for PO confirmation before listing products for pre-order (or use deferred-charge models if you need to start earlier)
  • Add buffer days to all customer-facing timelines (7-14 days minimum)
  • Calculate realistic limits using PO quantity minus buffers and expected cancellations
  • Match payment models to timelines: Charge upfront for short windows, charge-later for longer ones
  • Start manual, then automate: A simple workflow beats complex systems you do not maintain

The Shopify purchase order API limitation means most merchants will run this manually or use third-party tools. That is fine. What matters is having a process that prevents overselling and sets accurate customer expectations.

Pre-orders are one of the most effective ways to validate demand, improve cash flow, and reduce inventory risk. But they only work when your pre-order campaigns are grounded in the reality of your incoming inventory. Get your pre-order purchase order management right, and you will run campaigns that customers trust and that your operations team can actually fulfill.


Ready to start? PreProduct makes it easy to run pre-order campaigns with variant-level limits, flexible payment models, and Shopify Flow automation. Start for free and align your next launch with your incoming inventory.

Pre-sell With PreProduct

7 day free trial with all plansMigrate pre-orders

Leveling Up Pre-orders with Shopify Plus: What You Can Only Do on Plus

43.8% of pre-orders use charge-later payment models, but multi-step installment plans that let customers split payments across weeks or months? That’s a Shopify Plus exclusive.

If you’re running pre-order campaigns and wondering whether the jump to Shopify Plus is worth it, payment flexibility is just the start. Plus merchants get access to 10x higher API rate limits, extended authorization periods up to 30 days, lower transaction fees and advanced Shopify Flow automation that standard plans simply can’t match.

This guide breaks down the specific Shopify Plus pre-order features that matter most for growing brands. You’ll learn what’s exclusive to Plus, when these features make a real difference and how to decide whether upgrading makes sense for your pre-order operations.

Already familiar with how to do pre-orders on Shopify? Good. This guide picks up where the basics leave off and focuses on what Plus unlocks.

What Makes Shopify Plus Different for Pre-orders

Shopify Plus starts at $2,300 per month, scaling up to $40,000 per month based on revenue. That’s a significant investment compared to standard plans at $39-399 per month. But for pre-order merchants operating at scale, the exclusive features can justify the cost.

Here’s what matters for pre-orders specifically:

FeatureStandard ShopifyShopify Plus
API rate limit40 requests/min400 requests/min (10x)
Authorization period*7 daysUp to 30 days
Third-party transaction fee0.5-2%0.15-0.20%
Multi-step payment plansNot availableAvailable
Shopify FlowLimitedFull access
Checkout customizationLimitedCode-level control
  • Vaulted card pre-orders like PreProduct uses aren’t subject to the authorization periods

Standard Shopify handles pre-orders well for most merchants. But when you’re managing high-volume launches, integrating with ERPs and 3PLs or offering complex payment structures, the limitations start to show.

Let’s break down each Plus-exclusive feature and when it actually matters.

Multi-Step Payment Plans: Installments for Pre-orders

Beside the lower Shopify transaction fees, multi-step payment plans are arguably the most compelling Plus-exclusive feature for pre-order merchants. Instead of charging customers once at checkout or once at fulfillment, you can split the total into multiple automatic charges over a defined schedule.

How Multi-Step Plans Work

With multi-step plans, customers select their preferred number of installments at checkout. The system then automatically processes charges based on your configured frequency (daily, weekly or monthly). This differs from third-party buy-now-pay-later services like Klarna or Affirm because you control the schedule and there’s no intermediary taking a cut.

For example, a $400 pre-order product could be structured as:

  • 4 monthly payments of $100
  • Initial deposit of $100, then 3 payments of $100
  • Weekly payments spread across the lead time

The key advantage: customers commit to the full purchase while spreading the cost over time. This reduces the barrier for higher-ticket items without requiring approval from external financing providers.

Customer Experience and Portal

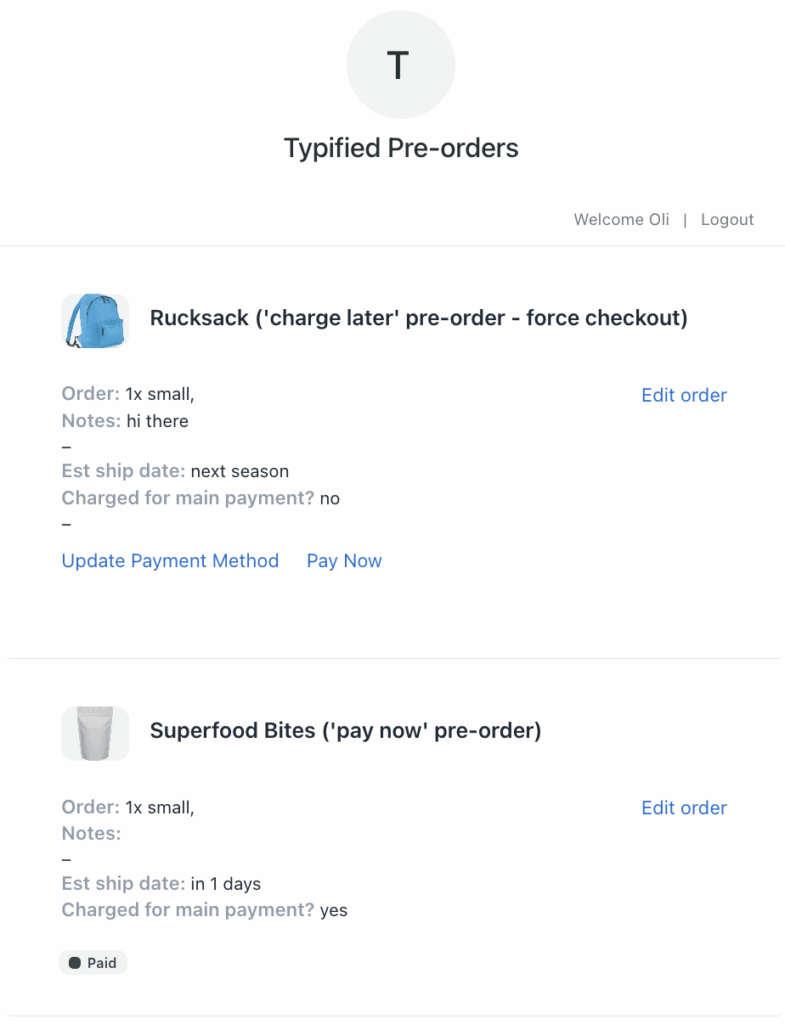
Customers get access to a portal showing their payment history, outstanding balance and upcoming charge dates. They can see exactly when each payment will process, reducing support tickets and building trust during longer lead times.

This transparency matters for pre-orders specifically because customers are already taking a leap of faith by paying before receiving their product. Showing them a clear payment schedule reinforces that commitment.

When to Use Installments

Multi-step plans work best for:

  • High-ticket items ($200+): Reduces the upfront commitment barrier
  • Long lead times (60+ days): Spreads payments across the waiting period
  • Made-to-order products: Matches production milestones to payment collection
  • Limited edition drops: Secures commitment from serious buyers

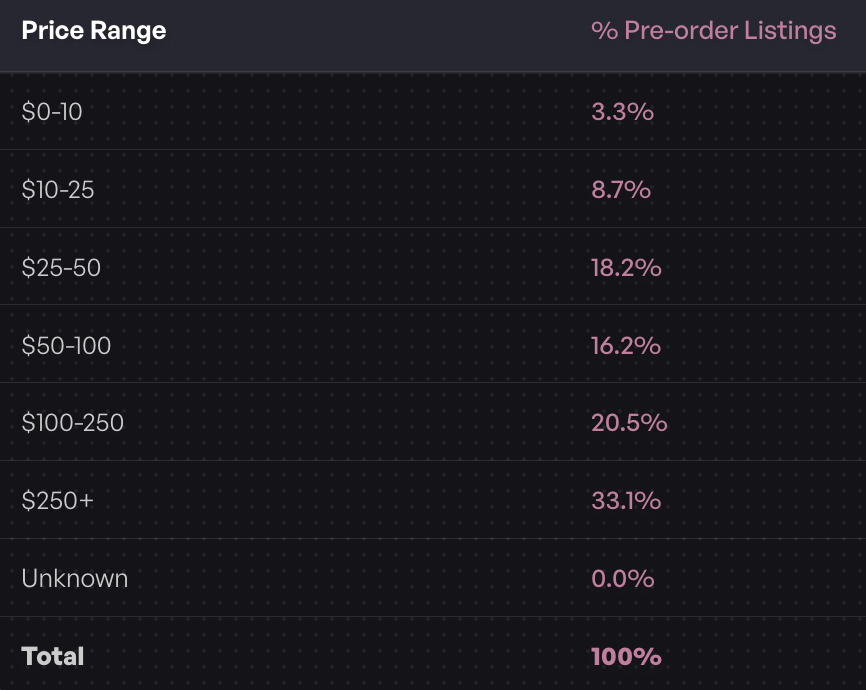
According to PreProduct’s analysis of $85 million in pre-orders, 33.1% of pre-order listings are priced at $250 or more. For these higher-value items, installment plans can meaningfully improve conversion rates.

If you’re on standard Shopify, you’re limited to single-charge options: full payment upfront, full payment later or a deposit with balance due at fulfillment. For Shopify payment plans beyond these basics, Plus is required.

Extended Authorization Periods

If you’re not using vaulted card pre-orders like PreProduct uses, Standard Shopify gives you a 7-day window to capture authorized payments. After that, the authorization expires and you need to re-charge the customer, which often means asking them to re-enter payment details.

Shopify Plus extends this to up to 30 days.

The 7-Day Limitation Problem

For pre-orders with lead times under a week, the standard authorization period works fine. But many pre-order campaigns run 2-4 weeks or longer. When that authorization expires, you’re stuck either:

  • Charging customers immediately (poor cash flow timing)
  • Re-requesting payment details (friction and drop-off)
  • Using vaulted card technology (requires specific setup)

The Shopify authorization period is one of the most common pain points for pre-order merchants on standard plans.

Plus Merchants Get Up to 30 Days

With Shopify Plus, you can capture payments up to 30 days after the initial authorization. This gives breathing room for pre-orders with 2-4 week lead times without requiring additional customer action.

The extended authorization launched in October 2020 specifically to address fulfillment delays that became common during supply chain disruptions. It remains a Plus-exclusive feature.

The 1.75% Fee Explained

There’s a catch: Shopify charges 1.75% when you capture payment after the standard 7-day period. For a $100 pre-order captured on day 15, you’d pay an additional $1.75.

This fee only applies to the extended portion, so if you capture within 7 days, there’s no additional cost. It’s essentially a convenience fee for holding the authorization longer.

Extended Auth vs Vaulted Cards

For lead times beyond 30 days, extended authorization still won’t help. That’s where vaulted card technology comes in. With vaulted cards, customer payment details are stored securely so you can charge them at any point without the authorization expiration limitation.

PreProduct’s system uses vaulted cards to bypass the standard authorization window entirely, which is why 43.8% of pre-orders on the platform use the charge-later model regardless of lead time. But for Plus merchants with predictable 2-4 week timelines, extended authorization provides a simpler option.

10x API Rate Limits for High-Volume Launches

This feature sounds technical, but the business impact is significant for pre-order merchants at scale.

Why API Limits Matter for Pre-orders

Every time your systems communicate with Shopify (inventory updates, order syncs, fulfillment status changes), they use API calls. Standard Shopify limits you to 40 requests per app per store per minute.

During a high-volume pre-order launch, this can become a bottleneck. If your ERP is syncing inventory, your pre-order app is updating listings and your analytics tools are pulling data, you can hit rate limits quickly. When that happens, requests get throttled, leading to delayed updates and potential overselling.

Standard vs Plus Rate Comparisons

Shopify increased API rate limits for Plus by 10x in 2023:

  • Admin API: 1000 points/second (vs 100 standard)
  • Storefront API: No limits

For pre-order merchants, this means:

  • Real-time inventory sync across multiple systems
  • Smoother integration with ERPs and inventory management systems
  • No throttling during high-traffic launch windows
  • Support for multiple stores pulling from shared inventory

Impact on Multi-Store Operations

If you’re running pre-orders across multiple storefronts (different regions, B2B and DTC, multiple brands), inventory sync becomes critical. One store selling through available pre-order slots while another hasn’t received the update creates overselling risk.

With Plus’s 10x rate limits, you can maintain real-time or near-real-time sync across stores. This is particularly important for limited edition drops where inventory is tight and demand is high.

Lower Transaction Fees at Scale

Shopify Plus merchants pay significantly lower transaction fees when using third-party payment processors.

Fee Comparison: Standard vs Plus

PlanThird-Party Gateway Fee
Basic Shopify2.0%
Shopify1.0%
Advanced Shopify0.5%
Shopify Plus0.15-0.20%

If you’re processing pre-orders through a third-party gateway (not Shopify Payments), the savings add up quickly.

Impact on Pre-order Margins

Pre-orders often involve higher-value items with longer lead times. If you’re processing $100,000 in monthly pre-order revenue through a third-party gateway:

  • Advanced Shopify: $500/month in transaction fees (0.5%)
  • Shopify Plus: $150-200/month in transaction fees (0.15-0.20%)

That’s $300-350/month in savings on transaction fees alone, which partially offsets the higher base cost of Plus.

For merchants using Shopify Payments as their primary gateway, the transaction fee savings are less dramatic since there’s no additional Shopify fee on top of payment processing. But for those with third-party payment requirements, the savings are meaningful.

Advanced Automation with Shopify Flow

Shopify Flow is available on all Shopify plans now, but Plus merchants get the full feature set and unlimited workflows. For pre-order automation, this matters.

Flow Actions for Pre-orders

With a pre-order app like PreProduct integrated with Shopify Flow, you get access to specialized actions:

  • Create and update pre-order listings automatically
  • Trigger charges when inventory conditions are met
  • Release fulfillment holds based on custom logic
  • Manage variant limits and deposit rules programmatically
  • Tag orders and customers based on pre-order status

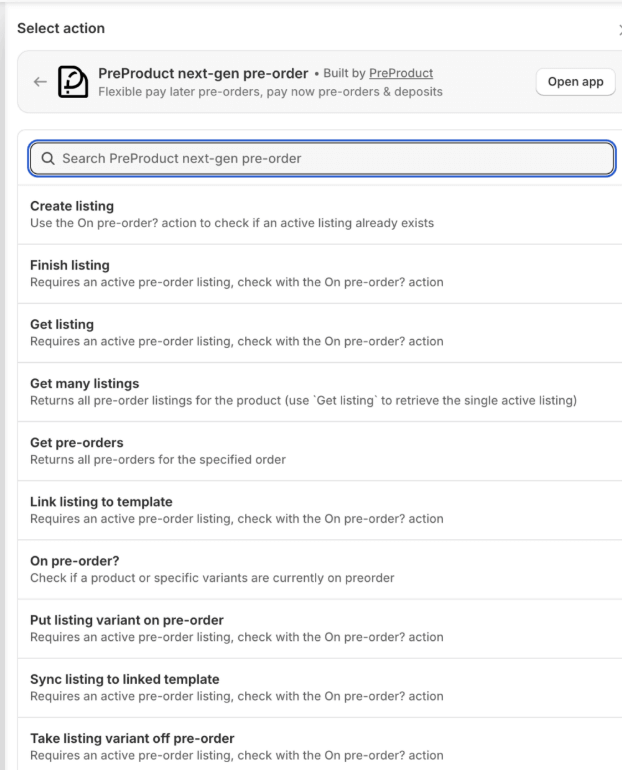
PreProduct exposes 15 custom Flow actions and 16 custom Flow triggers specifically for pre-order workflows.

Plus merchants also get access to the Send HTTP request action, which lets you call external APIs directly from Flow. For pre-order operations, this opens up direct integrations with ERPs, 3PLs, notification services and custom internal systems without needing middleware. When a pre-order is created or charged, you can push that data to any system with an API endpoint.

Example Workflows for Plus Merchants

Here are practical Flow automations that Plus merchants commonly implement:

Inventory-triggered pre-orders: When a variant’s inventory hits zero, automatically create a pre-order listing with predefined settings (charge-later, specific lead time messaging, variant limits).

Stock arrival charging: When inventory is added to a variant with active pre-orders, automatically trigger charges and release fulfillment holds.

VIP early access: Tag customers who’ve purchased before and automatically unlock pre-order access before public launch.

Lead time notifications: When a pre-order listing’s estimated ship date changes, trigger email notifications to affected customers.

Connecting to Broader Operations

The real power of Flow for pre-orders is connecting to your broader operations stack. Pre-order events can trigger actions in your CRM, update your support tools with order status or push data to your analytics platform.

For Plus merchants with complex operations, this eliminates manual handoffs and reduces the risk of pre-order customers falling through the cracks.

Checkout Customization Considerations

Shopify Plus gives you code-level access to customize the checkout experience. For pre-orders, this enables specific enhancements like custom messaging, validation rules and dynamic shipping options.

However, there’s an important limitation to understand.

Pre-orders and Custom checkout.liquid

Pre-orders using Shopify’s Selling Plan API (the native approach for deferred payments) are not supported on stores with customized checkout.liquid implementations.

If you’ve heavily customized your checkout using checkout.liquid, you’ll need to choose between those customizations and native pre-order functionality.

checkout.liquid Is Now Deprecated

Shopify sunset checkout.liquid in August 2025. Plus merchants must now use Checkout UI extensions for any checkout customization, which are fully compatible with pre-orders. If you’re migrating from an older checkout.liquid setup, this is no longer optional.

Checkout UI Extensions Alternative

Checkout UI extensions provide a supported path for checkout customization that works with pre-orders. You can add custom messaging, additional fields and validation logic without breaking pre-order functionality.

For most pre-order use cases, the standard checkout with clear messaging about payment terms and lead times is sufficient. Advanced customization is a Plus benefit, but not necessarily required for successful pre-order campaigns.

Is Shopify Plus Worth It for Pre-orders?

The honest answer: it depends on your volume and operational complexity.

Revenue Thresholds to Consider

Shopify Plus makes financial sense when you’re processing roughly $800,000 or more in monthly revenue. Below that threshold, the base fee of $2,000/month often exceeds the savings from lower transaction fees and the value of Plus-exclusive features.

For pre-order specifically, consider:

  • What percentage of revenue comes from pre-orders?
  • Are your integrations hitting Admin API rate limits during inventory syncs?
  • Do you need multi-step payment plans for your price points?
  • How complex is your inventory sync across systems?

Pre-order Volume Indicators

Signs that Plus might be worth it for your pre-order operations:

  • Processing 1,000+ pre-orders per month
  • Managing pre-orders across multiple storefronts
  • Average order value above $200 (where installment plans help)
  • Lead times in the 2-4 week range (where extended auth helps)
  • Integration with ERP/3PL systems that require real-time sync

When to Stay on Standard

For many pre-order merchants, standard Shopify plans are sufficient. Vaulted card technology (available through apps like PreProduct) bypasses the authorization period limitation. Flow automation handles most workflow needs. And API limits only become a real constraint at high volume.

If you’re not hitting clear limitations with standard Shopify, the value proposition of Plus for pre-orders specifically may not justify the cost jump.

Key Takeaways

Shopify Plus unlocks specific capabilities that matter for pre-order merchants operating at scale:

  • Multi-step payment plans let customers split pre-order payments, improving conversion on higher-ticket items
  • Extended authorization periods (up to 30 days) give breathing room for 2-4 week lead times
  • 10x API rate limits prevent throttling during high-volume launches and multi-store operations
  • Lower transaction fees (0.15-0.20% vs 0.5-2%) save money at scale with third-party gateways
  • Advanced Flow automation connects pre-orders to your broader operations stack

These features don’t make or break pre-order success for most merchants. Brands run successful pre-order campaigns on Basic Shopify every day. But for high-volume operations with complex payment requirements and tight inventory management needs, Plus provides tools that standard plans can’t match.

If you’re evaluating whether to upgrade, focus on the specific limitations you’re hitting today. The Shopify Plus pre-order solution that fits your needs depends on your volume, average order value and operational complexity, not just whether you want access to Plus features.

Start by identifying your current bottlenecks. If they align with what Plus solves, the upgrade likely makes sense. If not, standard Shopify with a capable pre-order app will serve you well.

Pre-sell With PreProduct

7 day free trial with all plansMigrate pre-orders
How to Promote Pre-Orders: A Complete Shopify Pre-Order Marketing Strategy

Pre-orders aren’t just about taking payments before stock arrives. They’re a marketing opportunity to build anticipation, gauge demand and drive revenue before you’ve committed to production or inventory.

But running a successful pre-order campaign on Shopify requires more than listing a product and hoping customers show up. You need a deliberate marketing strategy that treats pre-orders as a launch event, not a back-office operation. Once you’ve handled setting up your Shopify pre-orders, this guide will help you drive traffic and conversions.

In this guide, we’ll break down how to promote pre-orders effectively on Shopify, covering everything from pre-launch positioning to post-purchase communication. Whether you’re validating a new product or managing a restock, these tactics will help you maximize visibility, conversions and customer confidence.

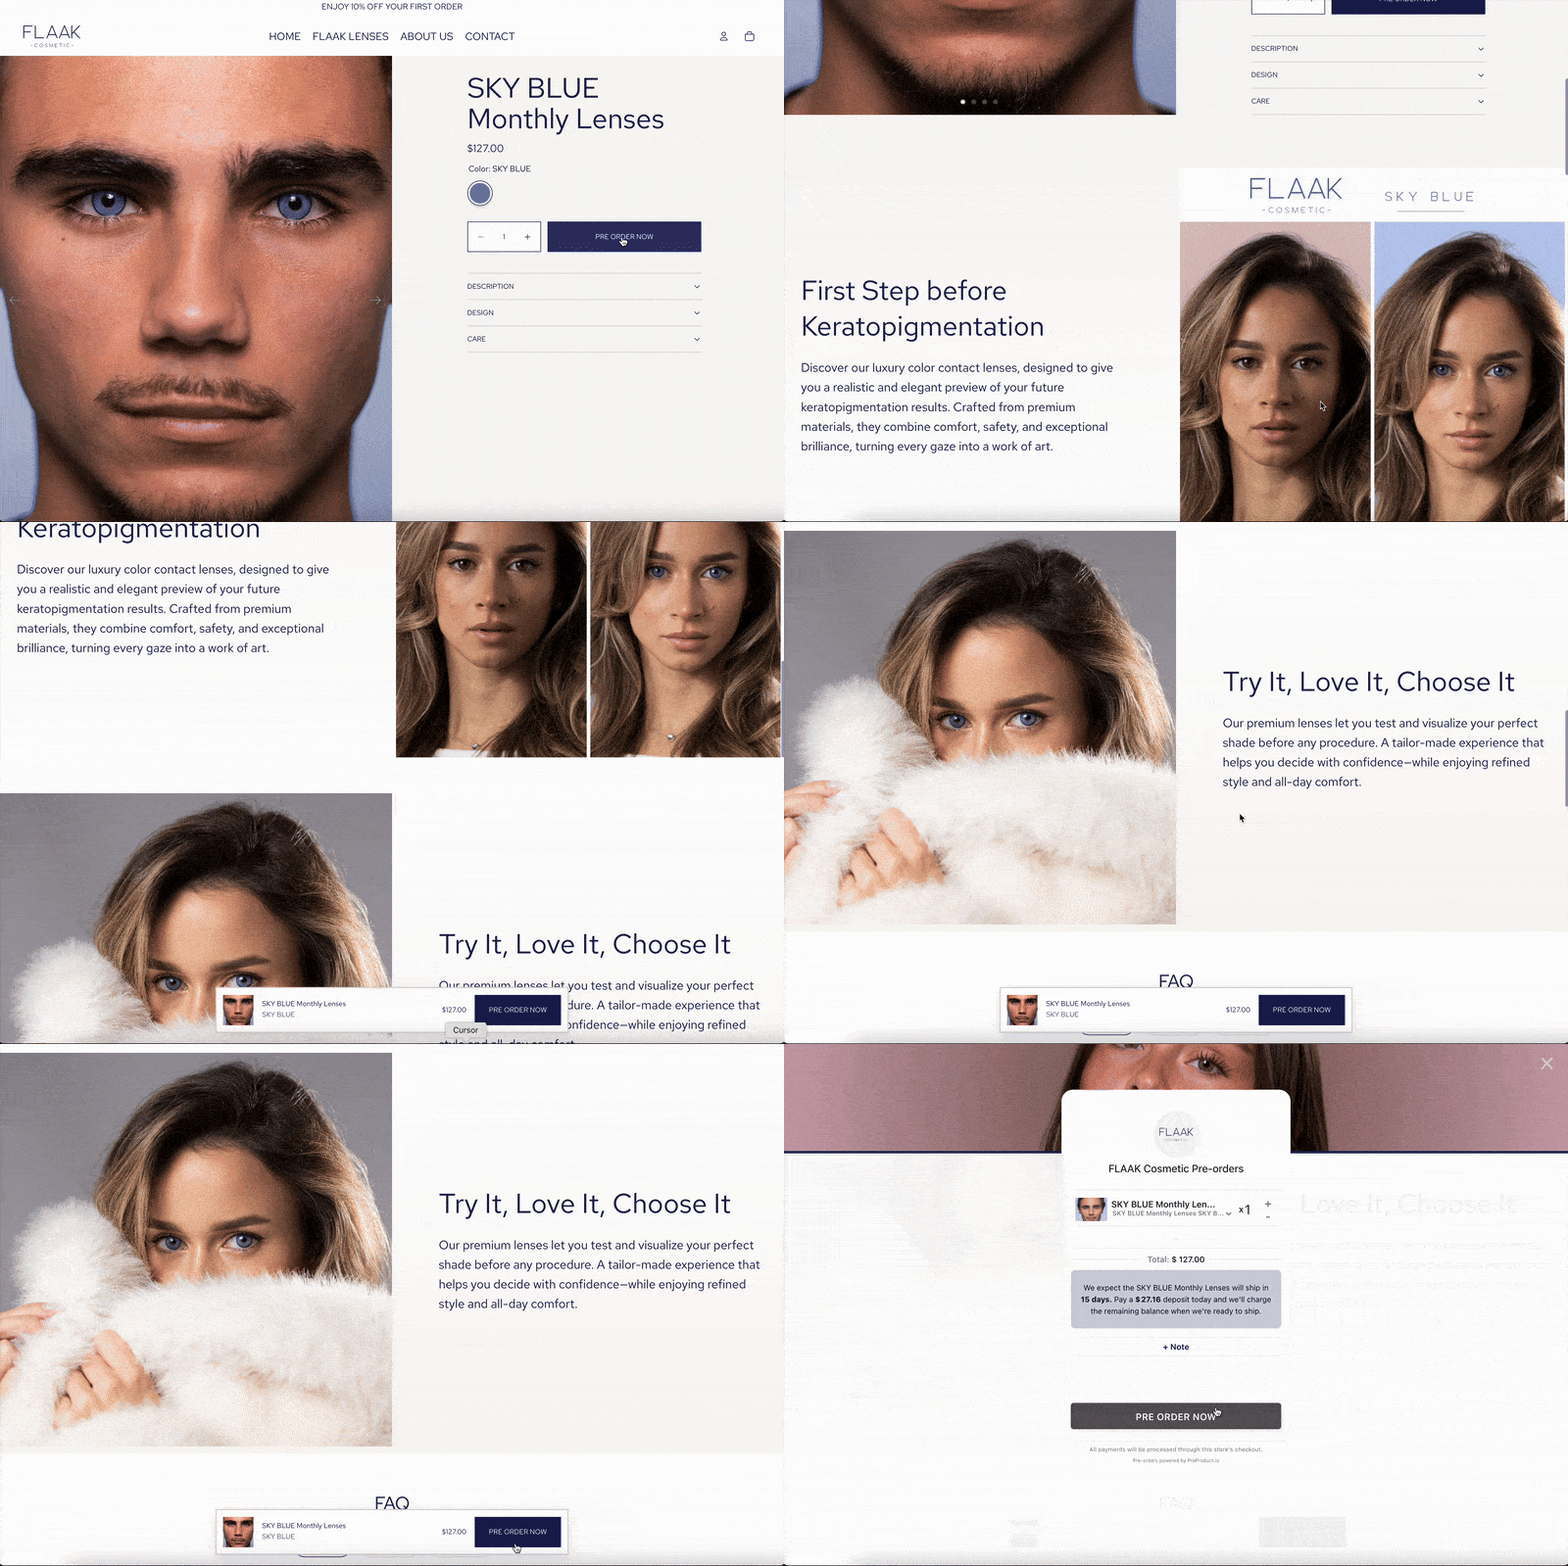
sticky pre-order button flow

Why Pre-Order Marketing Matters for Shopify Stores

Pre-order marketing isn’t optional, it’s essential. Without visibility and momentum, even the best products can flatline during a pre-sale window.

Here’s why promotion matters:

  • Demand is uncertain: Customers need reassurance that your product is worth waiting for, especially when they’re committing weeks or months in advance.
  • Competition is high: Other brands are launching constantly. Standing out requires intentional positioning and consistent touchpoints.
  • Cash flow depends on it: The more pre-orders you secure upfront, the better your runway for production, marketing and operations.

  • Refunds are costly: Poor communication or unclear expectations lead to cancellations and chargebacks. Marketing helps set the right tone from the start.

A strong Shopify pre-order marketing strategy solves all of these. It builds excitement, manages expectations and keeps customers engaged throughout the entire pre-order lifecycle.

Build Hype Before You Launch: Pre-Announcement Tactics

The best pre-order campaigns don’t start on launch day. They start weeks earlier with strategic pre-announcement marketing that primes your audience.

Create a waitlist or early access list

Before you open pre-orders, capture interest with a waitlist. Tools like Klaviyo, Omnisend or even a simple Shopify contact form let you collect emails from people who want first access.

Why waitlists work:

  • They let you gauge demand before committing to inventory
  • They create urgency when you finally open pre-orders

  • They give you a qualified audience to market to on day one

When the pre-order goes live, email your waitlist first with an exclusive window or discount. This rewards early interest and drives immediate conversions.

Tease the product on social media

Start posting sneak peeks, behind-the-scenes content and product teasers across Instagram, TikTok, Facebook and Twitter. Show prototypes, packaging mock-ups or production updates.

Effective tease content includes:

  • Short video clips showing the product in action
  • Polls asking followers what features or colors they want
  • Countdown posts leading up to the pre-order launch
  • User-generated content from beta testers or early reviewers

Tag relevant hashtags, engage with comments and build anticipation. The goal is to make your audience feel like they’re part of the journey before the product even launches.

Partner with influencers or brand ambassadors

Influencer marketing can accelerate awareness, especially if you’re targeting a specific niche. Reach out to micro-influencers (10K-100K followers) who align with your brand values and offer them early access in exchange for honest reviews or unboxing content.

Look for:

  • Creators who already post about similar products
  • Audiences that match your target customer demographic
  • Authentic engagement rates (not just follower counts)

When influencers share your pre-order, include trackable discount codes or affiliate links so you can measure impact and optimize spend.

Use a “coming soon” landing page

If your product isn’t ready to pre-order yet, create a dedicated Shopify landing page that teases the launch and collects emails. This gives you a single URL to share across all channels.

Your coming soon page should include:

  • High-quality product images or renderings
  • A short description of what makes it unique
  • An email capture form with clear CTA
  • Expected pre-order launch date (or “notify me when available”)
  • Social proof if you have early testimonials or press mentions

Tools like PageFly, Shogun or GemPages make it easy to build custom landing pages in Shopify without touching code.

Launch Day: Maximize Visibility and Conversions

When you open pre-orders, your marketing needs to shift from building anticipation to driving conversions. Here’s how to maximize visibility on launch day.

Send a dedicated launch email

Email your waitlist, newsletter subscribers and past customers with a clear, benefit-driven message. Your subject line should create urgency without feeling spammy.

Example subject lines:

  • “Pre-orders are open: Be first to get [Product Name]”
  • “It’s here: Pre-order now and save [X]%”
  • “[Product Name] is live, limited availability”

In the email body, include:

  • A compelling headline that reinforces the value proposition
  • High-quality product images
  • Key features and benefits (not just specs)
  • Clear CTA button (“Pre-order now” not “Learn more”)
  • Shipping timeline and any deposit or payment terms
  • FAQ addressing common pre-order concerns

Send this email within the first hour of going live, then follow up with reminder emails spaced 3-5 days apart throughout the pre-order window.

Announce on all social channels

Post across every platform where your audience is active: Instagram, TikTok, Facebook, Twitter, LinkedIn and Pinterest. Tailor your messaging to each platform’s format and audience expectations.

Social launch posts should:

  • Lead with the benefit, not the feature
  • Include a direct link to the pre-order page (bio link for Instagram)
  • Use video or carousel posts to showcase the product
  • Incorporate trending audio or formats (especially on TikTok)
  • Pin the post to the top of your profile for visibility

Consider running paid ads on Facebook and Instagram to amplify reach beyond your organic followers. Target lookalike audiences based on past purchasers or website visitors.

Optimize your Shopify pre-order product page

Your product page is where conversions happen. Make sure it’s optimized for clarity, trust and urgency.

Critical elements for a high-converting pre-order page:

  • Clear pre-order messaging: Use a Shopify pre-order app like PreProduct to replace the “Add to cart” button with “Pre-order now” and display lead time or expected ship date.
  • Compelling product descriptions: Focus on benefits, not just features. Answer “why should I wait for this?”
  • High-quality images and videos: Show the product from multiple angles, in use and in context.
  • Social proof: Display reviews, testimonials or press mentions if available.
  • Trust signals: Highlight your return policy, secure checkout and any guarantees.
  • FAQ section: Address common concerns like payment timing, shipping delays and cancellation policies.

If you’re offering a discount or incentive for pre-ordering, call it out prominently near the CTA.

Leverage your email subscribers

Beyond your launch email, consider setting up a dedicated pre-order email sequence using Klaviyo, Omnisend or Shopify Email. This keeps your pre-order top-of-mind throughout the campaign window.

A basic pre-order email sequence might include:

  1. Launch announcement (day 1): “Pre-orders are now open”
  2. Product deep-dive (day 3-4): Highlight a specific feature or use case
  3. Social proof (day 7): Share customer testimonials or influencer content
  4. Urgency reminder (day 10-12): “Pre-order window closing soon” or “Limited spots remaining”
  5. Final call (day 14): “Last chance to pre-order”

Space these emails strategically based on your pre-order window length. For shorter campaigns (7-10 days), condense the sequence. For longer windows (30+ days), add more touchpoints.

Drive Ongoing Momentum Throughout the Pre-Order Window

Launch day is just the beginning. Sustaining momentum throughout the pre-order window requires ongoing marketing efforts.

Share customer stories and testimonials

As pre-orders come in, highlight customer excitement on social media and email. Repost customer comments, tag people who shared your product and create user-generated content campaigns.

This builds social proof and FOMO for people still on the fence.

Create content around the product

Publish blog posts, YouTube videos or TikToks that educate your audience about the product or the problem it solves. This supports SEO and gives you shareable content to promote across channels.

Content ideas:

  • How-to guides showing the product in action
  • Comparison posts (your product vs alternatives)
  • Behind-the-scenes content showing production or design process
  • Interviews with your team about why you created the product

Each piece of content should link back to your pre-order page and include a clear CTA.

Run retargeting ads

Most people won’t convert on their first visit. Set up Facebook and Instagram retargeting ads to remind visitors about your pre-order and nudge them toward checkout.

Retargeting ad strategies:

  • Show dynamic product ads to people who viewed the pre-order page but didn’t buy
  • Offer a limited-time discount or free shipping to cart abandoners
  • Use testimonials or social proof in ad creative to build trust
  • Create a sense of urgency (“Pre-orders close in 3 days”)
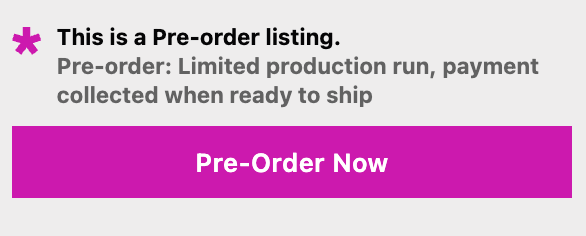
Retargeting typically has higher conversion rates and lower cost-per-acquisition than cold traffic ads.

Use a crowdfunding-style progress bar

Show real-time social proof with a progress bar that displays how many pre-orders you’ve received or how much revenue you’ve generated. This taps into FOMO and validates demand for hesitant buyers.
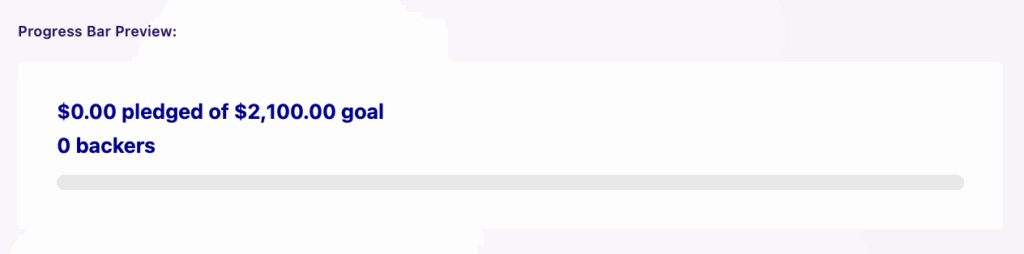
PreProduct offers a free Shopify crowdfunding bar generator that you can add to your product page or homepage. This Kickstarter-style visual reinforces momentum and encourages more conversions.

Engage your community

If you have a Facebook group, Discord server or other community space, actively promote your pre-order there. Share updates, answer questions and celebrate milestones with your most loyal fans.

Community-driven marketing feels less promotional and builds stronger brand loyalty over time.

Communicate Clearly: Managing Expectations and Building Trust

Pre-orders require transparency. Unclear expectations lead to refunds, negative reviews and support headaches. Your marketing should prioritize clarity at every touchpoint.
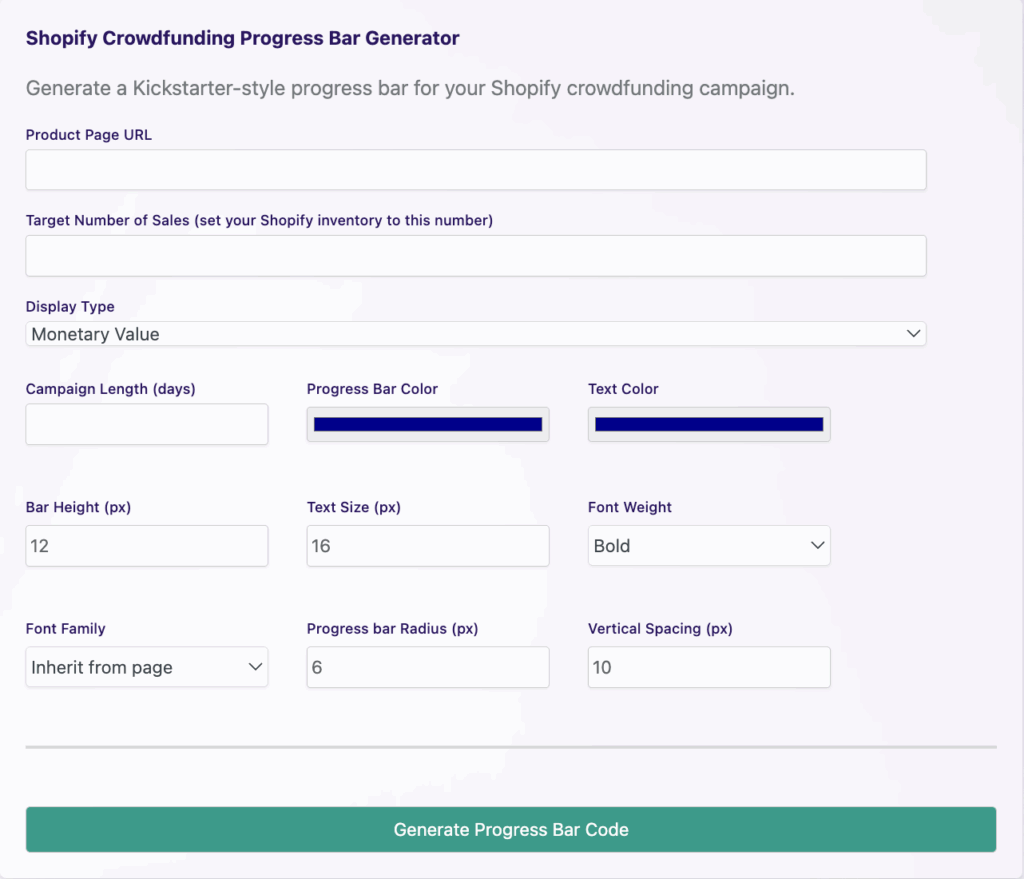
Set realistic shipping timelines

Be honest about when customers can expect their orders. If lead times are uncertain, provide a range (“ships in 8-12 weeks”) rather than a specific date you might miss.

Screenshot

Display shipping timelines:

  • On your product page
  • In your pre-order button copy
  • During checkout
  • In your confirmation email
  • In your FAQ section

Use a Shopify pre-order policy to formalize your terms and ensure compliance with FTC guidelines.

Explain your payment model

Customers need to know when they’ll be charged. Are you collecting payment upfront? Taking a deposit now and charging the balance later? Using charge-later to authorize cards but capture later?

Your Shopify pre-order app should display this clearly before checkout. PreProduct supports multiple payment models including charge-upfront, charge-later and deposit pre-orders, giving you flexibility based on your cash flow needs and customer preferences.

Send regular updates

Once someone pre-orders, keep them informed throughout the fulfillment process. Send emails when:

  • Their pre-order is confirmed
  • Production or shipping timelines change
  • Stock arrives and you’re preparing to ship
  • Their order ships with tracking info

Use Klaviyo, Shopify Email or your pre-order app’s email automation to handle these touchpoints. Consistent communication reduces anxiety and support tickets.

Be transparent about delays

If production or shipping gets delayed, tell your customers immediately. Explain what happened, provide a new timeline and offer options (wait it out, request a refund, etc.).

Transparency builds trust. Hiding delays or going silent erodes it fast.

Leverage Email Marketing for Pre-Order Success

Email is your highest-ROI channel for pre-order marketing. Here’s how to use it strategically throughout the campaign.

Segment your audience

Not everyone on your email list should get the same message. Segment by:

  • Waitlist subscribers: These people explicitly asked for pre-order access. Prioritize them.
  • Past customers: They already trust your brand. Remind them of your track record.
  • Engaged subscribers: People who open and click emails regularly are more likely to convert.
  • Cart abandoners: If someone added the pre-order to cart but didn’t check out, follow up with a reminder or incentive.

Segmentation lets you tailor messaging and timing for better conversion rates.

Craft a dedicated pre-order email sequence

We touched on this earlier, but it’s worth emphasizing: a multi-email sequence outperforms a single launch email. Plan your cadence in advance and automate where possible.

Each email should have a single clear goal:

  • Email 1: Announce the pre-order and drive initial conversions
  • Email 2: Educate about a key feature or benefit
  • Email 3: Share social proof or customer stories
  • Email 4: Create urgency with a deadline or limited availability
  • Email 5: Final reminder before the pre-order window closes

Use subject lines that create curiosity without clickbait. Test different CTAs and send times to optimize performance.

Include strong CTAs and visuals

Every pre-order email should include a clear, action-oriented CTA button. “Pre-order now” or “Reserve yours today” works better than vague phrases like “Learn more.”

Pair your CTA with high-quality product images or lifestyle shots that show the product in context. Visual content increases click-through rates and helps customers visualize owning the product.

Track and optimize email performance

Monitor open rates, click-through rates and conversion rates for each email. If a particular message underperforms, test different subject lines, preview text or email copy.

Most email platforms (Klaviyo, Omnisend, Shopify Email) include A/B testing tools. Use them to refine your approach mid-campaign.

Use Social Media and Influencer Marketing to Amplify Reach

Social media expands your reach beyond your email list and website visitors. Here’s how to use it effectively for pre-order marketing.

Post consistently across platforms

Don’t just post on launch day and disappear. Create a content calendar with 3-5 posts per week throughout your pre-order window.

Mix up your content types:

  • Product announcements and features
  • Behind-the-scenes content
  • Customer testimonials and unboxings
  • Countdown posts creating urgency
  • Educational content (how-tos, tips, use cases)
  • Polls and engagement posts

Use Instagram Stories, TikTok videos and Reels to reach audiences that prefer short-form video content.

Run paid social ads

Organic reach on social media is declining. Paid ads let you target specific audiences and scale your pre-order campaign beyond your existing followers.

Effective ad formats for pre-orders:

  • Carousel ads: Show multiple product images or features in one ad
  • Video ads: Demonstrate the product in action
  • Dynamic product ads: Retarget people who viewed your pre-order page
  • Collection ads: Showcase your pre-order alongside related products

Target audiences based on:

  • Lookalike audiences (people similar to past buyers)
  • Interest-based targeting (people interested in your product category)
  • Retargeting (people who visited your site but didn’t convert)

Start with a modest budget ($10-20/day) and scale up based on performance. Track ROAS (return on ad spend) to ensure profitability.

Partner with influencers and affiliates

Influencer marketing works especially well for pre-orders because it builds credibility fast. Choose influencers who align with your brand and have engaged audiences (not just high follower counts).
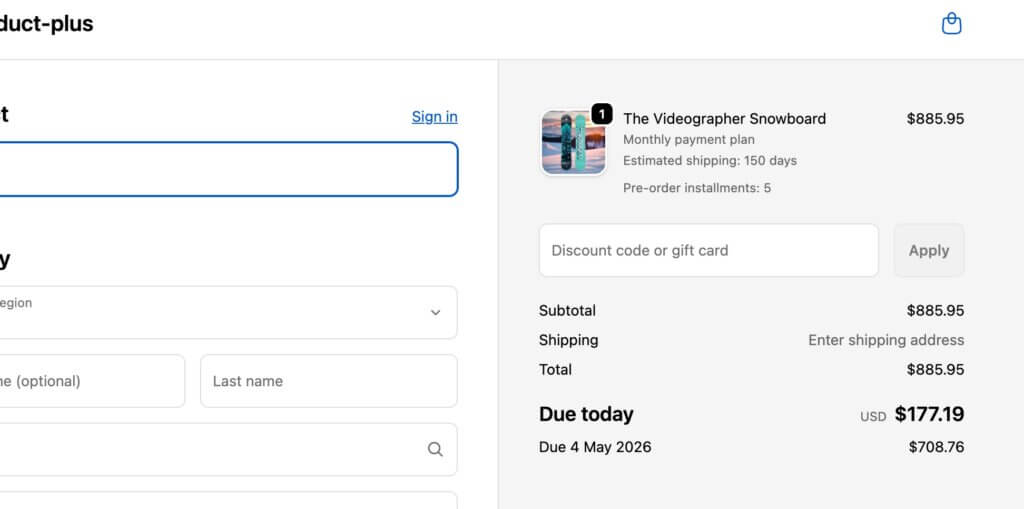
Offer influencers:

  • Early access to the product
  • Exclusive discount codes for their followers
  • Affiliate commissions on sales they drive
  • Creative freedom to promote authentically

Micro-influencers (10K-100K followers) often deliver better ROI than mega-influencers because their audiences are more engaged and niche-specific.

Track performance using unique discount codes or affiliate links so you know which partnerships are worth repeating.

Encourage user-generated content

Ask customers who pre-order to share their excitement on social media. Create a branded hashtag and repost customer content to your own channels.

UGC builds social proof and makes your marketing feel less promotional. It also gives you a steady stream of content without creating everything yourself.

Optimize Your Pre-Order Product Pages for Conversions

Your product page is where marketing meets sales. If it doesn’t convert, your promotional efforts are wasted.

Write compelling product descriptions

Focus on benefits, not features. Explain how the product improves your customer’s life, solves a problem or delivers a specific outcome.

Instead of: “Made with premium materials and available in three colors”
Write: “Built to last through years of daily use, available in colors that match your style”

Use short paragraphs, bullet points and clear headlines to make your description scannable.

Display clear pre-order messaging

Customers need to know immediately that this is a pre-order, not a regular purchase. Your add-to-cart button should say “Pre-order now” and your product page should clearly display:

  • Expected ship date or lead time
  • Payment terms (upfront, deposit or charge-later)
  • Pre-order discount or incentive (if applicable)
  • Cancellation and refund policy

A Shopify pre-order app like PreProduct handles this automatically, replacing your standard button with pre-order messaging and displaying lead times on the product page.

Use high-quality images and videos

Show your product from every angle. Include lifestyle shots that show it in use, not just white-background studio photos.

Video converts even better than static images. A 30-60 second product demo or unboxing video can significantly increase conversion rates.

Add social proof and trust signals

Display customer reviews, star ratings and testimonials prominently. If you don’t have reviews yet, show press mentions, awards or endorsements from industry experts.

Include trust badges near your CTA:

  • Secure checkout icons
  • Money-back guarantee
  • Free returns or easy cancellation policy
  • “As seen in” logos if you’ve been featured in media

These signals reduce purchase anxiety, which is especially high for pre-orders.

Optimize for mobile

Over 70% of Shopify traffic comes from mobile devices. Your pre-order page must look great and load fast on phones and tablets.

Test your page on multiple devices. Ensure images load quickly, buttons are thumb-friendly and text is readable without zooming.

Offer Incentives to Drive Pre-Order Conversions

Pre-orders require customers to wait, which adds friction. Incentives reduce that friction and make pre-ordering more appealing than waiting for the regular launch.
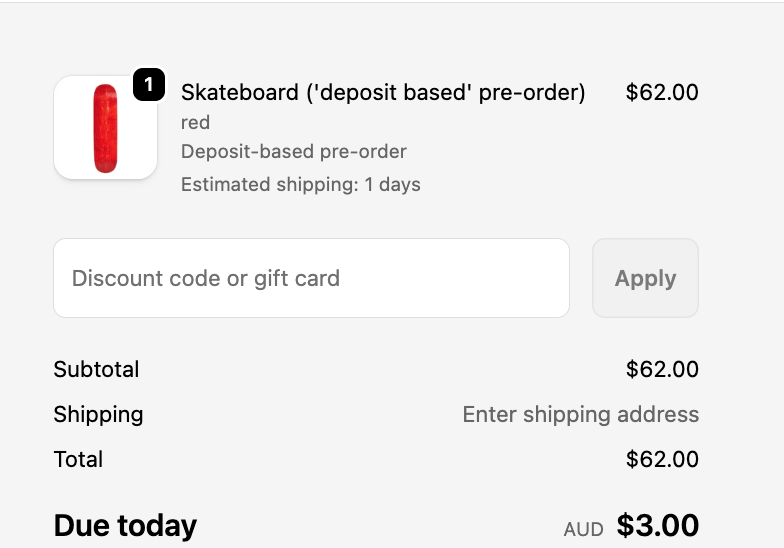
Discount early buyers

Offer 10-20% off for customers who pre-order, positioned as a reward for their patience and commitment. This is one of the most common pre-order incentives because it’s simple and effective.

Display the discount prominently on your product page and in your marketing emails. Use phrases like “Pre-order and save 15%” or “Early bird discount: 20% off for the first 100 buyers.”

Include exclusive bonuses

Bundle a free gift, upgrade or exclusive add-on with pre-orders. This could be:

  • Free shipping
  • A complimentary accessory
  • Early access to future products
  • A limited-edition version or colorway

Exclusivity taps into FOMO and makes pre-ordering feel like a VIP experience.

Create limited availability

Scarcity drives urgency. Cap the number of pre-orders you’ll accept or set a deadline for the pre-order window.
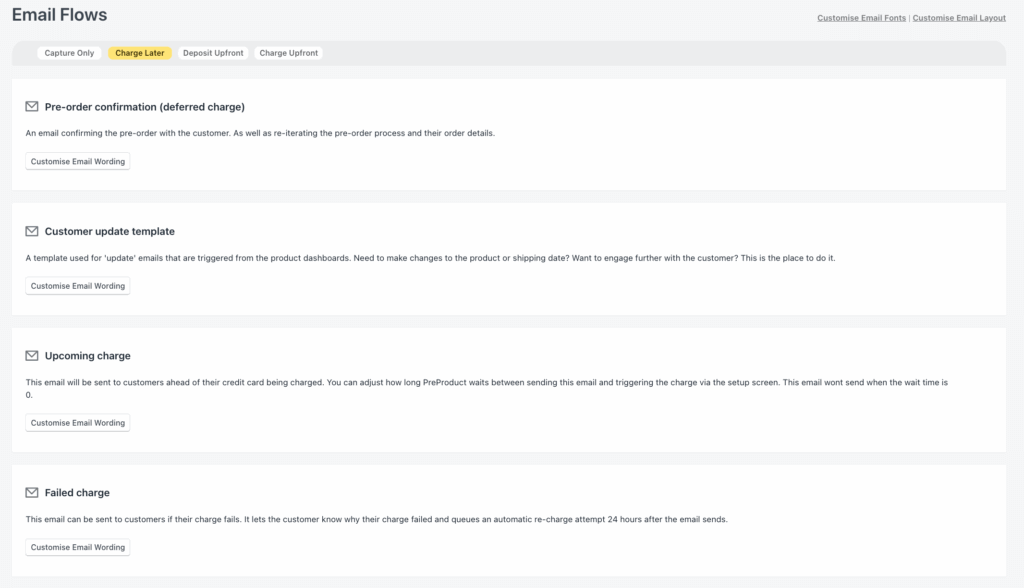
Messages like “Only 50 pre-orders available” or “Pre-order window closes Friday” push hesitant buyers to act now instead of waiting.


If you’re using caps, make sure you can fulfill them. Overselling and canceling orders damages trust.
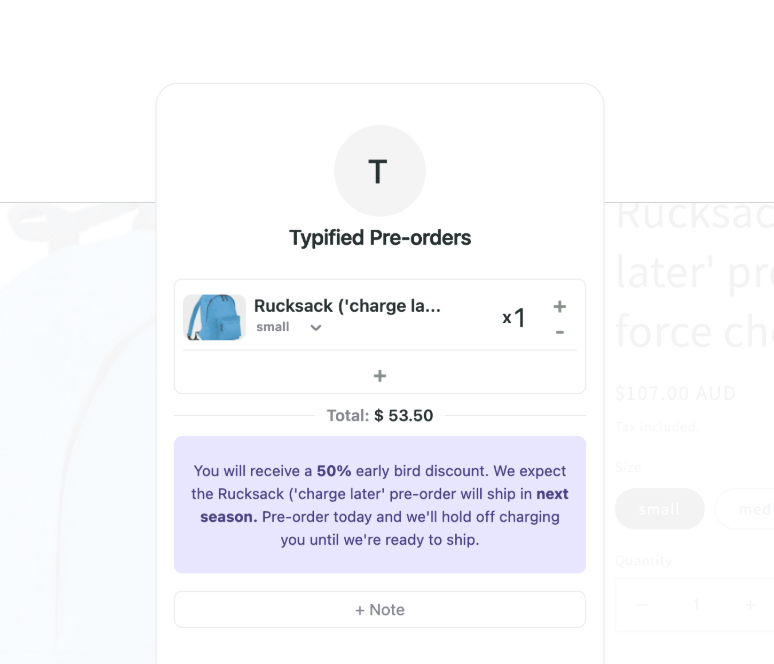
Offer flexible payment options

High-ticket items can be tough to sell as pre-orders because customers don’t want to pay hundreds of dollars upfront for a product that won’t ship for weeks.

Solve this with flexible payment models:

  • Deposits: Collect a small amount upfront, charge the balance later
  • Charge-later: Authorize cards at checkout but only capture payment when you ship
  • Payment plans: Let customers split the cost across multiple installments

PreProduct supports all of these payment models natively for Shopify stores, giving you flexibility based on your product price point and customer preferences. Learn more about Shopify payment plans and how to implement them.

Post-Purchase: Keep Customers Engaged After They Pre-Order

Your marketing doesn’t stop once someone pre-orders. Keeping customers engaged throughout the fulfillment process reduces refunds and builds long-term loyalty.

Send a confirmation email immediately

As soon as someone pre-orders, send a confirmation email that:

  • Thanks them for their order
  • Confirms what they ordered and when it ships
  • Explains payment details (when they’ll be charged, etc.)
  • Provides a link to track their order status
  • Includes your contact info for support questions

This email sets expectations and reassures customers that their order went through.

Provide regular status updates

Don’t go silent after someone pre-orders. Send progress emails every 2-4 weeks with updates on production, shipping timelines or any changes.

Examples:

  • “Your pre-order is in production: here’s what’s happening”
  • “Good news: your order is ahead of schedule”
  • “Quick update: slight delay, but here’s the new timeline”

Transparency builds trust, even when things don’t go perfectly.

Offer a customer portal for self-service

Let customers check their order status, view payment schedules and manage their pre-orders without emailing support. PreProduct includes a customer portal where pre-order buyers can see expected ship dates, payment history and order details.

This reduces support tickets and gives customers more control over their experience.

Create a post-purchase email sequence

Once the product ships, continue engaging with new customers through a post-purchase email flow:

  1. Shipping notification: Confirm the order is on its way with tracking info
  2. Delivery confirmation: Check that they received it and love it
  3. Review request: Ask for a review or testimonial
  4. Cross-sell: Recommend related products or accessories
  5. Loyalty offer: Invite them to join a rewards program or VIP list

This turns one-time pre-order buyers into repeat customers.

Measure Success: Track Key Pre-Order Marketing Metrics

You can’t improve what you don’t measure. Track these metrics to understand what’s working and optimize your pre-order marketing strategy.

Pre-order conversion rate

What percentage of visitors to your pre-order product page actually convert? This tells you if your page is optimized and your offer is compelling, while funnel analytics shows you how far visitors from each traffic source get before they buy.

How to calculate: (Number of pre-orders / Product page visitors) x 100

Benchmark: A good conversion rate for pre-orders is 2-5%, though this varies by industry and price point.

Email performance metrics

Track open rates, click-through rates and conversion rates for your pre-order email campaigns. This shows which messages resonate with your audience.

Key metrics:

  • Open rate: 20-30% is solid for most industries
  • Click-through rate: 2-5% is typical
  • Conversion rate: 1-3% from email clicks is strong

Use A/B testing to improve underperforming emails.

Customer acquisition cost (CAC)

How much are you spending on marketing to acquire each pre-order customer? This helps you understand ROI and allocate budget efficiently.

How to calculate: Total marketing spend / Number of pre-orders

Compare CAC to your average order value (AOV) to ensure profitability. Ideally, your AOV should be at least 3x your CAC.

Refund and cancellation rate

High refund rates signal problems with your marketing, product positioning or fulfillment process. Track how many customers cancel or request refunds before you ship.

How to calculate: (Number of refunds / Total pre-orders) x 100

If your cancellation rate exceeds 10%, investigate why. Common causes include unclear shipping timelines, poor communication or product quality concerns.

Social media engagement

Track likes, comments, shares and saves on your pre-order posts. High engagement indicates your content resonates and can help predict conversion rates.

Also monitor follower growth and reach during your pre-order campaign. If you’re running paid ads, track cost per click (CPC) and return on ad spend (ROAS).

Common Pre-Order Marketing Mistakes to Avoid

Even experienced brands make mistakes when promoting pre-orders. Here are the most common pitfalls and how to avoid them.

Overpromising and underdelivering

Don’t promise a ship date you can’t hit or features you can’t deliver. It’s better to under-promise and over-deliver than the reverse.

If timelines change, communicate immediately and give customers the option to cancel if they’re no longer interested.

Going silent after launch

Launching and disappearing is a fast way to lose customer trust. Stay visible throughout the pre-order window with regular updates, content and engagement.

Ignoring customer questions

When customers have questions about pre-orders (payment timing, shipping, cancellations), answer them quickly and publicly. Unanswered questions kill conversions.

Create a comprehensive FAQ on your product page and in your emails to address concerns proactively.

Failing to set clear expectations

Ambiguity leads to refunds. Be explicit about when customers will be charged, when orders will ship and what happens if there’s a delay.

Use your Shopify pre-order policy to formalize these terms and ensure legal compliance.

Not following up post-purchase

Your relationship with customers shouldn’t end when they pre-order. Keep them engaged with updates, educational content and opportunities to provide feedback.

Post-purchase engagement reduces refunds and increases the likelihood they’ll buy from you again.

Putting It All Together: Your Shopify Pre-Order Marketing Checklist

Here’s a step-by-step checklist to execute a successful pre-order marketing campaign on Shopify:

Pre-launch (2-4 weeks before):

  • [ ] Build a waitlist or early access list
  • [ ] Create teasers and countdown content for social media
  • [ ] Reach out to influencers or affiliates
  • [ ] Set up a “coming soon” landing page
  • [ ] Draft your launch email and pre-order email sequence

Launch day:

  • [ ] Send launch email to waitlist and subscribers
  • [ ] Post announcement across all social channels
  • [ ] Set up Facebook and Instagram ads
  • [ ] Optimize your Shopify pre-order product page
  • [ ] Add a crowdfunding-style progress bar (optional)

During the pre-order window:

  • [ ] Send regular email updates and reminders
  • [ ] Share customer testimonials and UGC
  • [ ] Publish blog posts or videos about the product
  • [ ] Run retargeting ads for cart abandoners
  • [ ] Engage your community (Facebook groups, Discord, etc.)

Post-purchase:

  • [ ] Send order confirmation emails
  • [ ] Provide status updates every 2-4 weeks
  • [ ] Offer a customer portal for self-service
  • [ ] Send shipping notifications with tracking
  • [ ] Request reviews and testimonials after delivery

Ongoing optimization:

  • [ ] Track conversion rates, email metrics and CAC
  • [ ] A/B test email subject lines and ad creative
  • [ ] Monitor refund rates and investigate high cancellations
  • [ ] Survey customers for feedback on the pre-order experience

Final Thoughts: Make Pre-Orders a Growth Engine

Pre-orders aren’t just a way to take revenue before stock lands. They’re a marketing opportunity to build anticipation, validate demand and create momentum for your product launch.

The brands that succeed with pre-orders treat them like launch events. They invest in visibility, communicate transparently and keep customers engaged from pre-announcement through delivery.

Whether you’re a new brand testing your first product or an established store managing restocks, a deliberate Shopify pre-order marketing strategy makes the difference between a quiet launch and a successful campaign.

Start with the tactics that fit your resources and audience, then scale up as you learn what works. With the right tools (like PreProduct), clear messaging and consistent execution, pre-orders can become a reliable growth engine for your Shopify store.

Pre-sell With PreProduct

7 day free trial with all plansMigrate pre-orders