Managing cash flow while keeping customers happy can feel like walking a tightrope. Shopify partial payments let you collect a portion of the sale upfront and charge the remaining balance later, creating flexibility for both you and your customers. Whether you’re launching a new product line, managing pre-orders, or selling higher-ticket items, understanding how to implement partial payment strategies can transform how you capture revenue. If you’re new to pre-orders, start with our complete guide to pre-orders on Shopify before diving into payment models.
From processing over $85 million+ in pre-order sales, we’ve learned what actually works. This guide breaks down everything you need to know about Shopify deposits, charge-later options, and installment plans so you can choose the right approach for your store.
What Are Shopify Partial Payments?
The Core Concept
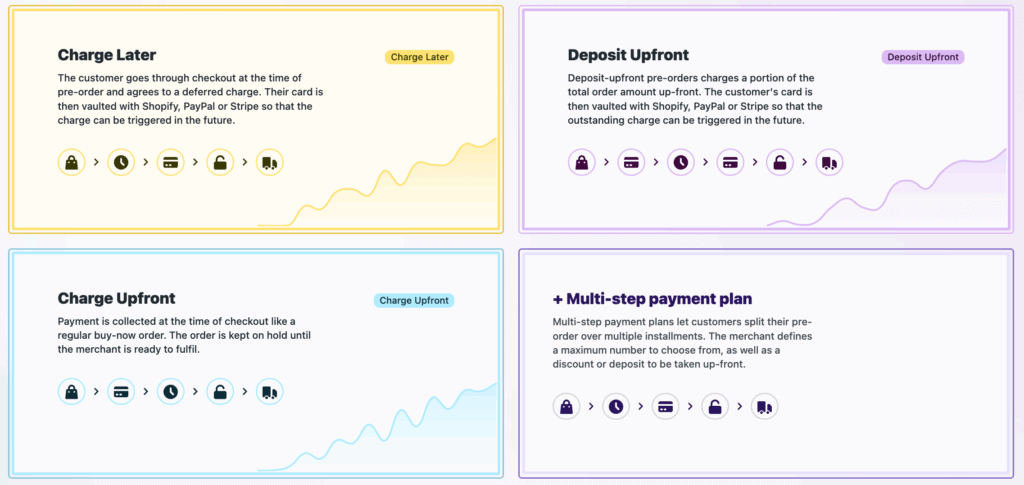
Shopify partial payments enable merchants to charge a portion of the sale upfront while deferring the remaining balance until later. Instead of collecting the full amount at checkout, you might take 30% now and charge the rest when the product ships. This approach relies on vaulted card technology, where payment details are securely stored with your payment provider, allowing you to trigger charges at a later date without restrictive authorization windows.
The flexibility extends beyond simple deposits. Merchants can structure payments in three main ways: deposit upfront with a later charge, full charge-later with zero upfront cost, or multi-step installment plans that spread payments across several transactions.
Three Main Approaches to Partial Payments
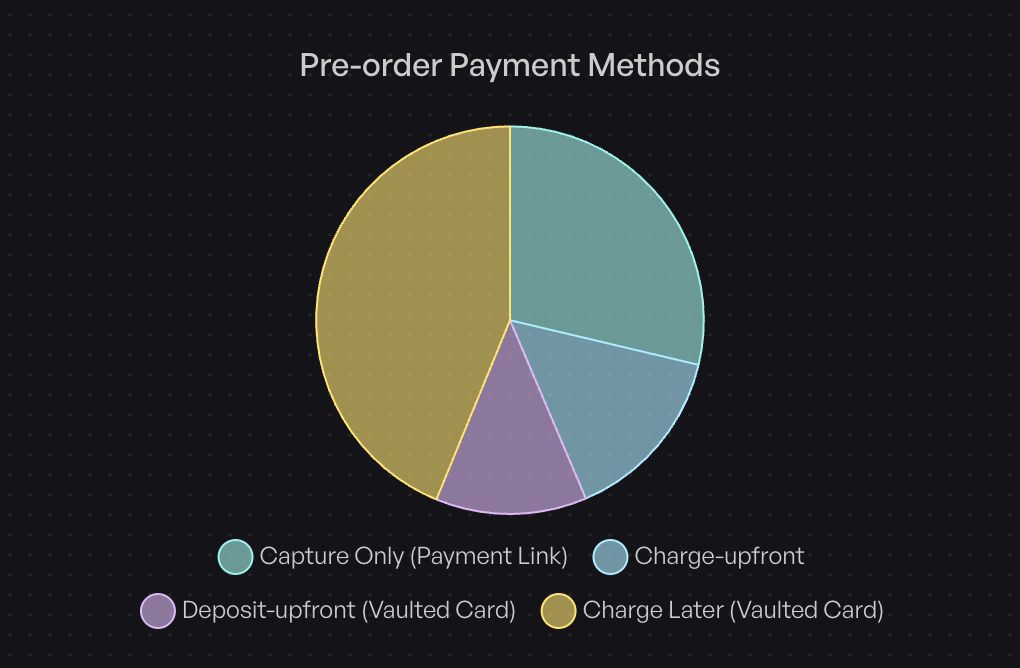
Based on data from over one million pre-orders, here’s how merchants actually structure their payments:
Charge-later accounts for 43.8% of all pre-order listings (75,781 listings). Customers complete checkout without paying anything upfront, and merchants trigger the charge when ready to ship. This approach maximizes conversion by removing initial friction while still securing the order.
Deposit upfront represents 12.6% of listings. Merchants collect a partial payment during checkout, typically 20-50% of the product value, then charge the balance when the item is ready. This balances customer commitment with flexibility.
Charge upfront makes up 14.9% of listings. The full amount is collected immediately at checkout, providing instant cash flow but requiring customers to pay before receiving the product.
The remaining 28.7% use capture-only approaches, where payment is taken through payment links rather than vaulted cards.
Why Partial Payments Matter in 2026
The shift toward flexible payment models reflects changing customer expectations. Buyers increasingly expect options beyond “pay now or don’t buy.” For merchants, partial payments solve a critical challenge: how do you capture revenue before inventory arrives without alienating customers who want to minimize upfront commitment?
Traditional Shopify payment authorizations expire after 7 or 30 days depending on your payment provider and Shopify plan. Partial payment solutions using vaulted cards bypass these limitations, giving you control over when charges occur regardless of lead times.
How Shopify Partial Payments Work
Technical Requirements
Three payment providers currently support the vaulted card technology required for deferred charges: Shopify Payments, PayPal, and Authorize.net (although we’ve heard reports of Cybersource recently being supported). Any credit card that passes standard checkout validation works for partial payments; no special card types are required.
The system captures and securely stores card details at initial checkout. When you’re ready to charge, you trigger the payment through your pre-order app or payment platform. The customer doesn’t need to re-enter payment information or take any action.
The Customer Experience
From a customer perspective, partial payments create a streamlined experience. They complete checkout once, entering payment details as they normally would. For deposit-based approaches, they see the deposit amount charged immediately. For charge-later options, no charge appears until you trigger it.
Customers can monitor their deferred payment status through customer portals that show expected shipping dates, outstanding balances, and payment schedules. This transparency reduces support inquiries and maintains trust during longer lead times.
The Merchant Workflow
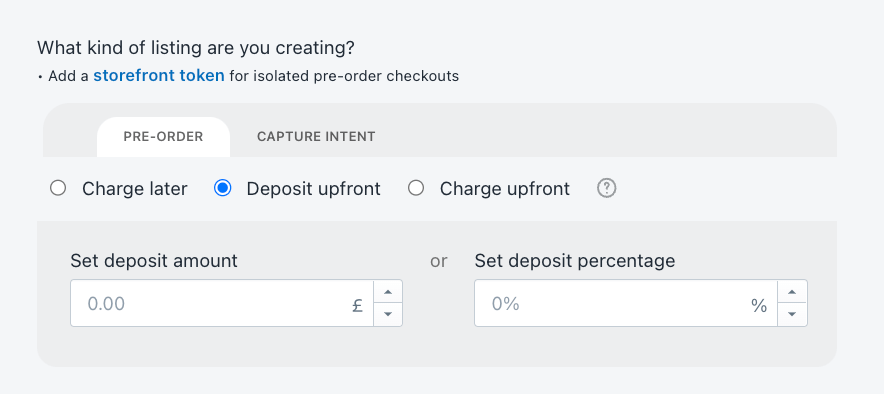
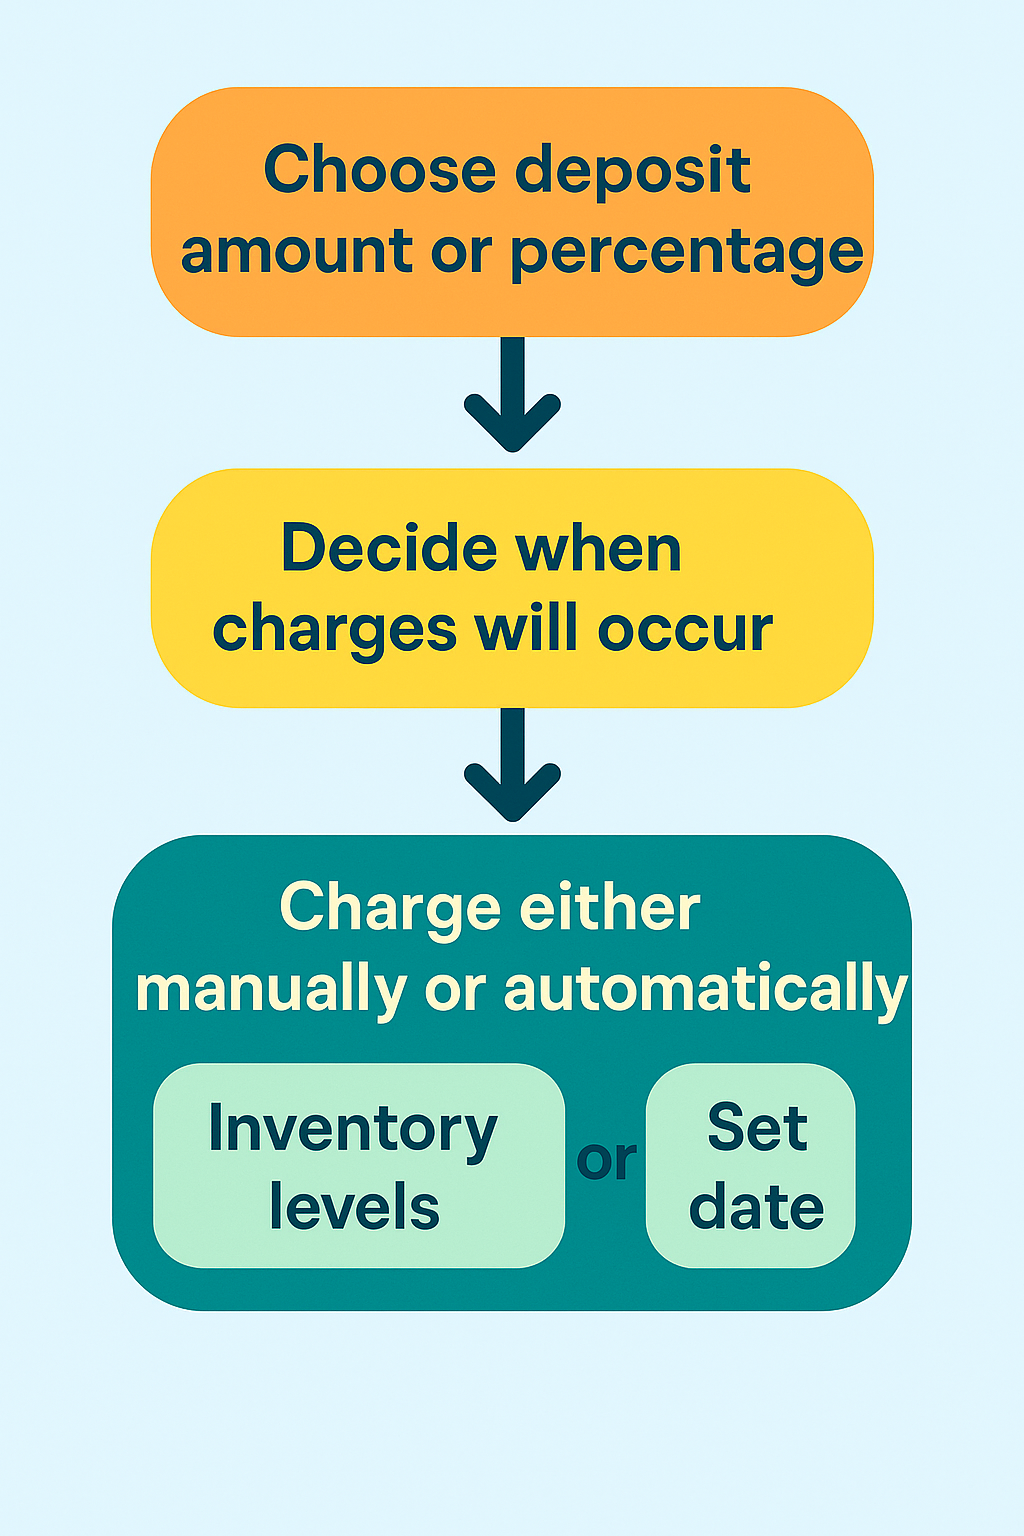
Setting up partial payments requires choosing your deposit amount or percentage, configuring when charges will occur, and customizing customer communications. You can set charges to trigger manually when you’re ready to ship, automatically based on inventory levels, or on specific dates.
For deposit approaches, you specify whether to charge a fixed amount or a percentage of the product price. The system calculates and displays the deposit at checkout, shows the remaining balance, and handles the math automatically.
When triggering remaining charges, you can process them at the listing level (charging all customers for a specific product) or at the customer level (charging individual orders as they’re ready). Failed charges generate automated recovery emails, giving customers the opportunity to update payment methods before orders are cancelled.
Benefits of Partial Payments for Pre-orders
For Merchants: Extended Sales Windows
Traditional payment authorizations create artificial constraints. With Shopify Payments, authorizations typically expire after 7 days, though this can extend to 30 days in some cases. If your product lead time exceeds these windows, you face a choice: charge upfront and risk higher refund requests, or wait until inventory arrives and lose revenue velocity.
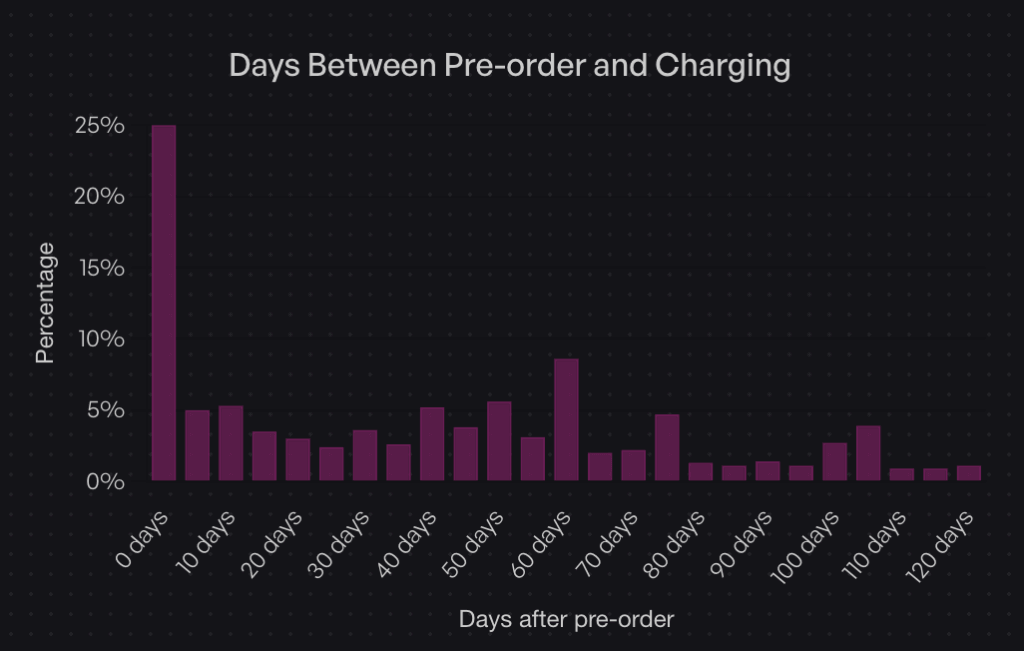
Partial payments eliminate this constraint. Data shows that while 25% of merchants charge immediately (Day 0), 47.8% charge within the first 30 days of the order. The flexibility to control charge timing means you can align revenue capture with your specific supply chain reality, not arbitrary authorization periods.
For Merchants: Reduced Refund Administration
Charge-upfront pre-orders create customer frustration when delays occur. Customers who’ve already paid feel entitled to immediate resolution, generating support tickets and refund requests. Charge-later and deposit models reduce this friction. Customers who haven’t fully paid yet tend to be more patient with timeline adjustments, as they haven’t fully committed their funds.
This isn’t just theory. Merchants using charge-later approaches report fewer cancellations and support inquiries compared to charge-upfront campaigns, particularly for products with variable lead times.
For Customers: Lower Initial Commitment
The psychological barrier of a $300 product is very different from a $75 deposit. Partial payments let customers secure items they want without the immediate financial impact of the full purchase. This is particularly powerful for higher-ticket items where the decision to buy might be delayed by cash flow concerns.
Customers who make partial payments also demonstrate stronger purchase commitment. Having “skin in the game” through a deposit makes them more likely to complete the purchase compared to waitlists or notification systems with zero commitment.
Real-World Impact: The Holochain Foundation Example
When Holochain Foundation launched their Web3 platform hardware, they faced a classic challenge: significant production costs with uncertain demand. They used deposit-based pre-orders to validate interest and secure upfront capital for manufacturing.
By collecting deposits, they confirmed real demand beyond survey responses or email signups. The deposits provided working capital to initiate production runs. And critically, they maintained full control over when to charge the remaining balance, coordinating charges with actual shipping timelines rather than racing against authorization expirations.
When to Use Deposits vs Charge-Later vs Installments
Strategic Decision Framework
The right payment approach depends on three factors: product price point, lead time length, and your cash flow needs. Here’s how to think through the decision.
Use Deposit Upfront When:
High-ticket items ($500+) benefit from deposits. The partial payment demonstrates commitment without requiring customers to part with the full amount months before delivery. We believe optimal deposit amounts range from 10-50% of the product value.
Long lead times (three months or longer) work better with deposits than charge-later. Asking customers to wait 90+ days with zero payment creates uncertainty. A deposit confirms their commitment and provides you with working capital during the production window.
Custom or made-to-order products justify deposits because you’re investing resources specifically for that customer. The deposit offsets your production costs and reduces the risk of cancellations after you’ve already started work.

When you need early production capital, deposits inject cash flow before the product is ready to ship. This is particularly valuable for crowdfunded-style launches or when production minimums require upfront investment.

Merchants who use deposit approaches represent 12.6% of listings in our dataset. While less common than charge-later, deposits serve a specific purpose for higher-value, longer-timeline products.
Use Charge-Later When:
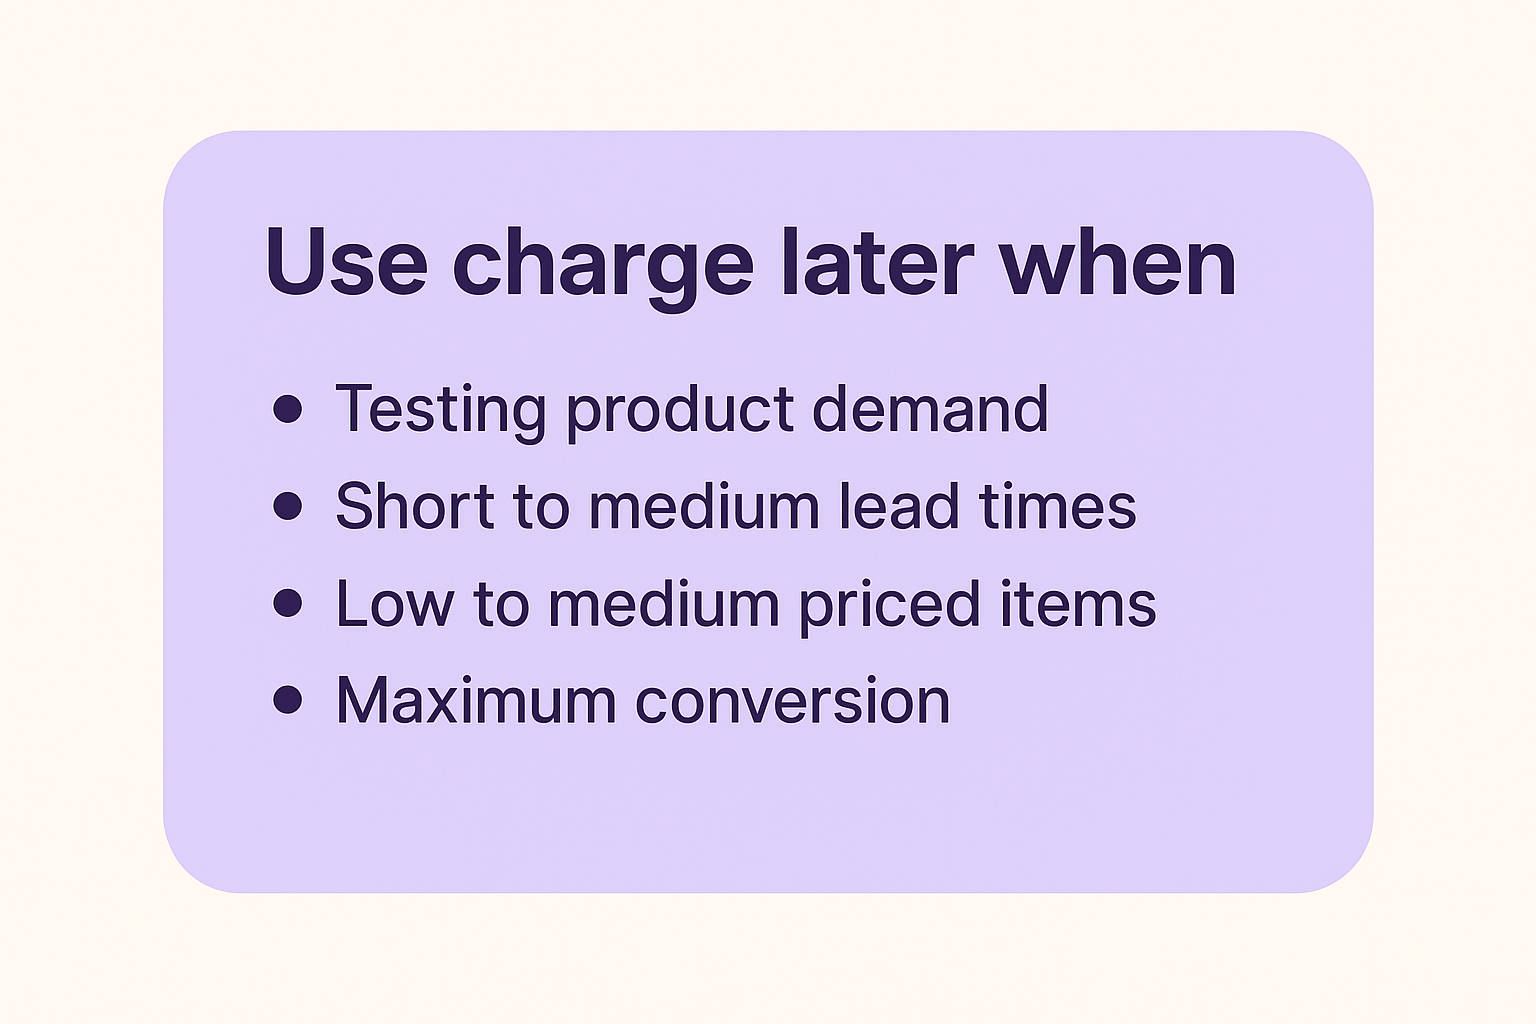
Testing product demand works better with charge-later. The zero upfront cost maximizes conversion, giving you the truest read on interest. You can validate demand without customers needing to part with money immediately.
Short to medium lead times (one to two months) pair well with charge-later. Customers don’t perceive significant risk in the timeline, and you maintain flexibility on charge timing.
Low-medium priced items ($50-$300) see strong performance with charge-later. The payment amount isn’t large enough to justify deposits, and the reduced friction at checkout improves conversion rates.
When you want maximum conversion, charge-later removes all payment friction. Customers complete checkout knowing they won’t be charged until the product ships, eliminating the primary objection to pre-ordering.
The data supports this approach: 43.8% of pre-order listings use charge-later models, making it the most popular payment timing choice. The appeal is clear: secure orders now, charge when convenient, avoid authorization periods entirely.
Use Installment Plans When:
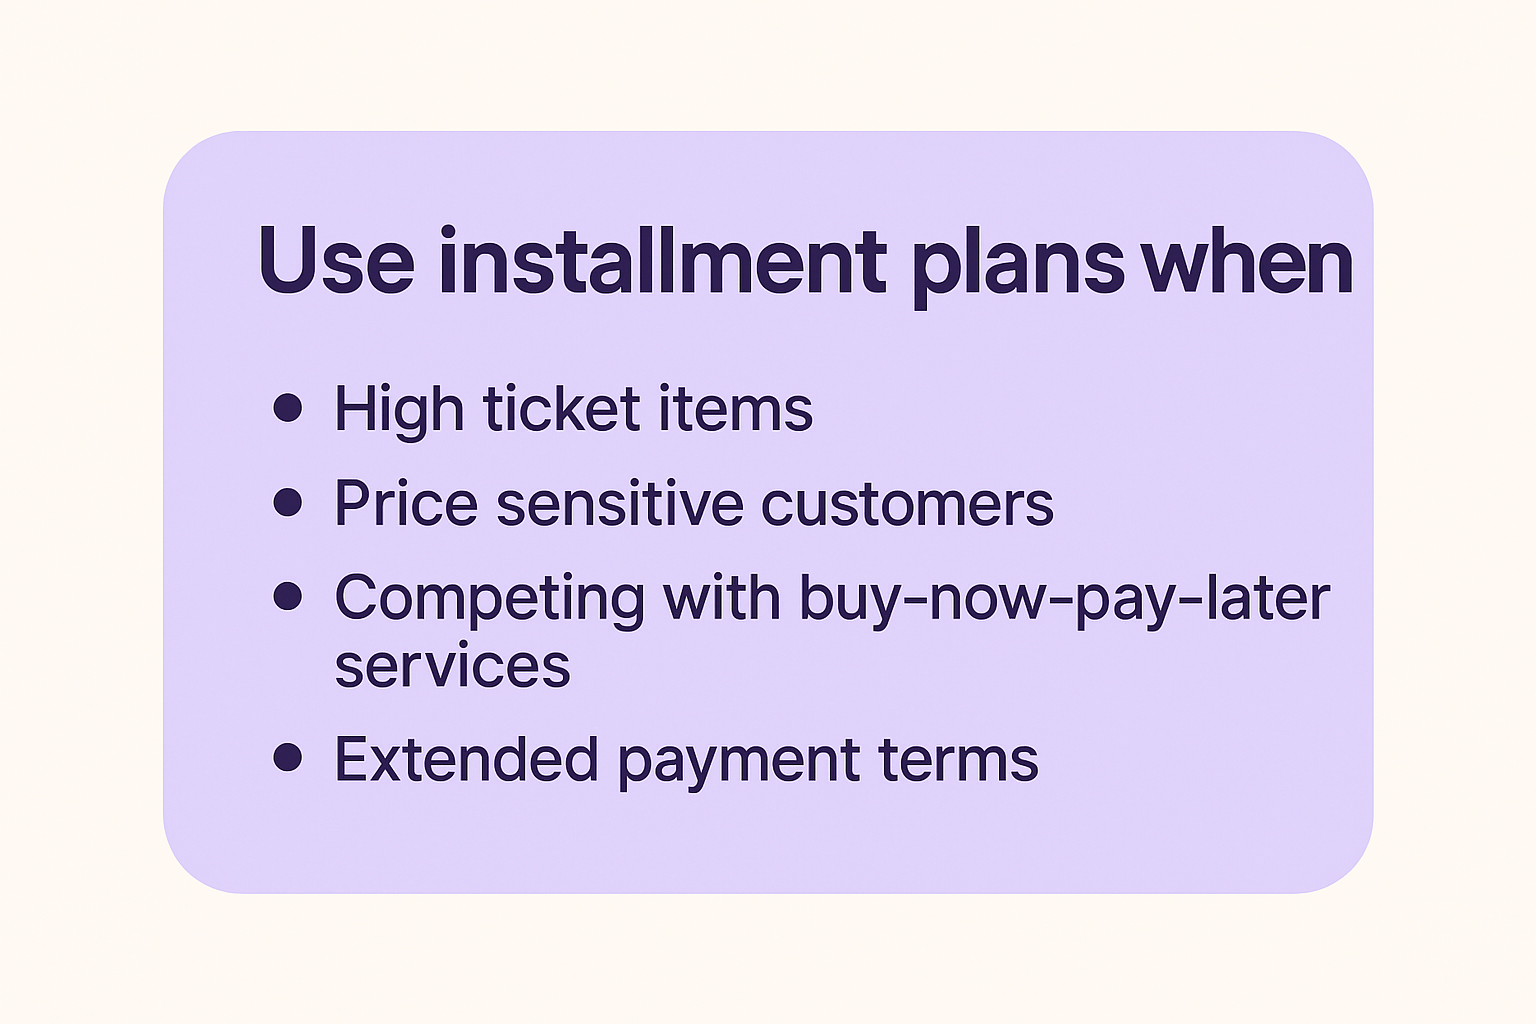
High-ticket items ($1,000+) benefit from spreading payments across multiple installments. This makes expensive products accessible to customers who want to spread the cost over time, similar to how Affirm or Klarna work.
Price sensitive customers who prefer to spread the cost over time. Offering installment plans allows you to offer a lower price point to customers who prefer to pay over time. Think of this like BNPL (buy-now-pay-later) but the customer receives the product later instead of upfront.
Competing with buy-now-pay-later services becomes easier when you offer your own installment options. Rather than paying fees to third-party services, you can structure multi-step payment plans that charge customers directly.
Extended payment terms (60-90+ days or longer) work well for premium product positioning. Luxury items or high-end equipment can be structured with monthly payments that align with when customers actually receive and use the product.
Multi-step payment plans work by splitting pre-orders into multiple automatic charges on a defined schedule. Customers select their preferred number of installments at checkout, and the system automatically processes charges based on your configured frequency (daily, weekly, or monthly).
Available for Shopify Plus stores and non-Shopify platforms, these plans integrate with charge-later or deposit-upfront pre-order models. You can configure maximum installment limits, offer discounts for choosing payment plans, and customize the customer-facing interface to match your brand. Customers access a portal showing their payment history, outstanding balance, and upcoming charge dates.
Optimal Deposit Percentages by Scenario
For physical goods in the $200-$500 range: 25-35% deposits work well. This is enough to confirm commitment without creating significant friction.
For higher-ticket items ($500-$1,500): 20-30% deposits provide meaningful capital while keeping the initial amount manageable. A $300 deposit on a $1,200 product feels more acceptable than a $600 deposit.
For custom or made-to-order products: 40-50% deposits are appropriate. Your costs are higher, customization requires more resources, and the commitment level should reflect the work involved.
For products with very long lead times (6+ months): 30-40% deposits strike a balance. Too small and it doesn’t feel meaningful; too large and customers balk at paying so much so far in advance.
The key is putting it in the context of your business and customer-base. Your hard fought intuition is a great starting point, as what works for one product or audience may not work for another.
How to Set Up Shopify Partial Payments
Option 1: Manual Setup (Not Recommended)
Some merchants attempt to create partial payment flows manually through Shopify’s native features. This involves creating separate deposit products, generating unique discount codes for the remaining balance, and manually coordinating payment collection with customers.
Why this approach fails: The customer experience is poor. They purchase a “deposit” product, then receive an email later with a discount code and instructions to buy the actual product. It’s confusing and unprofessional.
The manual coordination is time-consuming. You’re manually tracking which customers paid deposits, generating individual discount codes, and sending follow-up emails. For anything beyond a handful of orders, this becomes unmanageable.
You lose analytics and segmentation. These orders don’t flow through normal Shopify reporting as pre-orders; they look like separate product purchases. You can’t easily segment customers who have deposits pending or identify which partial payment campaigns perform best.
The approach is error-prone. Forgotten discount codes, incorrect discount amounts, customers who lose emails, all these issues create support tickets and frustration.
(FYI: Early on in PreProduct, before Shopify supported vaulted card payments; we actually offered a version of this ‘deposit product’ approach. It was pretty painful and we discontinued it as soon as the vaulted card functionality was released.)
Option 2: Using Pre-order Apps (Recommended)
Specialized pre-order apps handle the complexity of partial payments through purpose-built workflows. PreProduct offers flexible payment timing options including charge-upfront, charge-later, deposits, and multi-step installment plans.
Step-by-step setup process:
First, choose your payment timing approach. Decide whether you’re collecting full payment upfront, charging later, or taking a deposit. This decision drives the rest of your configuration.
Second, set your deposit amount or percentage if applicable. You can specify either a fixed dollar amount or a percentage of the product price. The app automatically calculates and displays this at checkout.
Third, configure automatic charge triggers or plan for manual triggering. Some merchants prefer to trigger charges manually when they’re ready to ship. Others want automation based on inventory levels, where charges occur automatically when stock is added to Shopify.
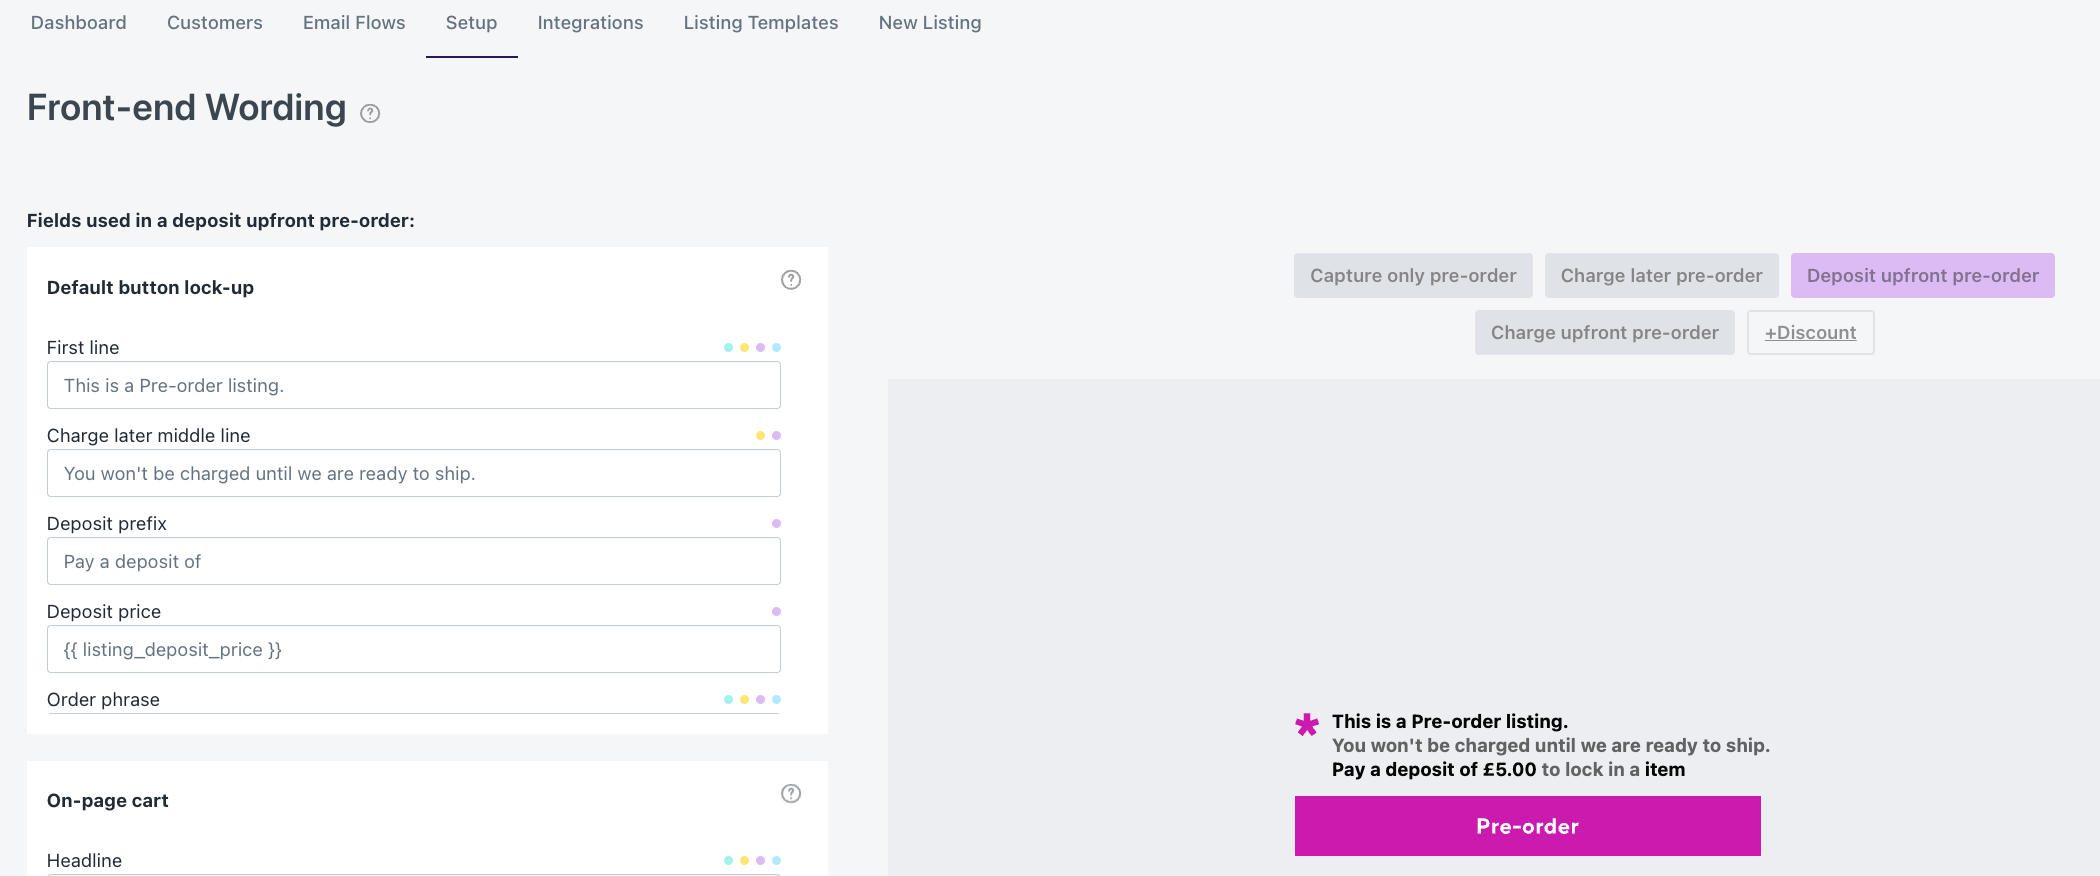
Fourth, customize your customer portal and communications. Set up the messaging customers see on product pages, in cart, and at checkout. Configure email sequences for order confirmations, upcoming charges, and payment reminders.
Fifth, set up failed charge notifications and recovery workflows. If a customer’s card declines when you trigger the remaining charge, automated emails give them an opportunity to update their payment method before you cancel the order.
Sixth, test the complete flow. Place a test order through the entire checkout process, confirm the deposit or charge-later behavior works correctly, and verify that triggering the remaining charge functions as expected.
Configuration Best Practices
Communicate lead times clearly on product pages. Use specific dates when possible (“Ships in February 2026”) or windows when dates are uncertain (“Ships 8-12 weeks after order”). Vague language like “coming soon” creates customer anxiety.
Set realistic charge dates based on your actual supply chain. Building in buffer time is smart, but don’t pad timelines excessively. Customers appreciate accuracy more than conservatively long estimates.
Craft deposit policy language that explains what customers are paying now, what they’ll be charged later, and when that charge will occur. This belongs in multiple places: product page, cart, and checkout.
Design email sequences for payment reminders that notify customers a few days before their remaining balance will be charged. This reduces surprise and gives them time to ensure sufficient funds are available.

Managing Partial Payment Orders
Order Tracking and Segmentation
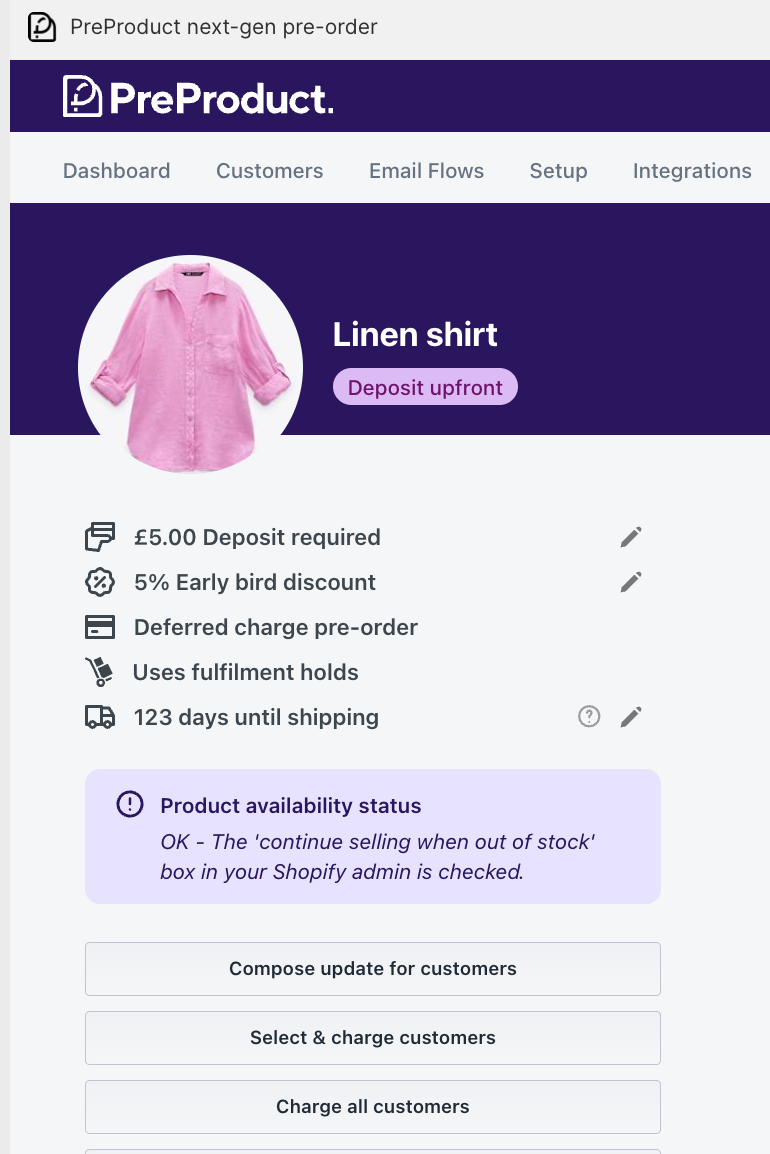
Once partial payment orders start flowing in, you need visibility into payment status across your customer base. Shopify deposits apps like PreProduct provide dashboards that show which orders have deposits paid, which customers are on charge-later status, and which charges have been triggered but not yet collected.
Segmentation becomes critical for larger campaigns. You might need to charge customers in batches as inventory arrives in waves, or handle exceptions for customers requesting earlier or later charges. Good pre-order tools let you filter by payment status, creation date, product, and other attributes.
Triggering Remaining Charges
Manual charge initiation gives you complete control. You review orders ready to ship, select the customers to charge, and trigger the charges. This works well for smaller volumes or when you need to carefully coordinate charges with actual inventory availability.
Automated triggers based on dates work for predictable timelines. If you know products will ship on March 15th, you can configure charges to trigger automatically on March 10th, giving time for payment processing before you need to create shipping labels.
Stock-based triggers charge customers automatically when you add inventory to Shopify. You receive a shipment, update your stock levels, and the app detects the change and initiates charges. This aligns charges with actual product availability rather than estimated dates.
Batch processing lets you charge large groups simultaneously. If you have 500 orders and inventory for all of them arrives, you can process all charges in one action rather than triggering them individually.
Failed Charge Management
Not every charge attempt succeeds. Cards expire, customers change banks, or funds aren’t available. When charges fail, you need a recovery process.
Common failure reasons include expired cards (especially problematic for long lead times), insufficient funds, or cards that were cancelled and replaced. Some failures are soft declines that will succeed if retried; others are permanent until the customer updates their payment method.
Automated recovery emails immediately notify customers when charges fail. These emails explain what happened, provide a link to update payment information, and set a deadline before the order is cancelled. Clear, non-accusatory language is important; frame it as “we need your help to complete your order” rather than “your payment failed.”
Grace periods and retry logic give customers time to fix issues. A common approach: retry the charge once after 24 hours, send another notification if it fails again, and give customers 3-5 days total before cancelling the order. The timeline should balance giving customers adequate time with your need to manage inventory.
When to cancel vs hold orders depends on your inventory situation. If you have excess inventory, you can be generous with grace periods. If inventory is tight and you have a waitlist, shorter grace periods let you reallocate products to customers whose payments will succeed.
Refund Scenarios
Partial payments complicate refunds compared to standard orders. If you’ve collected a deposit and need to refund, do you refund just the deposit? What if you’ve already charged the remaining balance?
Partial vs full refunds depend on when the refund request comes in and why. If a customer wants to cancel before you’ve triggered the remaining charge, you refund the deposit. If they want to cancel after being fully charged but before shipping, you refund everything. If the product has shipped and they’re returning it, your normal return policy applies.
Split payment complications arise when deposits and final charges occur far apart. Your accounting needs to handle a deposit collected in January and a refund processed in March that pulls from a different financial period.
Customer communication templates should clearly explain what amount is being refunded and when they’ll see it. “Your $75 deposit will be refunded to your original payment method within 5-10 business days” sets clear expectations.
Integration with Operations
Fulfilment Hold Management
The biggest operational risk with pre-orders is accidental early shipment. Products shouldn’t ship until you’ve triggered the remaining charges. Fulfilment holds prevent pre-order items from flowing to your 3PL or shipping team until you explicitly release them.
For Shopify stores, apps can place orders in “hold” fulfilment status. This keeps them out of your normal fulfilment queue. When you trigger charges and they succeed, the hold is released and the order moves to “unfulfilled,” making it visible to your fulfilment team.
For BigCommerce and WooCommerce stores, the approach differs. Pre-order apps keep orders in the app until you release them, then push them to your platform admin only when ready to ship. This ensures your team never sees an order before it’s time to fulfil it.
ERP and Inventory Systems
If you use an ERP system, syncing pre-order payment status matters for accurate financial reporting. Your ERP needs to know which orders represent collected revenue versus orders that will generate revenue when charged later.
Webhooks or API connections push order status updates from your pre-order app to your ERP. When a deposit is collected, your ERP records it. When the remaining balance is charged, another update flows through. This keeps your financial picture accurate without manual data entry.
For demand forecasting, pre-orders provide early signals about which products will sell and in what quantities. If you have 200 pre-orders before production starts, you know you need at least 200 units. Integrating this data into inventory planning prevents stockouts and informs production run sizes.
Learn more about managing pre-orders with ERP systems.
3PL Coordination
If you use a third-party logistics provider, they need to understand which orders are pre-orders and shouldn’t ship yet. Most 3PLs integrate with Shopify or your platform and automatically pull orders marked as unfulfilled. If pre-orders flow through before you’re ready, they’ll ship them.
The fulfilment hold approach prevents this. Only when you explicitly release holds do orders become visible to your 3PL. This coordination is critical for smooth operations.
For more on this topic, see our guide on managing pre-orders with your 3PL.
Mixed Carts: Pre-orders Plus In-Stock Items
Should you allow customers to purchase pre-order and in-stock items in the same cart? This decision impacts operations significantly.
Mixed carts increase average order value. Customers can buy what’s available now along with pre-order items, maximizing their cart size. However, this creates split fulfilment complexity. You need to ship the in-stock items immediately and hold the pre-order items for later.
Isolated carts force customers to check out separately for pre-orders and regular items. This simplifies operations; each order is either all in-stock or all pre-order. However, it may reduce total cart value and creates a slightly more complex customer experience.
The right choice depends on your operational capacity. If you can handle split fulfilments without errors, mixed carts are valuable. If your fulfilment setup struggles with partial shipments, isolated carts reduce mistakes.
Common Mistakes to Avoid
Payment Timing Errors
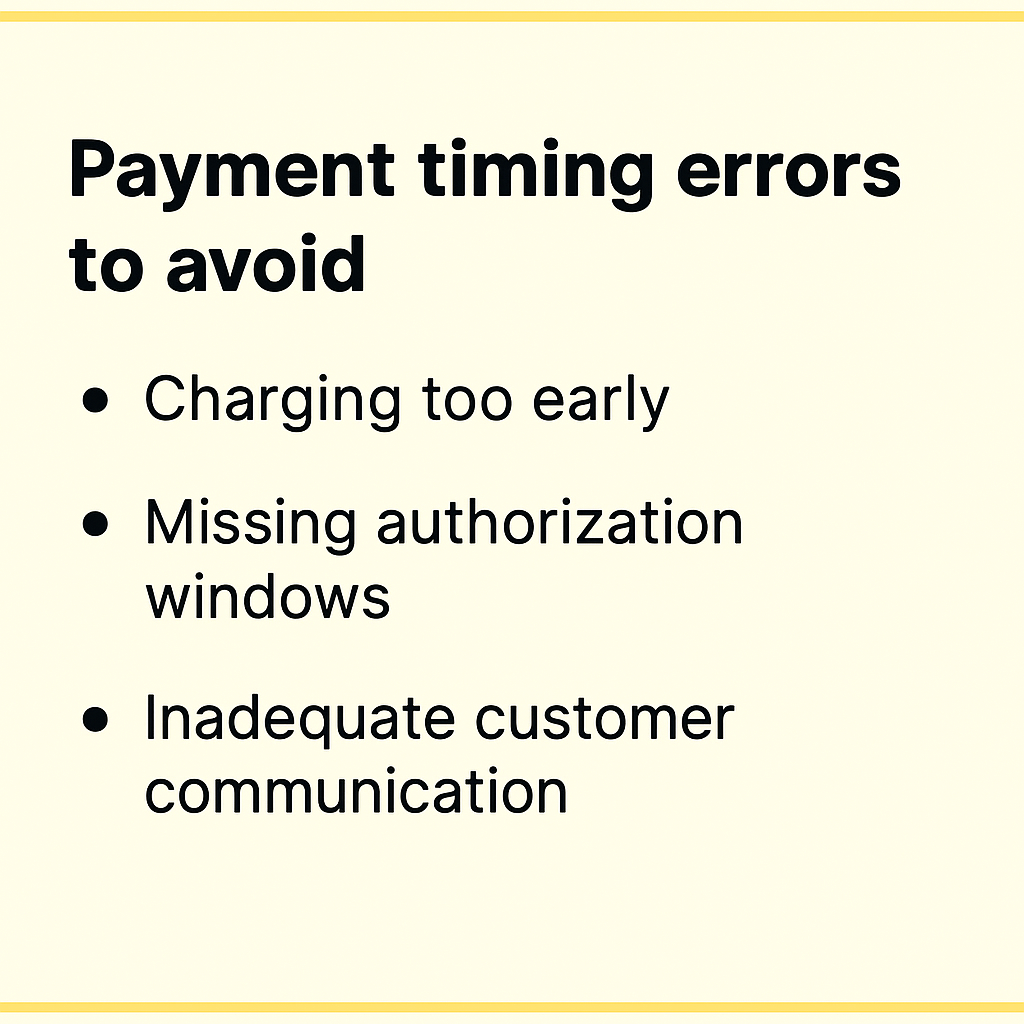
Charging too early before products are ready to ship creates customer frustration. If you charge the remaining balance and then announce a delay, customers who were patient during the charge-later period suddenly become frustrated. Only trigger charges when you’re confident products will ship within days.
Missing authorization windows applies to merchants not using vaulted card solutions. If you’re trying to use standard Shopify authorizations for long-lead-time products, you’ll hit expiration issues. This is why partial payment apps with vaulted cards exist in the first place.
Inadequate customer communication about when charges will occur causes surprise and support tickets. Notify customers a few days before charging remaining balances. Give them a heads-up rather than charging unexpectedly.
Deposit Amount Missteps
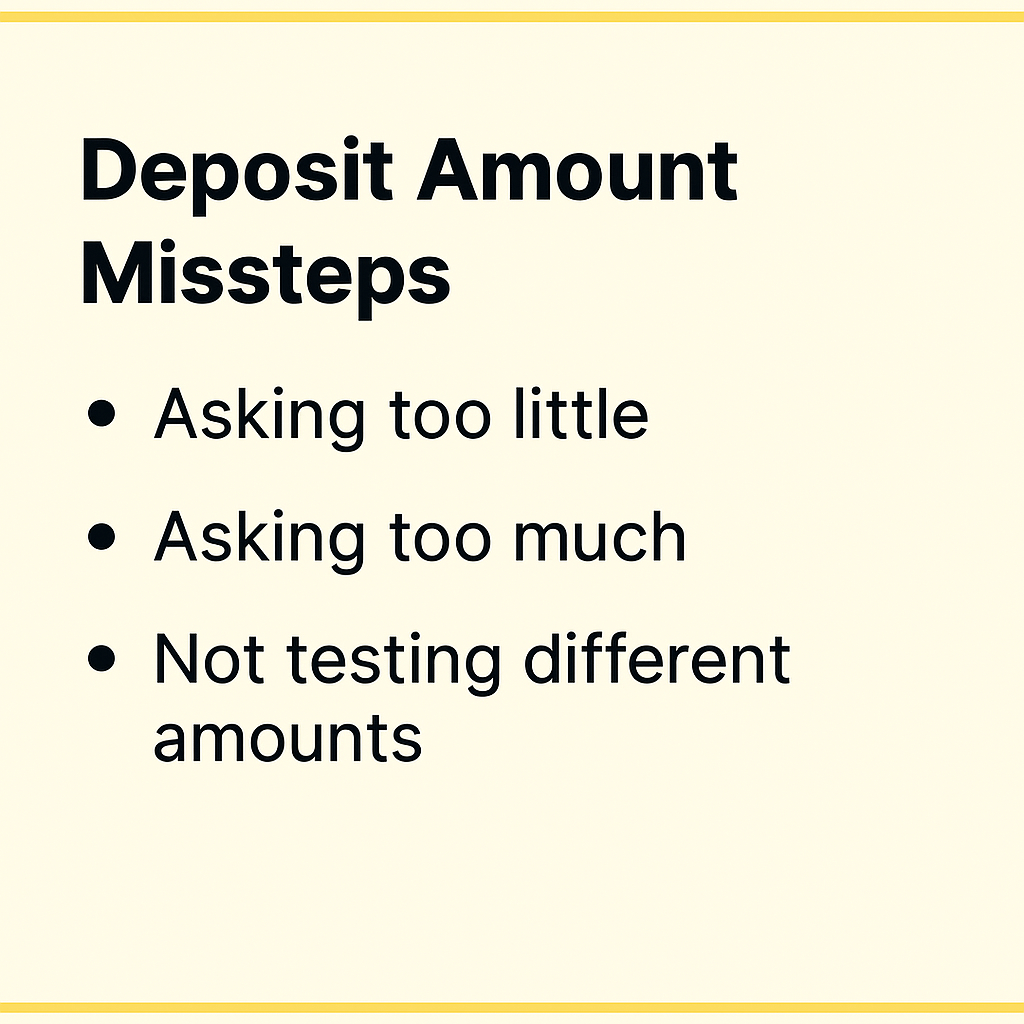
Asking too little defeats the purpose of deposits. A $10 deposit on a $300 product doesn’t demonstrate meaningful commitment. Customers will cancel without hesitation because they haven’t invested much.
Asking too much creates friction at checkout. A $250 deposit on a $400 product feels nearly as expensive as just paying full price. You lose the psychological benefit of partial payments.
Not testing different amounts means you’re guessing at optimal deposit levels. Run small test campaigns with 25%, 35%, and 45% deposits on the same product. Measure conversion rates and cancellation rates. The data will tell you what works for your audience.
Technical Pitfalls
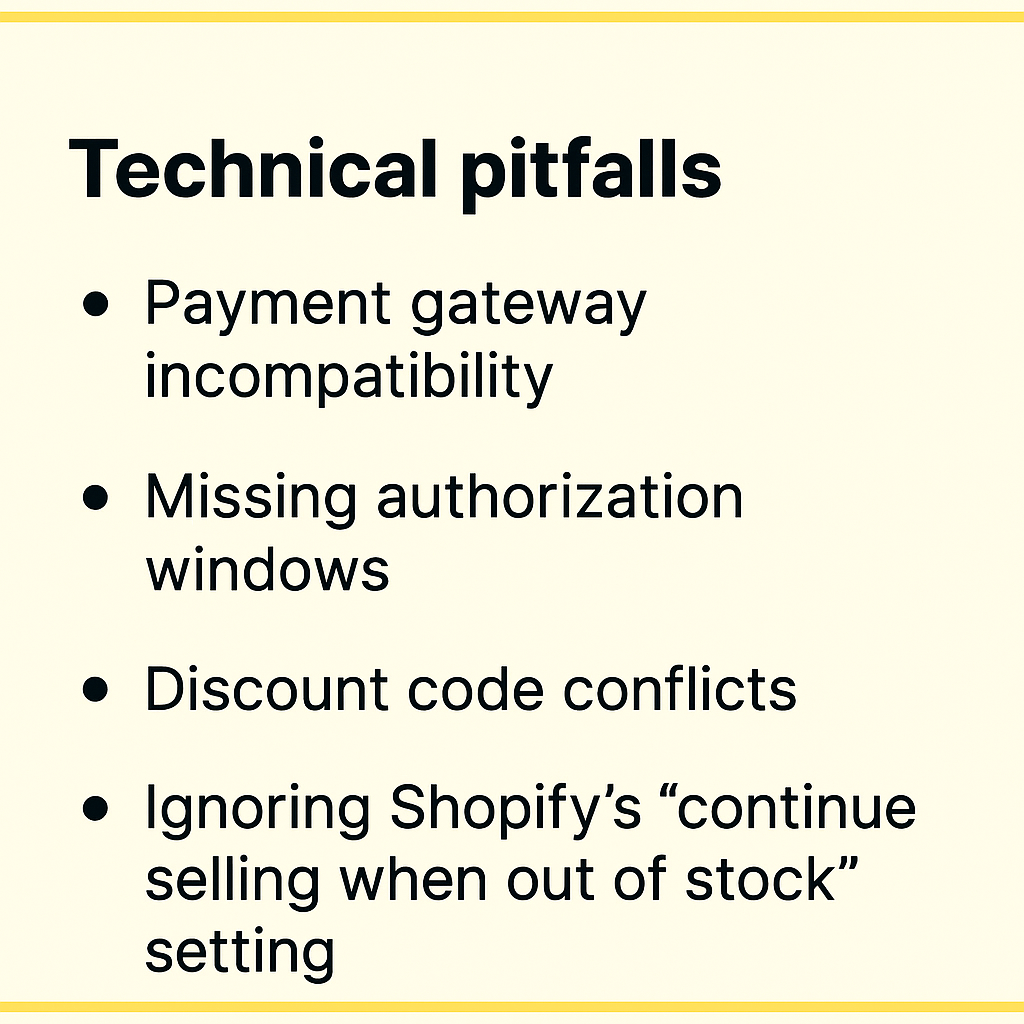
Payment gateway incompatibility is the most common technical issue. If you’re not using
a payment provider that supports Shopify deferred-charge such as Shopify Payments, PayPal, or Authorize.net, vaulted card features won’t work. You’ll need to use capture-only approaches with payment links instead, which creates a different customer experience.
Discount code conflicts can arise with partial payments. Shopify’s “buy X, get Y” style discounts aren’t yet supported by some pre-order apps. If you rely heavily on these discount types, test compatibility before launching campaigns.
Ignoring Shopify’s “continue selling when out of stock” setting causes checkout failures. Pre-order products need this setting enabled so customers can purchase when stock is at zero. Good pre-order apps handle this automatically, but if you’re building custom solutions, it’s easy to miss.
Customer Experience Issues
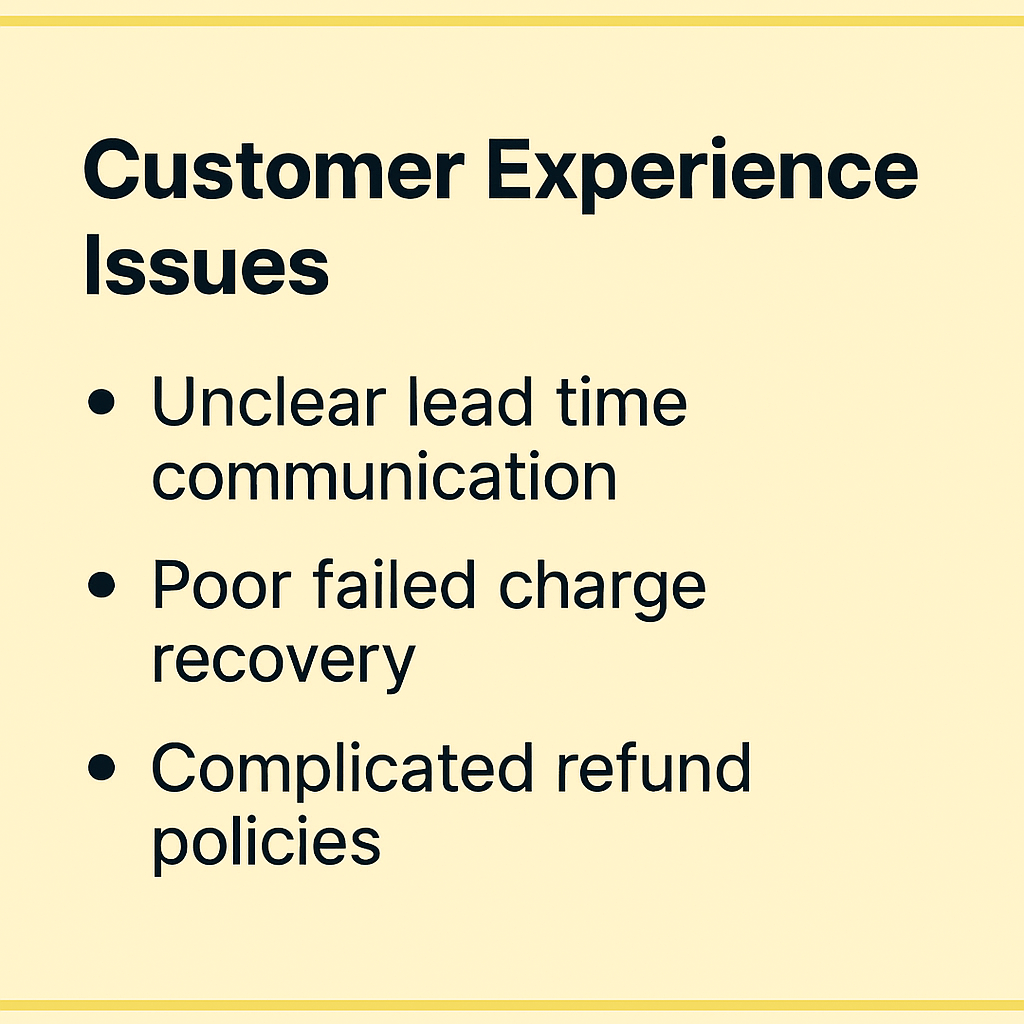
Unclear lead time communication on product pages leads to unrealistic expectations. If you say “ships soon” and then customers wait three months, they’ll be unhappy even if the product itself is perfect. Specific timelines set accurate expectations.
Poor failed charge recovery loses revenue unnecessarily. If charges fail and you just cancel orders without giving customers a chance to update payment methods, you’re leaving money on the table. Simple recovery emails can save 30-50% of failed charges.
Complicated refund policies create support burden. If customers don’t understand whether they’re getting deposits back, remaining balances back, or something else, they’ll contact support repeatedly. Clear refund language prevents this.
Frequently Asked Questions
Can Shopify take partial payments without apps?
Shopify doesn’t offer native partial payment functionality for pre-orders. While you can create manual workarounds using separate products and discount codes, these approaches create poor customer experiences and significant administrative overhead.
Specialized apps provide the vaulted card technology, customer portals, and automated workflows that make partial payments practical. The investment in an app quickly pays for itself through reduced support burden and improved conversion rates.
Which payment gateways support deposits?
Shopify Payments, PayPal and Authorize.net currently support the vaulted card technology required for true charge-later and deposit-upfront functionality (although we’ve heard reports of Cybersource recently being supported). Other payment providers don’t offer the ability to securely store card details and charge them at a later date without re-entering information.
If you use a different payment gateway, you can still offer partial payments through capture-only approaches using payment links. When it’s time to collect the remaining balance, you send customers a link to complete payment. This creates an extra step but works with any payment provider.
What’s the ideal deposit percentage?
Based on industry data and merchant testing, 20-50% is the optimal deposit range for most products. The specific amount within that range depends on your product price point, lead time, and customer base.
Lower-priced products ($200-$400) work well with 25-35% deposits. Higher-ticket items ($500-$1,500) can go lower, around 20-30%, because the absolute dollar amount is still significant. Custom or made-to-order products justify 40-50% deposits given the resources you’re investing.
The only way to know for certain is testing different levels with your specific audience.
How do I handle failed charges?
When a charge fails, implement a recovery workflow:
First, send an immediate notification email explaining what happened and providing a link to update payment information. Keep the tone helpful, not accusatory.
Second, automatically retry the charge after 24 hours. Many soft declines succeed on retry once banks process pending transactions.
Third, if the second attempt fails, send another notification with a deadline. “We’ll need to cancel your order by [date] unless we can process payment.”
Fourth, give a grace period of 3-5 days total before cancelling. This balances customer convenience with your need to manage inventory.
Apps like PreProduct automate this entire workflow, reducing manual work and recovering revenue that would otherwise be lost.
Can I offer installment plans for pre-orders?
Yes, multi-step payment plans work well for pre-orders, particularly cost-sensitive customers and high-ticket items. These plans charge customers in multiple installments, like 3 payments of $200 instead of $600 upfront.
The system works by letting customers select their preferred number of installments at checkout. You configure the payment frequency (daily, weekly, or monthly), maximum installment count, and optional discounts for customers who choose payment plans. The app automatically processes charges on the defined schedule.
Available for Shopify Plus merchants and non-Shopify platforms, automated installment scheduling handles all charge timing. Customers see a selector above the pre-order button where they choose how many payments they want, and they access a portal showing payment history, outstanding balances, and upcoming charge dates.
For merchants on standard Shopify plans, manual installment approaches work. You trigger each charge manually when the next payment is due. This requires more oversight but achieves the same outcome.
What happens if I need to refund a deposit?
Refunding deposits works like any other Shopify refund. Process the refund through your Shopify admin or pre-order app, and the funds return to the customer’s original payment method within 5-10 business days.
If you’ve already charged the remaining balance, you can refund either the full amount or just a portion, depending on the situation. The refund process itself is straightforward; the complexity is deciding which amount to refund and communicating that clearly to the customer.
Clear refund policies prevent confusion. State upfront: “If you cancel before [date], we’ll refund your deposit in full. After [date], deposits are non-refundable but you can apply them to other products.”
Do deposits work with Shopify discounts?
Most discount types are compatible with partial payments. You can apply discount codes to orders, offer pre-order-specific discounts, and run sales that include deposit-based pre-orders.
The main limitation is Shopify’s “buy X, get Y” automatic discount format, which some pre-order apps don’t yet support. Standard percentage or fixed-amount discount codes work fine.
If you rely heavily on complex automatic discount combinations, test compatibility with your pre-order app before launching campaigns. Most common discount use cases work without issues.
Conclusion
Shopify partial payments can transform how you capture pre-order revenue. From the 1 million+ pre-orders report data to the rise of BNPL services like Klarna and Affirm. Partial payments are a great way to reduce friction and increase conversion rates.
The key takeaways:
Vaulted cards eliminate authorization periods, giving you complete control over charge timing regardless of lead times.
Payment timing flexibility lets you match your cash flow needs to customer expectations. Choose charge-upfront for immediate revenue, charge-later for maximum conversion, or deposits for balanced commitment.
Strategic deposit amounts based on product type and price point improve conversion while demonstrating real customer commitment.
App-based solutions solve the operational complexity, poor customer experience, and support burden of manual approaches.
Whether you’re launching new products, managing restocks, or selling made-to-order items, partial payments reduce friction while securing revenue before inventory arrives.
Ready to start taking Shopify deposits and partial payment pre-orders? PreProduct supports charge-upfront, charge-later, deposits, and multi-step installment plans with automated workflows and comprehensive customer communications.
Pre-sell With PreProduct
7 day free trial with all plans