Understanding backorder vs out of stock is essential for any ecommerce merchant facing inventory gaps. Stockouts cost retailers $1.2 trillion globally every year in direct lost sales alone. When customers land on a product page and can’t buy what they want, the consequences ripple through your revenue, customer loyalty and brand perception.
But there’s more than one way to handle out of stock ecommerce situations. You can mark products as “out of stock” and block purchases entirely. You can accept backorders and let customers buy now for later delivery. Or you can take a third approach that some merchants overlook: pre-orders.
Understanding the difference between backorder vs out of stock (and knowing when each makes sense) can mean the difference between capturing revenue and losing customers to competitors. By the end of this guide, you’ll know exactly which approach fits your situation.
What Does Backorder Mean? Understanding Backorder Meaning
So what does backorder mean exactly? A backorder happens when a product is temporarily unavailable but customers can still purchase it. The backorder meaning is simple: the item isn’t in your warehouse right now, but you’ve confirmed that more inventory is coming. Customers place their order, you take payment (or vault their card), and you ship once stock arrives.
Think of backorders as a promise: “We don’t have it today, but we will soon, and we’re holding your spot.”
The key characteristics of a backorder:
- Customers can still purchase the product despite zero inventory
- Restocking is confirmed with a known or estimated timeline
- Payment is typically collected upfront or at time of shipment
- Fulfillment is delayed until inventory is replenished
Backorders usually work best for short restocking windows. On average, it takes 14-21 days to fulfill a backorder, though this varies by product and supply chain. The shorter the window, the more willing customers are to wait.
From an operational perspective, backorders let you continue taking orders rather than turning customers away. But they also create fulfillment complexity. You need systems to track incoming inventory, manage customer expectations, and process payments at the right time.
What Does Out of Stock Mean?
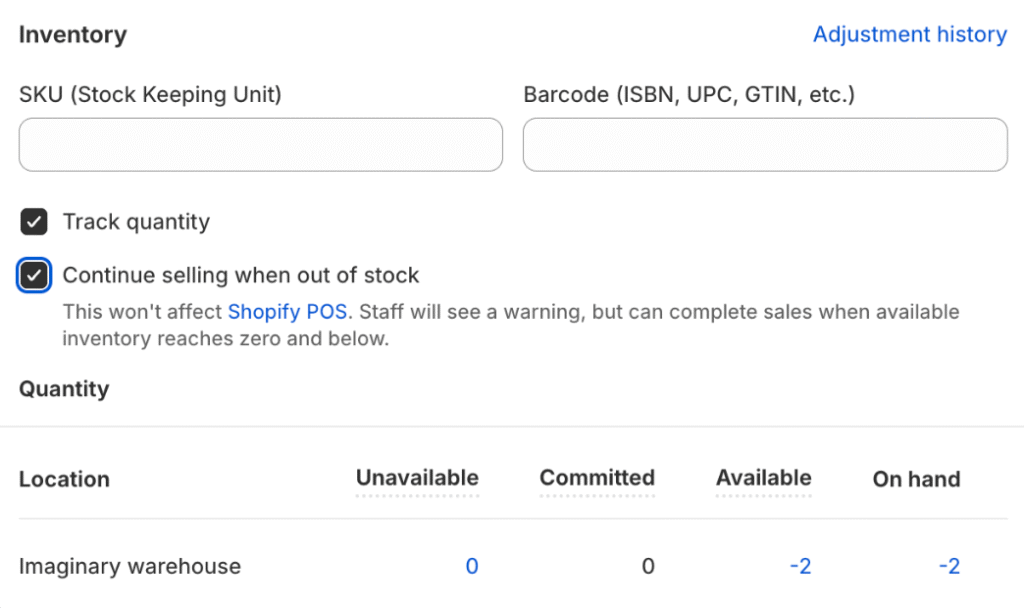
When a product is marked “out of stock,” customers cannot purchase it at all. The buy button is disabled, replaced with a “Sold Out” badge, or the product may be hidden from your store entirely.
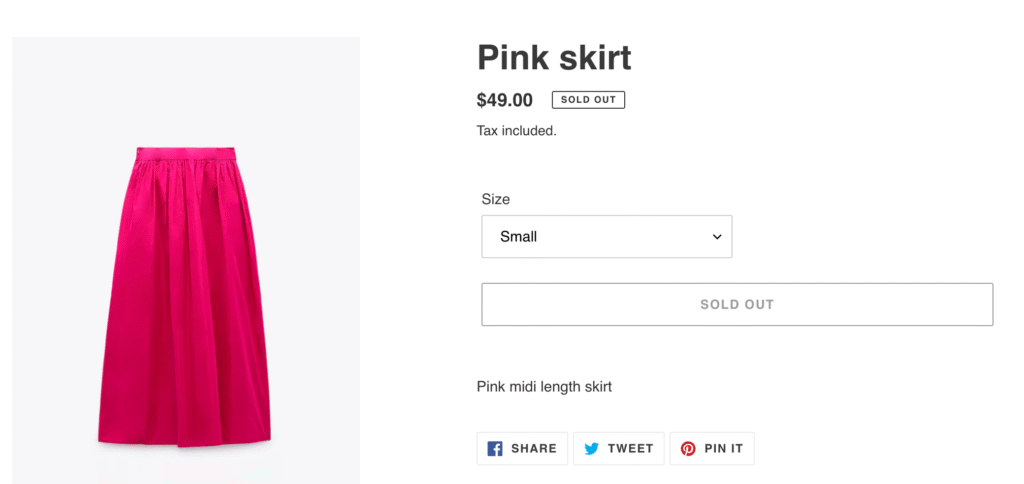
An out-of-stock status signals uncertainty. Unlike backorders, there’s no guarantee the product will return, and no commitment to a timeline. Customers have to wait and hope, or look elsewhere.
The key characteristics of out of stock:
- Customers cannot purchase the product
- Restocking timeline is unknown or uncertain
- No payment is collected
- The product may or may not return
Out of stock is the default setting for most ecommerce platforms when inventory hits zero. It’s the safest approach from a fulfillment standpoint because you’re not making promises you can’t keep. But it’s also the most expensive from a revenue standpoint.
When customers encounter out-of-stock products, 69% abandon their purchase entirely and shop elsewhere. And 43% will go directly to a competitor. Every “Sold Out” badge is a potential lost customer.
Key Differences Between Backorder and Out of Stock
The fundamental difference comes down to purchase availability and customer commitment. Here’s how they compare:
| Factor | Backorder | Out of Stock |
|---|---|---|
| Can customers purchase? | Yes, with delayed fulfillment | No, purchase blocked |
| Restocking timeline | Confirmed or estimated | Unknown or indefinite |
| Payment timing | Upfront or deferred | None |
| Customer expectation | “My order is coming soon” | “Maybe it will come back” |
| Revenue impact | Preserved (delayed) | Lost |
| Operational complexity | Higher | Lower |
From a customer psychology perspective, the difference is significant. A backorder customer has made a commitment. They’ve decided to buy, entered their payment details and are waiting for delivery. An out-of-stock customer hasn’t committed to anything. They’re still in consideration mode and can easily be distracted by a competitor.
This psychological difference matters for your business. Customers who have already committed are less likely to cancel or shop around. But backorder customers also have higher expectations. They expect clear communication, accurate timelines and a smooth delivery experience.
When to Use Backorders
Backorders work best in specific scenarios where you have confidence in your restocking timeline and customers are willing to wait.
Fast-moving bestsellers
When a popular product sells out faster than expected, backorders let you continue capturing demand. If you have a reliable supplier and predictable restocking timeline, accepting backorders keeps sales flowing while you wait for the next shipment.
Core catalog items
For products that are a permanent part of your catalog, backorders make sense during temporary stockouts. These are items you’ll definitely restock, and customers know they’re getting a product that’s proven and available.
Short restocking windows
Backorders work best when the wait time is measured in days or weeks, not months. The sweet spot is typically 2-6 weeks. Beyond that, customer patience wears thin and cancellation risk increases.
Reliable supplier relationships
Only offer backorders when you’re confident in your restocking timeline. If your supply chain is unpredictable, making promises you can’t keep will damage customer trust more than simply saying “out of stock.”
When NOT to use backorders:
- Seasonal items unlikely to restock this season
- Products with uncertain supply chains
- Wait times beyond 8-12 weeks
- Items being discontinued or phased out
The risk with backorders is overpromising. If you tell customers their order will ship in two weeks and it takes six, you’ve created a support headache and potentially lost their trust for future purchases.
When to Mark Products Out of Stock
Sometimes the safest approach is to be upfront: this product isn’t available, and you can’t make promises about when it will return.
Discontinued products
If you’re not bringing a product back, don’t pretend otherwise. Mark it out of stock (or redirect to an alternative) and move on. Accepting backorders for discontinued items is a recipe for refunds and complaints.
Uncertain restocking timelines
When you genuinely don’t know when inventory will arrive, it’s better to be honest. Telling customers “out of stock” is more trustworthy than making up a timeline you can’t guarantee.
Supply chain disruptions
Major supply chain issues can make restocking timelines impossible to predict. During periods of uncertainty, marking products out of stock protects both customer expectations and your operations team.
Quality or compliance issues
If a product is unavailable due to quality concerns or regulatory issues, you need to resolve those before selling again. Out of stock is the appropriate status while you work through the problem.
The downside of out of stock is lost revenue. But the upside is operational simplicity and honest customer communication. Sometimes it’s better to lose a sale today than damage trust with a broken promise.
For Shopify merchants dealing with stockouts, we’ve written a comprehensive guide on what to do when products are out of stock on Shopify, covering strategies from hiding products to setting up notifications. Understanding Shopify backorder functionality is crucial for maintaining sales during inventory gaps.
The Third Option: Preorder vs Backorder
Here’s where most backorder vs out of stock discussions fall short. They treat these as the only two options when there’s a third approach that often works better for ecommerce: pre-orders.
Understanding preorder vs backorder differences is crucial for choosing the right strategy. Pre-orders are different from backorders in a few important ways:
- Proactive vs reactive: Pre-orders are typically used for new products or planned restocks, while backorders are reactive responses to unexpected stockouts
- Longer acceptable timeframes: Customers willingly wait months for pre-orders but lose patience after a few weeks with backorders
- Different psychology: Pre-order customers are excited early adopters; backorder customers are frustrated buyers whose item wasn’t available
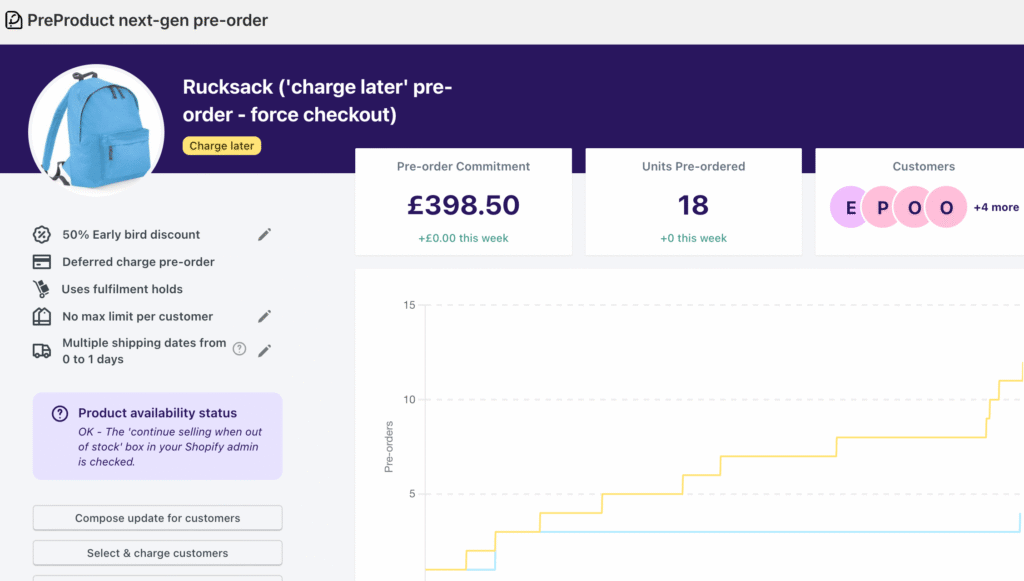
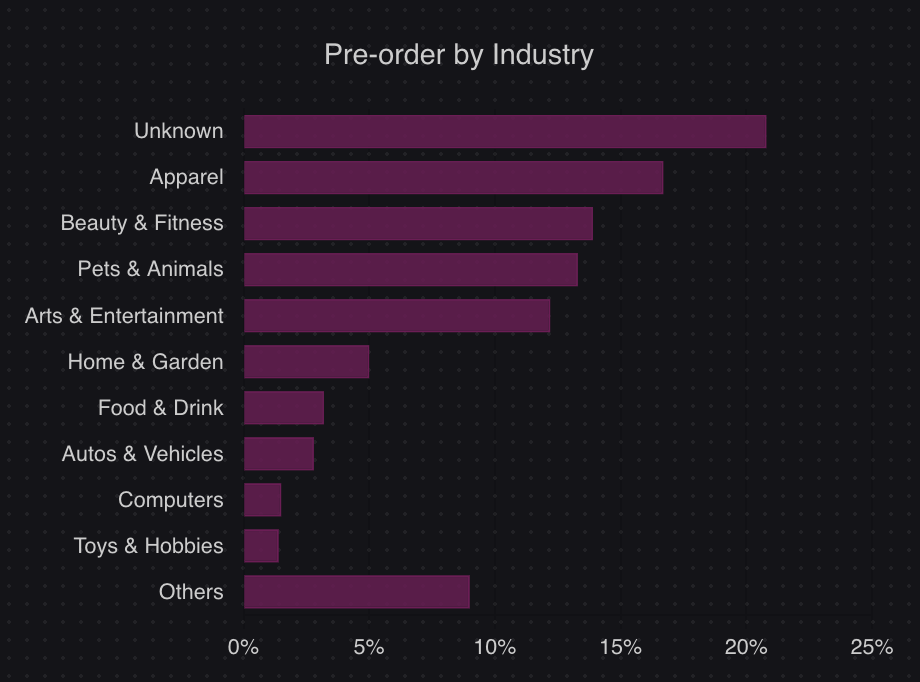
The data backs this up. According to our analysis of over one million pre-orders generating $85M+ in revenue, the most common pre-order shipping timeframe is 121-150 days. That’s 4-5 months. Customers don’t just tolerate these wait times, they expect them.
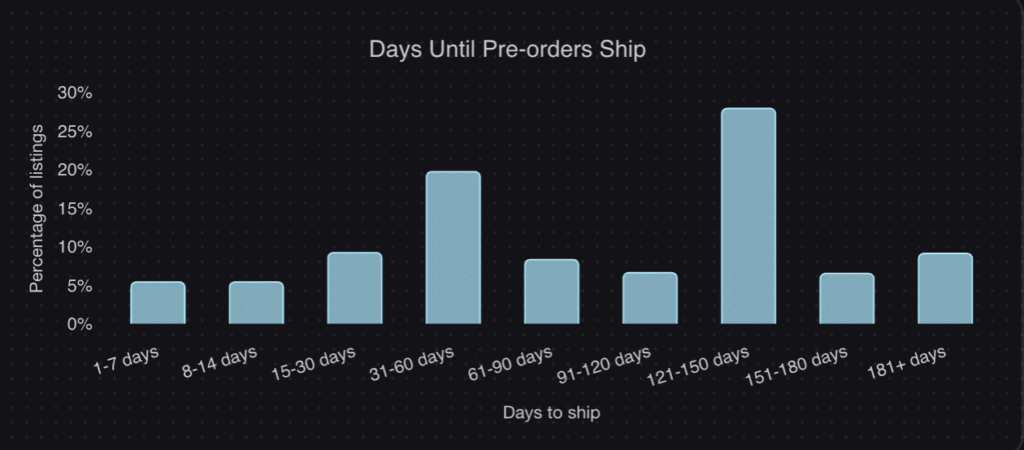
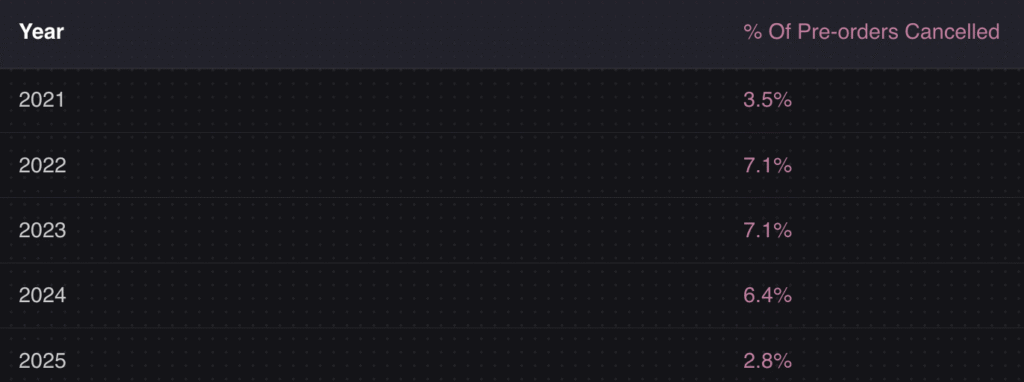
The average pre-order cancellation rate? Just 5.4%. Despite wait times that would be unacceptable for a backorder, pre-order customers stay committed because they’ve made a conscious choice to wait for something they want.
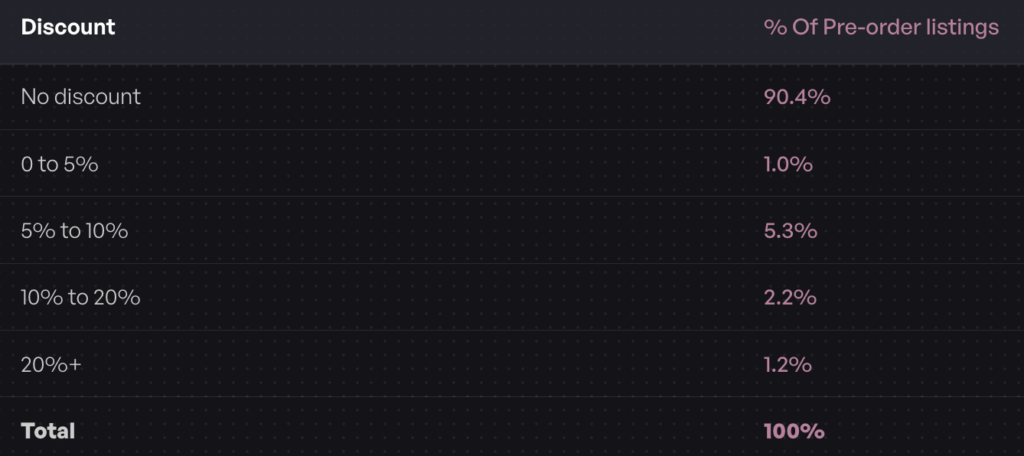
Another insight: 90.4% of pre-orders carry no discount. Customers aren’t waiting because they got a deal. They’re waiting because they want early access to the product. This is fundamentally different psychology than a backorder, where customers often feel they’re being inconvenienced.
When pre-orders work better than backorders:
- New product launches (build anticipation before inventory arrives)
- Restocks with longer lead times (4+ weeks)
- Made-to-order or custom products
- Limited edition drops (create scarcity and urgency)
- Seasonal products returning next season
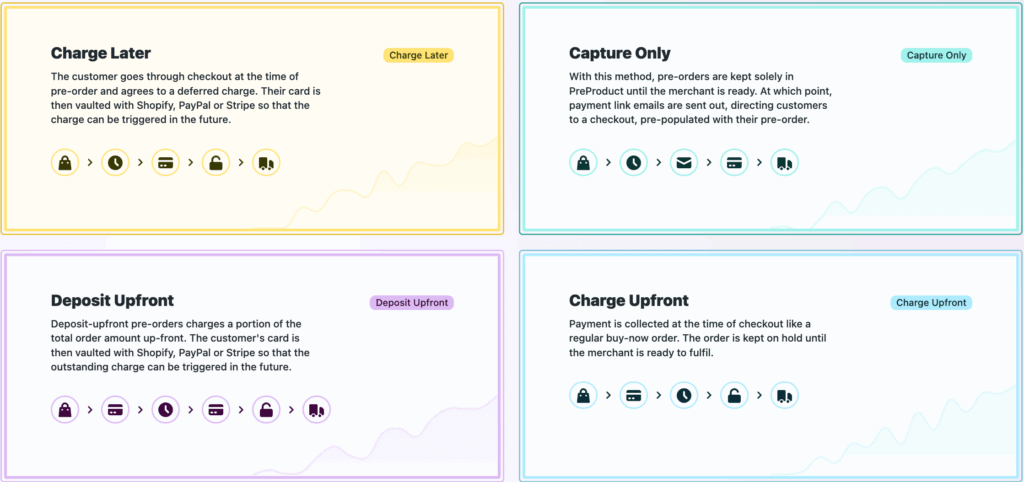
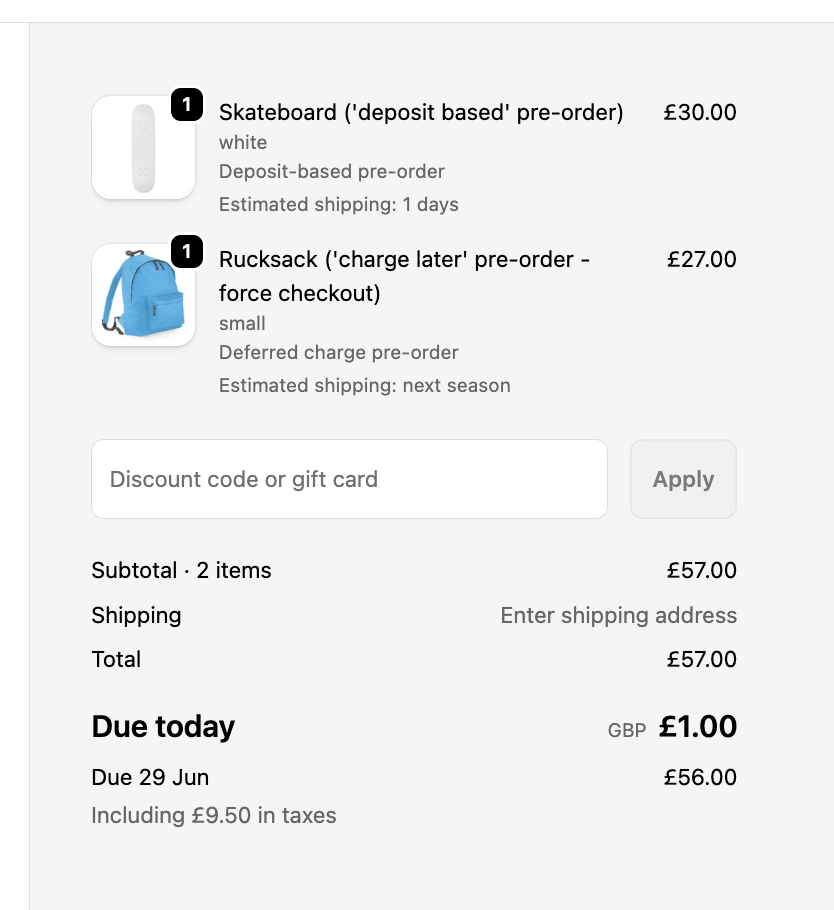
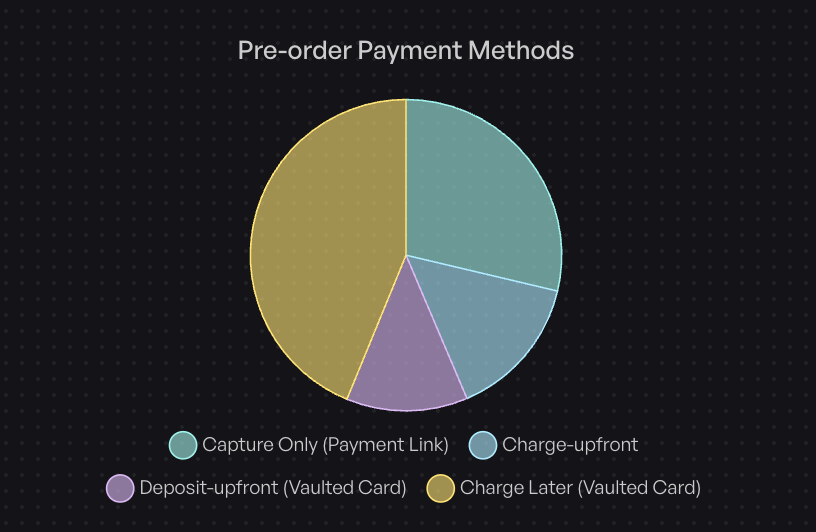
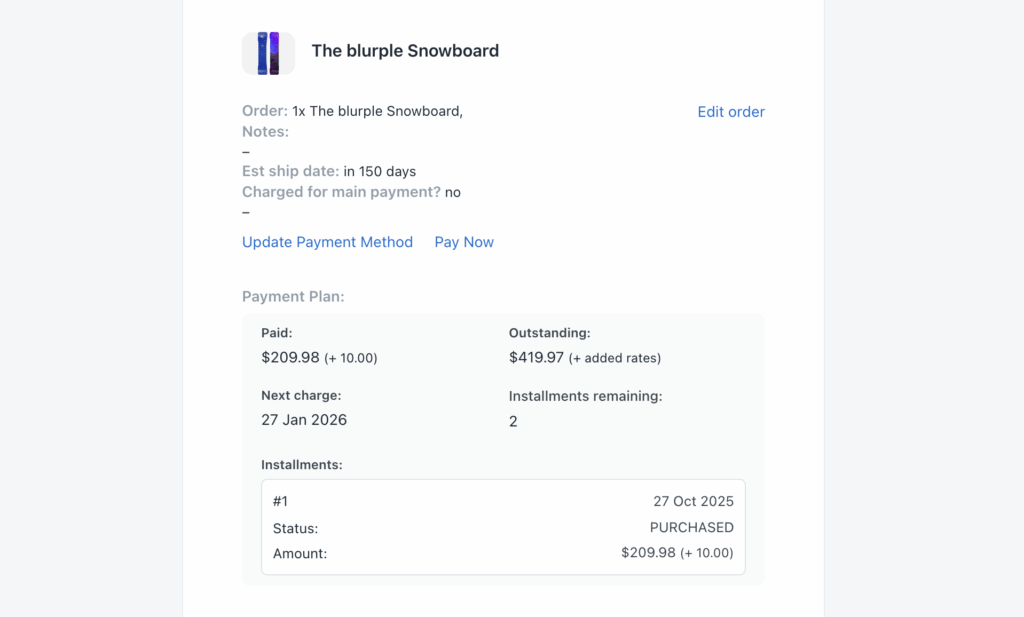
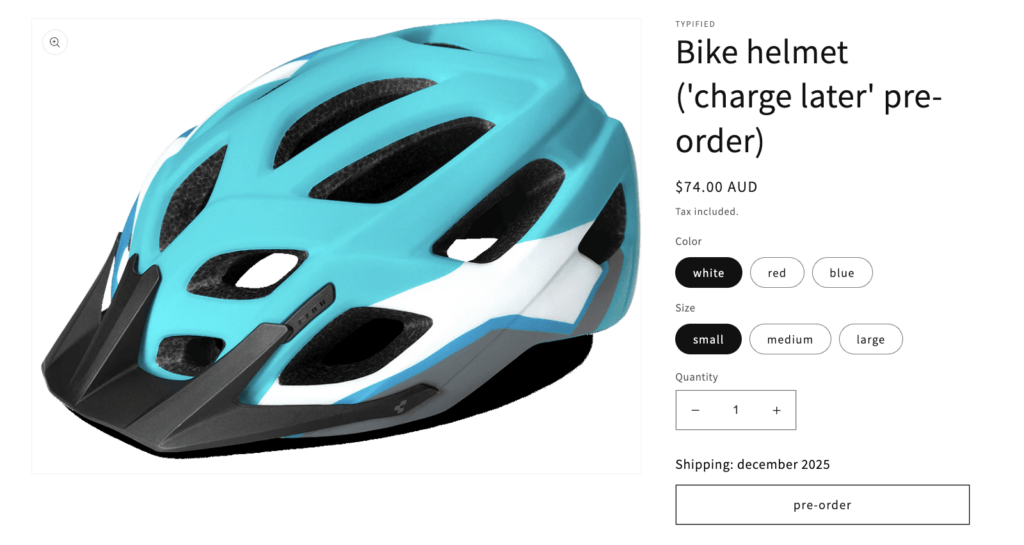
Pre-orders also give you payment flexibility that backorders typically don’t. With charge-later pre-orders, you can vault a customer’s card at checkout and charge when you’re ready to ship. This reduces refund risk for longer timelines while still capturing customer commitment.
For a deeper comparison, see our guide on pre-orders vs backorders vs waitlists.
How to Choose Between Backorder vs Out of Stock
With three options available, how do you decide which approach fits your situation? Here’s a decision framework based on the most common backorder vs out of stock scenarios:
| Scenario | Best Approach | Why |
|---|---|---|
| Known restock date (2-4 weeks) | Backorder | Short wait, high confidence, keep sales flowing |
| Known restock date (4-12 weeks) | Pre-order with charge-later | Longer wait needs proper expectation-setting |
| Unknown restock timeline | Back-in-stock notification | Don’t make promises you can’t keep |
| New product launch | Pre-order | Build anticipation, capture early demand |
| Seasonal product (returning later) | Pre-order or notification | Depends on how far out the restock is |
| Product being discontinued | Out of stock + redirect | Don’t accept orders you can’t fulfill |
| Made-to-order items | Pre-order with deposit | Collect commitment before production |
| High-ticket items | Pre-order with deposit | Reduce risk for both parties |
The key questions to ask:
- How confident are you in the restock timeline? High confidence = backorder or pre-order. Low confidence = out of stock or notification.
- How long will customers wait? Under 4 weeks = backorder probably works. Over 4 weeks = consider pre-orders with proper messaging.
- Is this a new launch or a restock? New launches benefit from pre-order anticipation. Restocks can go either way.
- What’s the price point? Higher-ticket items may warrant deposit-based pre-orders to secure customer commitment.
- How will this affect your operations? Backorders and pre-orders both require systems to track orders, manage fulfillment holds and communicate with customers.
Best Practices for Shopify Backorder and Out of Stock Management
Regardless of which approach you choose, clear communication is essential. Customers can handle waiting. What they can’t handle is uncertainty. Here are best practices for managing backorder vs out of stock situations in your store.
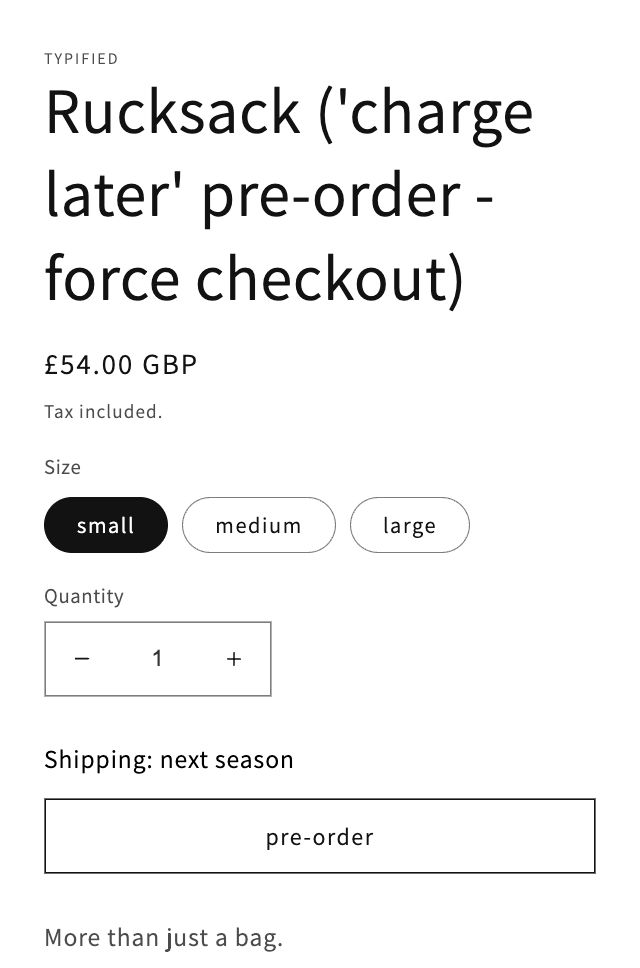
Set expectations on the product page
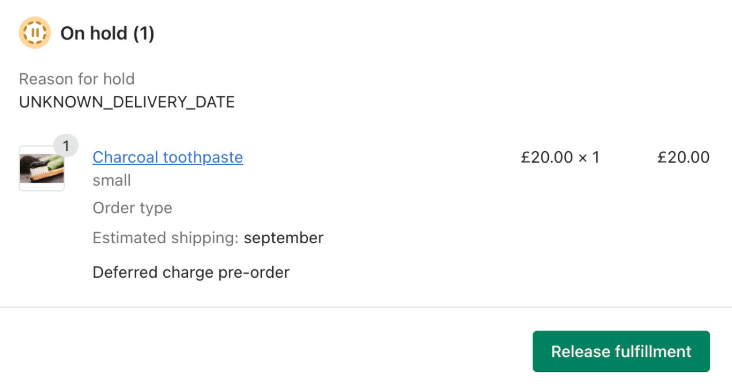
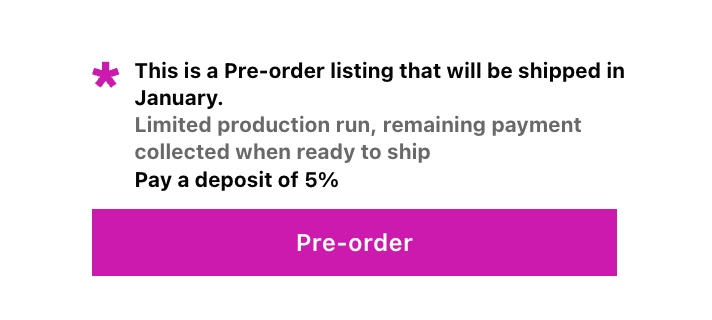
Don’t bury the shipping timeline in fine print. If an item is on backorder or pre-order, make the expected delivery date prominent. “Ships in 2-3 weeks” or “Expected ship date: April 15” gives customers the information they need to decide.
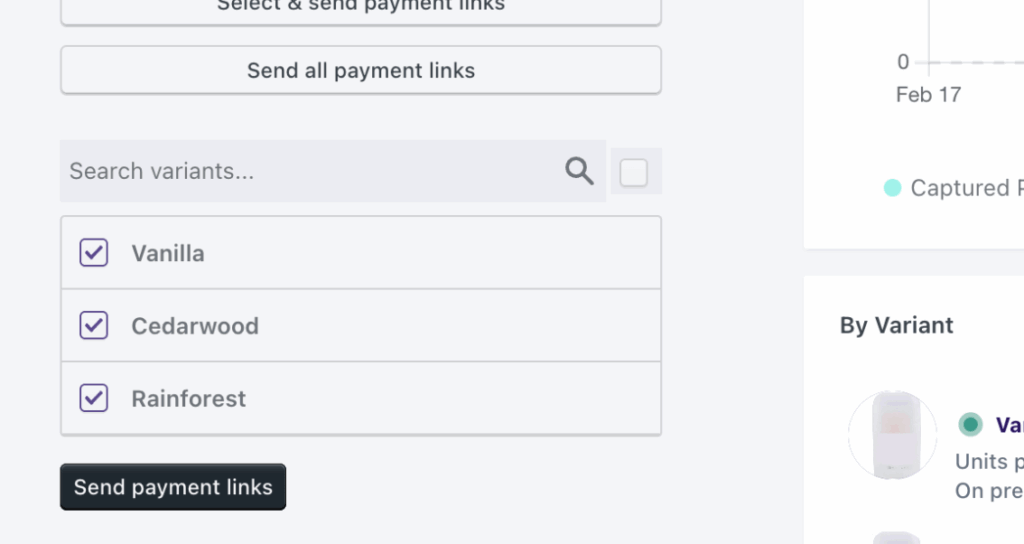
Use dedicated buttons and messaging
A generic “Add to Cart” button doesn’t tell customers they’re committing to a delayed order. Use clear labels like “Pre-order Now” or “Backorder” to signal that this isn’t a standard purchase.
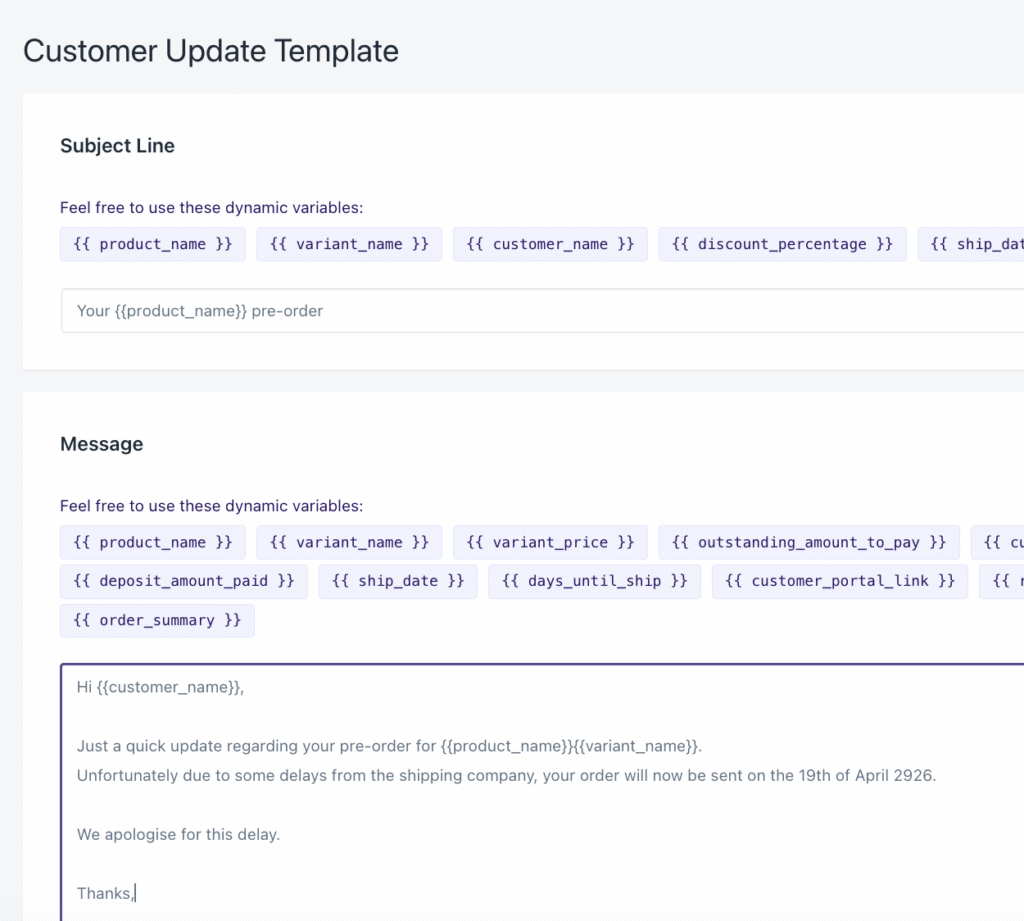
Send automated updates
Keep customers informed throughout the wait. A simple “Your order is still on track to ship next week” email can prevent support tickets and build trust. If timelines change, communicate proactively.
Consider payment timing carefully
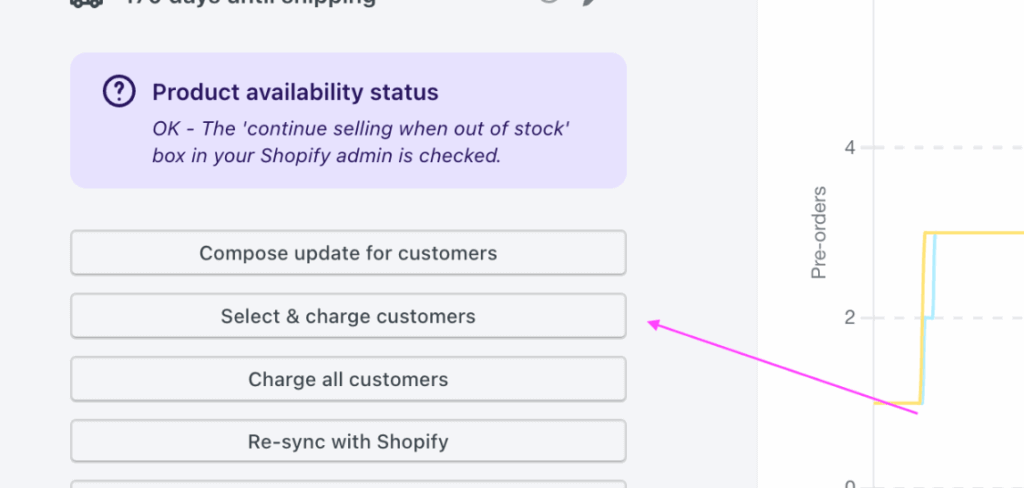
For short backorders, charging upfront is usually fine. For longer waits (especially 30+ days), consider charge-later options where you vault the customer’s card and charge closer to shipment. This reduces refund requests and expired card issues.
Our data shows that 43.8% of pre-order listings use charge-later, which suggests merchants are finding value in delaying payment for longer lead times.

Forecast demand to prevent stockouts
The best backorder strategy is avoiding backorders in the first place. Use inventory forecasting tools and pre-order inventory management to predict demand and set reorder points that give you buffer before running out.
Don’t overcommit
If you’re not sure how much inventory you’ll receive, consider capping backorders or pre-orders to avoid overselling. It’s better to turn away some orders than to cancel orders after customers have committed.
Putting It All Together: Backorder vs Out of Stock
The backorder vs out of stock decision isn’t just about definitions. It’s about choosing the right tool for your specific out of stock ecommerce situation.
Backorders keep sales flowing during short, predictable stockouts. They work best when you have confidence in your restocking timeline and customers are willing to wait a few weeks.
Out of stock is the honest approach when you can’t make promises. It protects customer trust and operational simplicity, even though it means lost sales in the short term.
Pre-orders offer a third path that many merchants overlook. When comparing preorder vs backorder options, pre-orders handle longer timelines, build anticipation for new products and give you payment flexibility that backorders don’t. For most ecommerce scenarios beyond simple restocks, Shopify pre-orders are worth considering.
The common thread across all three approaches? Communication. Customers can handle delays when they know what to expect. What they can’t handle is uncertainty, broken promises or radio silence.
If you’re running a Shopify store and want to explore pre-orders as an alternative to Shopify backorder management, our guide on how to do pre-orders on Shopify covers the full setup process. And for managing inventory across pre-orders and regular stock, see our guide on managing pre-order inventory in Shopify.
Whatever approach you choose, the goal is the same: capture demand, keep customers informed and deliver on your promises.
Pre-sell With PreProduct
7 day free trial with all plans