Prefer a video? checkout the Youtube version of this article here.
1. Why should you offer partial payments/deposits?
1.1 What are Shopify deposit payments?
Offering Shopify deposit payments as an option allows the store to charge a portion of the sale up-front, basically the customer pays a required partial payment of the cost of the goods/services they purchase to secure the pre-order.
1.2 Benefits of deposit based pre-orders
- Increases the window of time that you can acquire orders.
- Accepting deposits means you can pre-sell and start receiving cash-flow before the product is available.
- Customers have a stronger commitment to the pre-order as they have paid a deposit.
- Split payments can make the financial outlay easier for customers.
1.3 Deposits in the real world
An example of Shopify deposit payments from the real world is the Holochain Foundation. They harnessed the power of deposits and split payments in their rollout of a new decentralised Web 3 platform. Charging an upfront amount to pay for the HoloPort hardware from their audience ahead of the final shipping date. This meant they were in complete control of when to charge the remaining payment and ship out the HoloPorts. Flexibility like this can come in extra handy with more ambitious product launches like this one.

2. Adding Shopify deposit payments manually
2.1 Intro
It is possible to start collecting deposit pre-orders manually without installing any apps or paying a developer to modify your theme, through a very bare-bones approach.
This would not be our recommended approach for a few reasons; both pros and cons are highlighted below. If you do want to go ahead with adding Shopify deposit payments manually the steps are also outlined below.
2.2 Pros and Cons of manual deposits (split payments via multiple products)
Pros
- Free of charge.
- Stays within Shopify’s admin.
Cons
- Bad customer experience due to lack of communication touch points.
- Bad customer experience due to email instructions at payment step as opposed to one click link.
- A lot of time consuming manual work in Shopify, meaning staff expense and possible room for error.
- Can only safely support purchases of 1 with a deposit (due to discount code).
- No dedicated analytics on who’s paid a deposit and who’s paid in full.
- No tagging or deposit specific segmenting in Shopify.
2.3 Steps for setting up manual Shopify deposits
- Create a new Shopify product that will be your ‘deposit’. For example, call it ‘A test product – deposit’ (in the description explain your deposit process and terms).
- Make sure the product isn’t marked as a ‘physical product’ in Shopify’s product admin. This is so shipping isn’t charged by default.
- Collect payments and orders of this deposit product.
- Now list your main product in Shopify with its full price.
- When you’re ready to charge customers the outstanding amount. Create a Shopify deposit code for the price of your deposit product, it’s important to make it only applicable to the main product that you’ll be charging for. Also, look at limiting the usage to 1 use per product per customer, so it’s not abused.
- Now go into the ‘orders’ section of Shopify and filter by the deposit product. You can now click on each of these orders, copy the customer’s name and email into a third-party email provider, along with the discount code from step 5 and a link to your main product.
3. Adding Shopify deposit payments via Shopify deposit apps
3.1 Intro
There are a few different Shopify apps available that will allow your store to take deposits. Both a deposit management app or a pre-order app like PreProduct will allow you to take deposits, with each app offering a variety of features and options.
It’s essential to carefully assess which one aligns best with your business needs.
We believe one of the best Shopify deposit apps is our app PreProduct (surprised?), which has a holistic deposit system that works through your existing Shopify checkout via Shopify payments or PayPal. It allows you to accept partial payments (based on the amount or percentage you setup when creating the listing), and gives you full control as to when you trigger the remaining payment amount. It also allows you to charge the remaining payment automatically, via our auto charge automation.
3.2 Pros and Cons of running deposits through PreProduct
Pros
- Ensure customers are committed to their pre-orders.
- Receive some money paid upfront, to assist with cash flow.
- Email campaigns to keep customers in the loop and engaged throughout the pre-order process.
- Great customer experience with email communication and deferred charges or one click payment links.
- More automated process so less manual work and room for error.
- Products on pre-order will automatically gain the Shopify tag ‘pre-order’ and deposit products will gain the tag ‘deposit’ to help with filtering in your Shopify admin.
- A user interface to choose which of your products/variants will be on pre-order and when.
- A designated dashboard for your pre-orders, without regular orders being mixed in and analytics to show number of orders received, and number who have paid.
- Third-party customer support, both technical and strategic.
Cons
- PreProduct is a paid app.
- Has to work within the e-commerce platforms constraints.
3.3 Functionality of PreProduct
PreProduct utilises a secure system for your Shopify store so that customers card information is vaulted with your payment processor. Basically when the customer places their pre-order Shopify will vault customers card details. This allows you to initiate payment collection manually on a specified date or automate it as inventory is added to your platform. This feature is a game-changer, particularly for an ecommerce business extensive product catalogs.
3.4 Steps for setting up a PreProduct deposit listing
We have a dedicated doc for how to create deposit listings here.
Dashboard (PreProduct app interface)
Navigate to the ‘New Listing’ screen in PreProduct and select/search-for the Shopify product you would like to list.
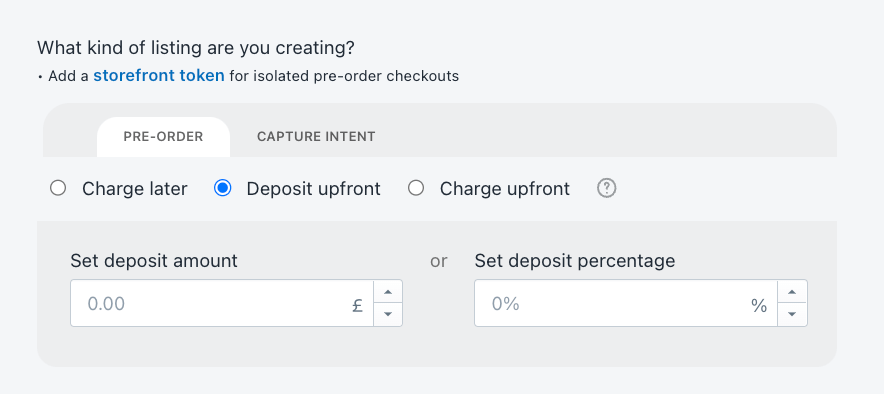
Under ‘What kind of listing are you creating?’, select ‘Deposit upfront’.
Now enter the deposit amount or percentage, which customers will have to pay upfront per item and click ‘create listing’. The amount entered defaults to your store’s primary currency.

You can also offer a discount with deposit based pre-order sales. You can utilize both general discount codes and discounts tailored for pre-orders. However, it’s important to note that as of September 5th, 2023, ‘buy X, get Y’ Shopify discounts are not currently supported.
Front-end
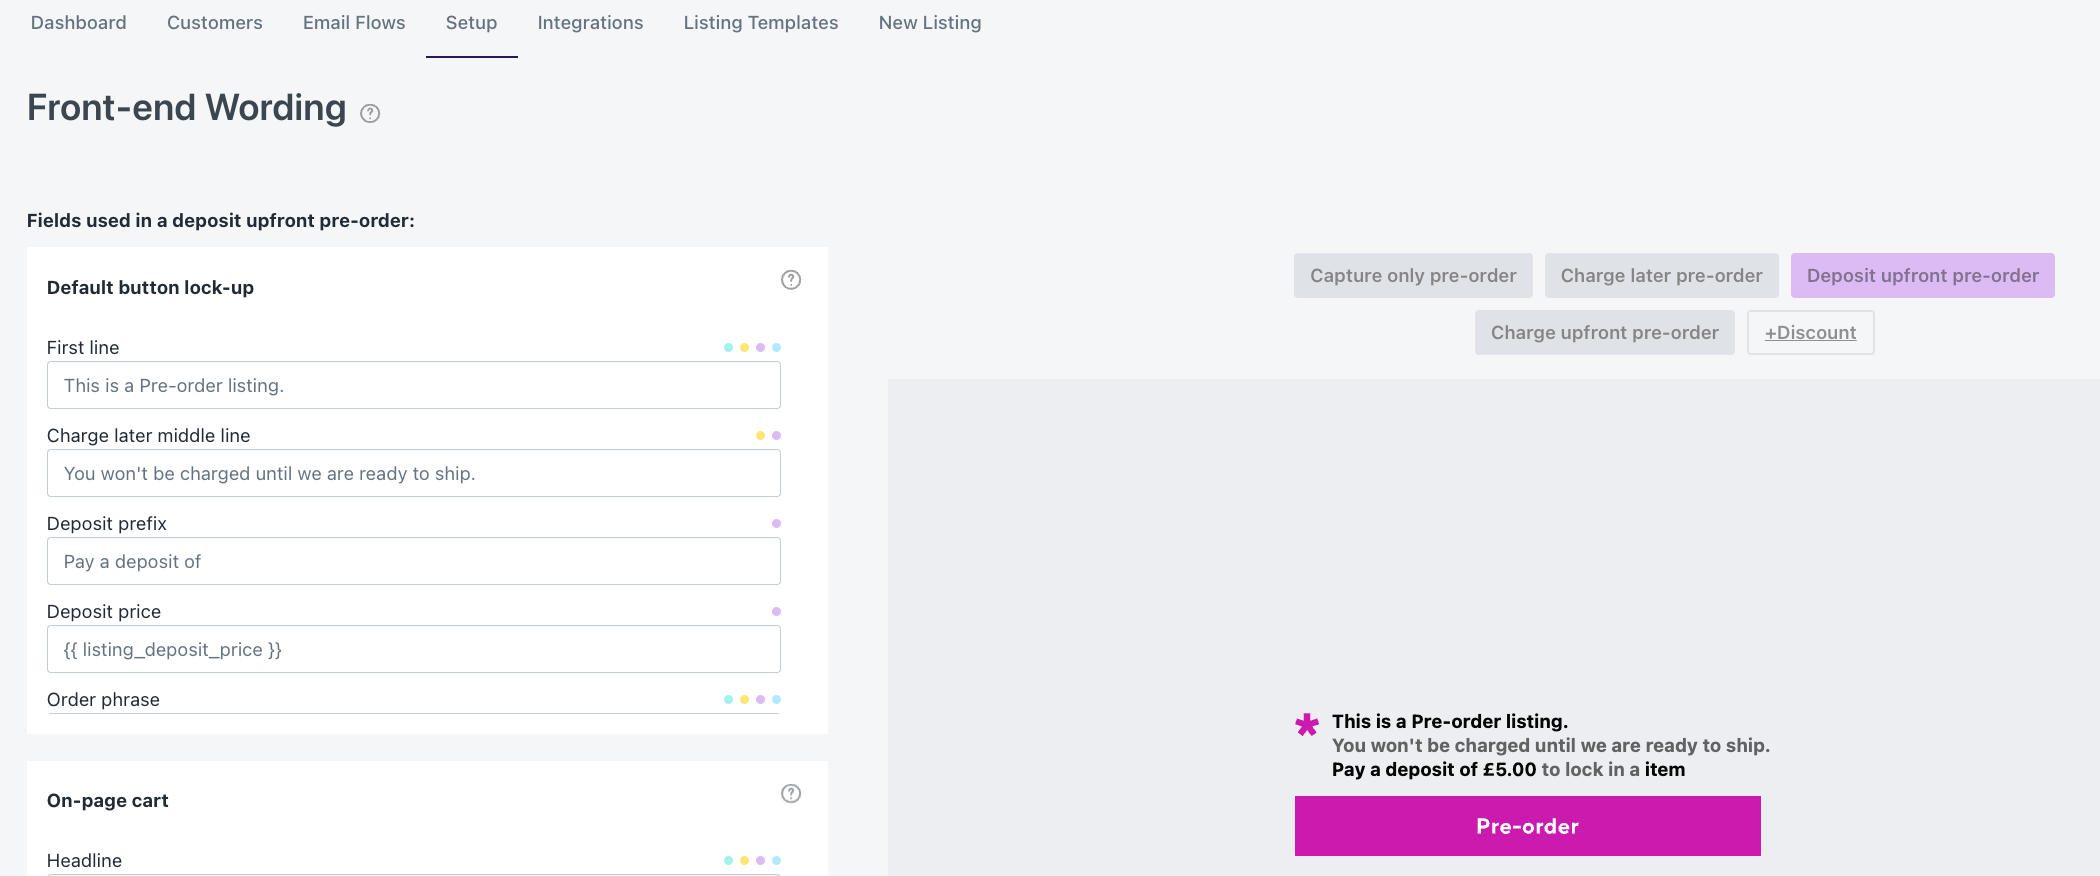
The PreProduct pre-order front-end will explain that a deposit is required, how much it is and then an incentive phrase afterwards.

The wording can all be edited via the ‘customise wording’ screen in PreProduct. Just make sure to select ‘deposit based pre-order’ before editing.

Campaign
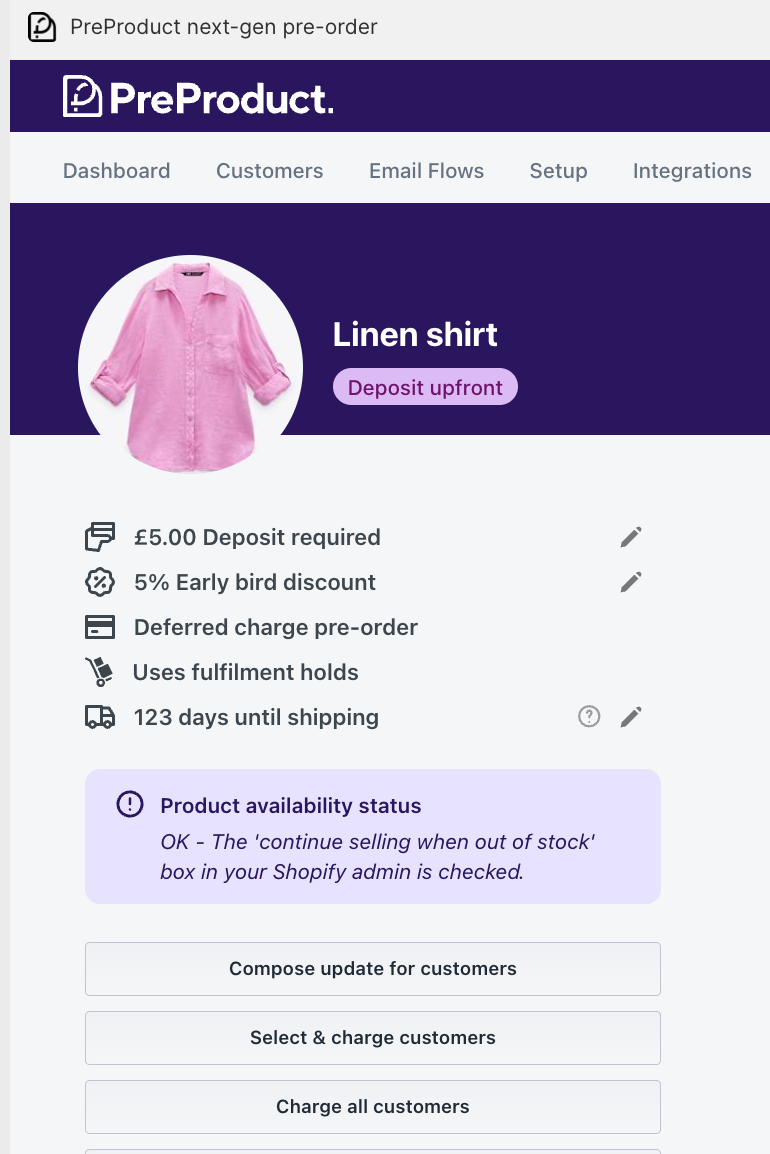
Pre-orders will populate in the PreProduct dashboards, allowing you to view and interact with them.
A solution like PreProduct allows you to ensure customers stay informed throughout the entire process, starting from the product page to shipping, using customized front-end messages, dedicated customer portals, and email campaigns. By entrusting PreProduct to handle communication for deposit pre-orders as soon as orders are made, you not only relieve your customer support team but also maintain a high level of customer satisfaction.
The PreProduct dashboard is also where you trigger the deferred charges. You can either select and charge separate product for specific customers, or you can choose to charge all customers at once.

4. Summary
Offering Shopify deposit payments gives many benefits to Shopify businesses when selling upcoming or out of stock products.
Whether it’s increasing cash flow and gross sales or improving forecasting ability, using PreProduct to offer deposit based pre-orders can help super-charge the above and improve the customer experience, all whilst saving you time in the process.
