PreProduct lets you customise the pre-order button text, the companion wording above it, as well as the on-page cart and checkout wording. It also lets you set colours, imagery and translations.
We have video walkthroughs of the setup screen here and front-end wording screen here.
Customising pre-order wording #
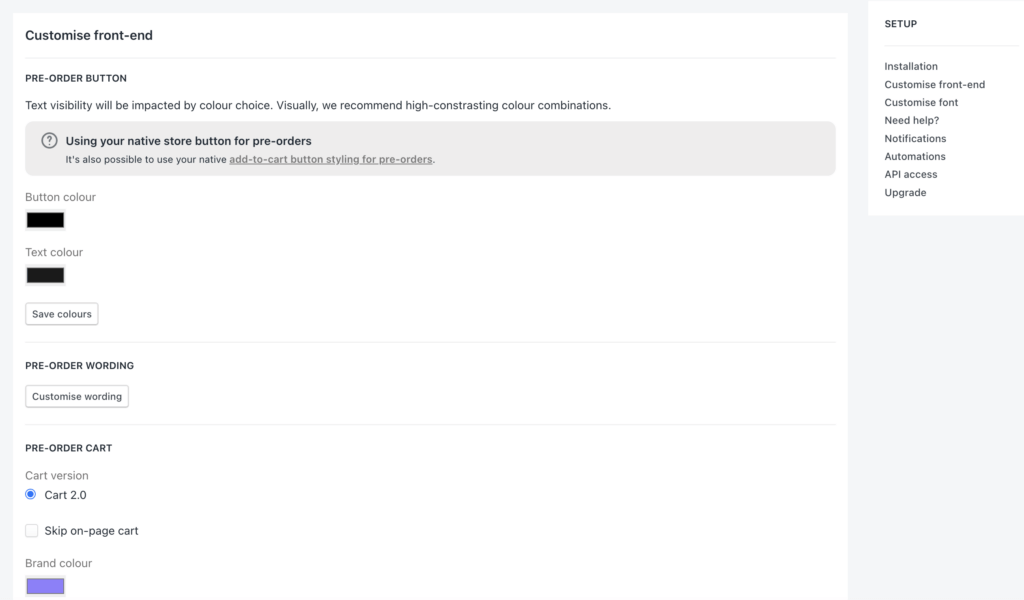
By default, PreProduct will show both a pre-order button, as well as an on-page pre-order cart. You can update the wording for both of these by going to PreProduct’s “setup” screen and clicking the “Customise wording” button.
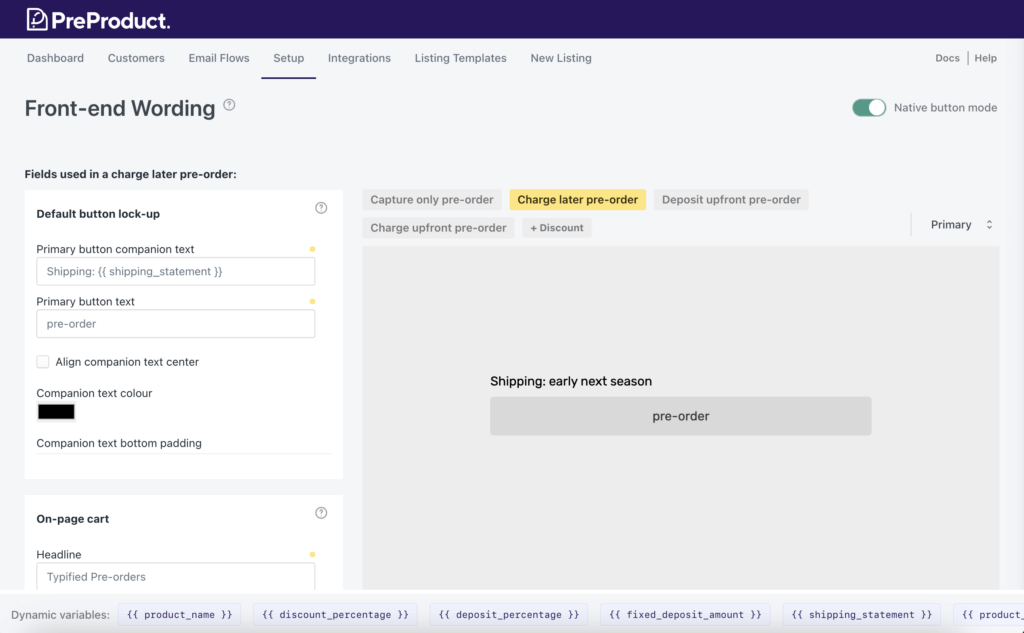
From the “Front-end wording” screen (pictured below) you can update the fields on the left-hand side to see the preview change. Feel free to use the dynamic variables from the bottom of the screen to include product specific information. Once you’re finished, click the “Save” button at the bottom of the screen.
The set of wording used depends on the type of pre-order listing. You can change which set of wording you’re editing by clicking the badges above the preview on the right-hand side. Notice that each pre-order type has a “+ Discount” variant available as well.

Pre-order wording translations #
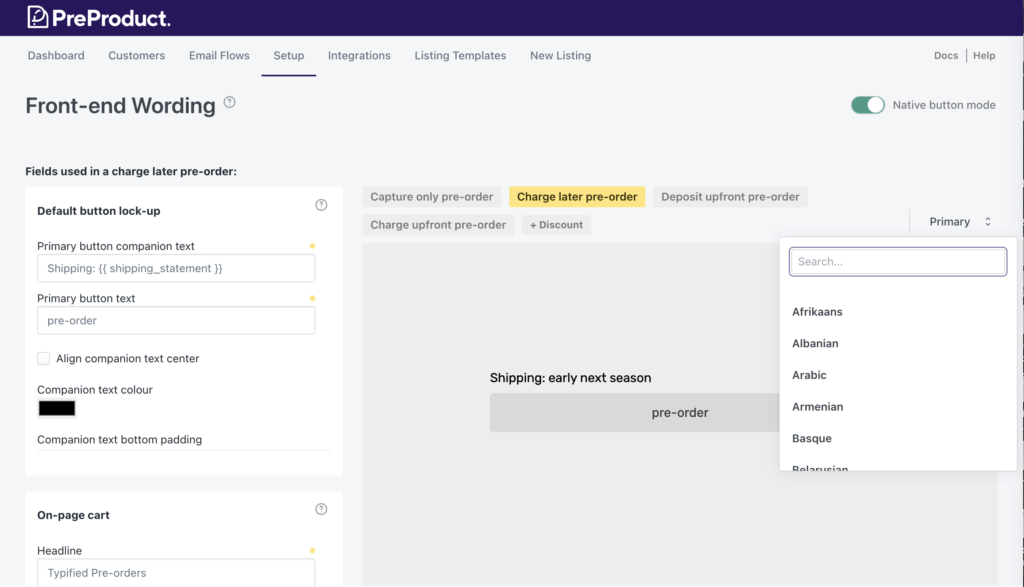
PreProduct lets you set translated versions of the custom wording. To create translations, select a language from the top right dropdown. A translation will be used if it matches a customer’s language, otherwise the store’s primary set of wording will be used.

Native button mode #
If you’re using your site’s native buttons for pre-orders, then you should toggle the ‘native button mode’ switch at the top right of the “Front-end Wording” screen. This will let you edit your button wording, as well as companion text.

Colours #
By default, the pre-order front-end uses black and grey for it’s colour scheme. If you’d like to change the colours, visit PreProduct’s ‘setup’ screen and scroll down to the “Customise front-end” section.

The ‘Setup’ screen #
You can configure some of the above settings, as well as others via PreProduct’s “setup” screen.
