Listing a product for pre-order is done in PreProduct by selecting existing products from your store.
PreProduct can require a line of code to be added to your theme (although the auto-install often stops this being necessary). You can learn more about this here or from the setup screen in the app. To create a new pre-order listing, follow the below steps (we also have a walkthrough video here)
Listing a product for pre-order #
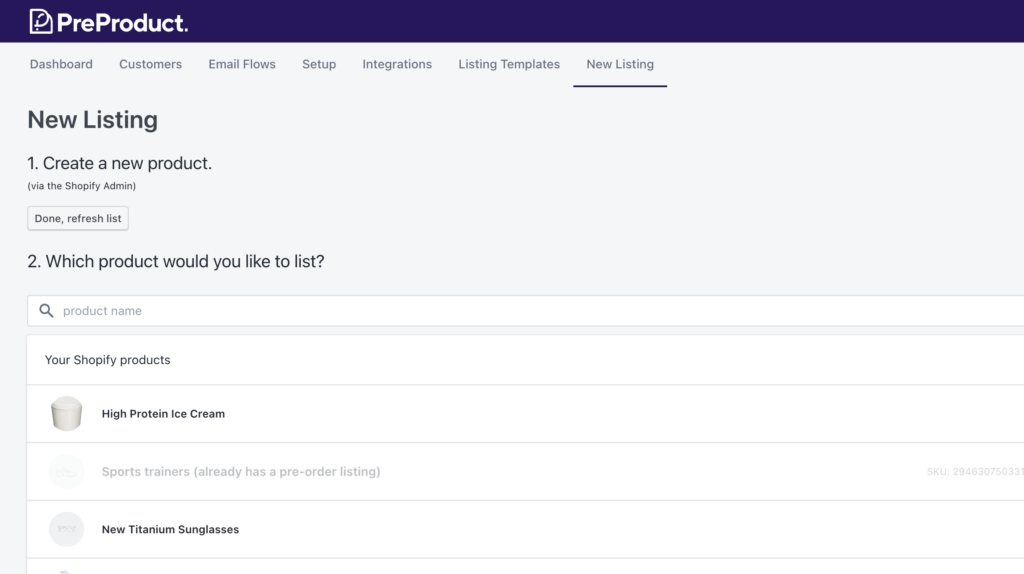
Start by navigating to PreProduct’s ‘New Listing’ screen from the top menu.

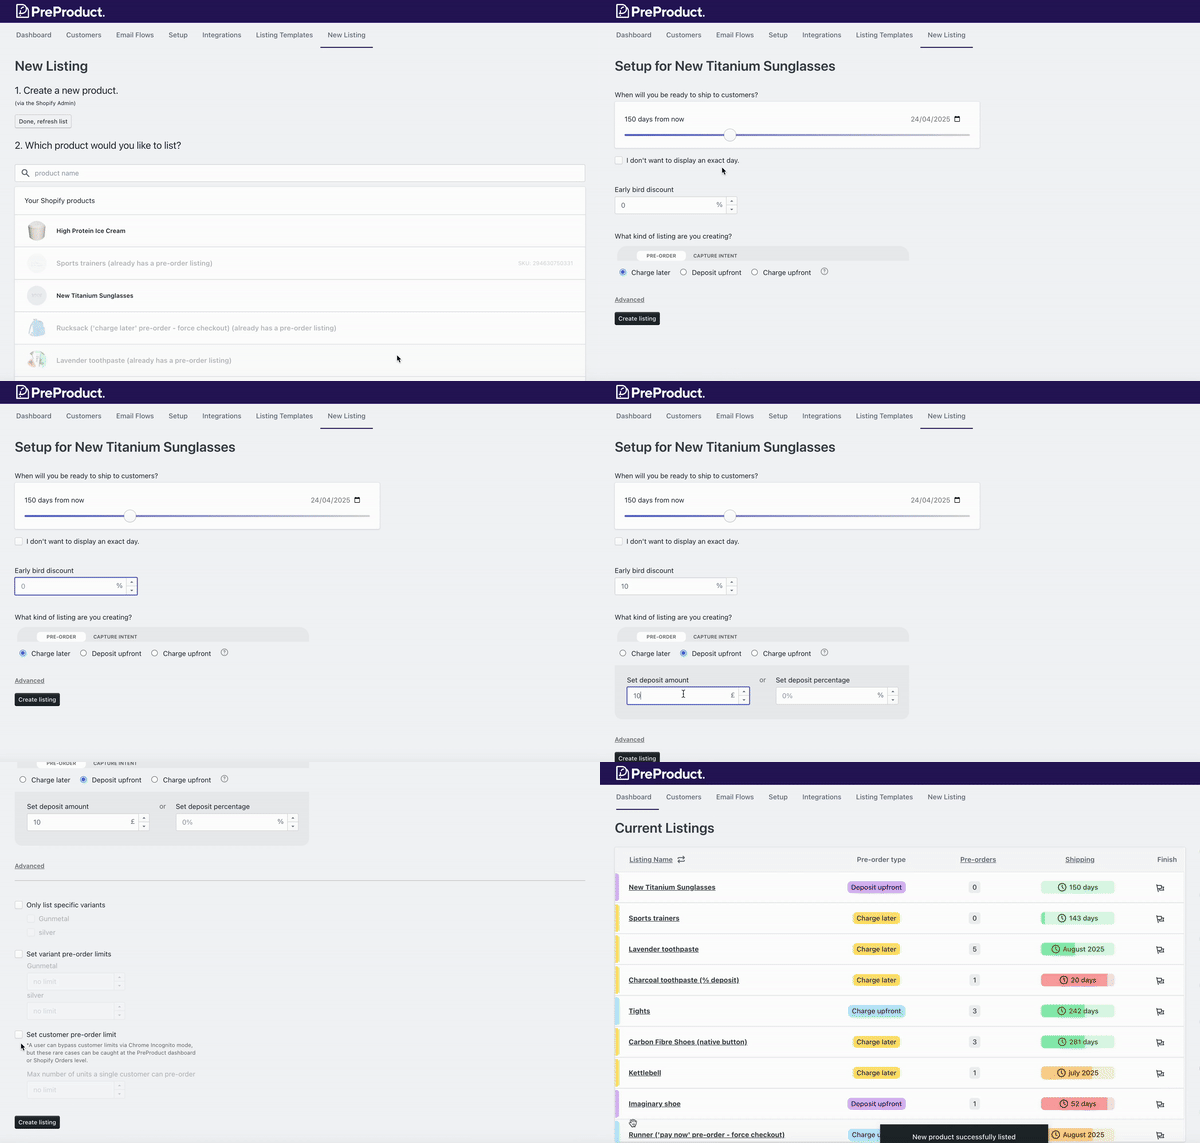
- From this screen, you can search your product catalogue by typing in the text field or using the page arrows at the bottom. Once ready, you can choose a specific Shopify product from the list or scroll to the bottom of the screen and click “Bulk create listings”.
- From this new screen, you can now choose your pre-order preferences. The various listing options are explained in more detail below. Once you’re ready ready, scroll to the bottom of the screen and click the “Create listing” button.

Listing options #
When will you be ready to ship to customers? #
PreProduct offers two different types of shipping statement, a period in days (which will automatically be decremented every 24 hours) or a fixed phrase e.g. ‘next season’, ‘July 2026’ etc. The ‘something else’ checkbox allows you to switch between the two options.
Early bird discount #
This number field will create a discount percentage if populated. Discounts work differently depending on the pre-order type, more information here.
Kind of listing #
PreProduct offers 4 different types of pre-order:
(information on the pros and cons of each)
- Charge-later – Customers are sent through checkout at the time of pre-order to accept a future charge. Then once you’re ready, you can trigger a deferred charge on their card for the outstanding amount.
- Deposit-upfront – PreProduct offers the ability to require a deposit for pre-orders. Pre-orders are powered by deferred charge with the deposit amount being charged upfront at the time of pre-order. The outstanding amount is charged against that same card once you trigger it.
- Charge-upfront – Just like the name suggests, customers are charged at the time of pre-order. In Shopify, orders are created straight away with an initial fulfilment status of “on hold”. For other platforms, PreProduct will keep the order out of the platform until you trigger fulfilment from the app.
- Capture-only – Customers will enter their order details, along with a name and email. Once you’re ready to charge customers, you can send out payment link emails from PreProduct.
Advanced options #
Only list specific variants #
You might have a product with variants which you’d like on pre-order and variants that should be buy-now. By checking this tick-box and then subsequent variant boxes, you can do just that. (PreProduct will dynamically hide and show your add-to-cart/pre-order buttons as needed)
Set max pre-order limits #
This section allows you to set a maximum number of pre-orders that a variant can receive. This is handy when you have a specific quantity of stock ordered and are worried about overselling.
Once a variant hits its limit, PreProduct will stop accepting pre-orders for it and hide that variant’s buy buttons.
Set customer pre-order limits #
This option allows you to limit the number of pre-orders that a single customer can make. PreProduct will stop the customer exceeding this limit from your product page. When using this setting, we recommend using one of PreProduct’s isolated redirects so that customers can’t update their quantities from your cart page.
